Video 2 video using Stable Diffusion guide - Part 2 (by ThinkDiffusion)

Introduction
In this guide, we'll be looking at creating animation videos from input videos, using Stable Diffusion and ControlNet. We will look at 3 workflows:
Mov2Mov
The simplest to use and gives ok resultsSD-CN Animation
Medium complexity but gives consistent results without too much flickeringTemporal Kit & Ebsynth
The most complex but gives you the most control
Workflow 2: SD-CN Animation
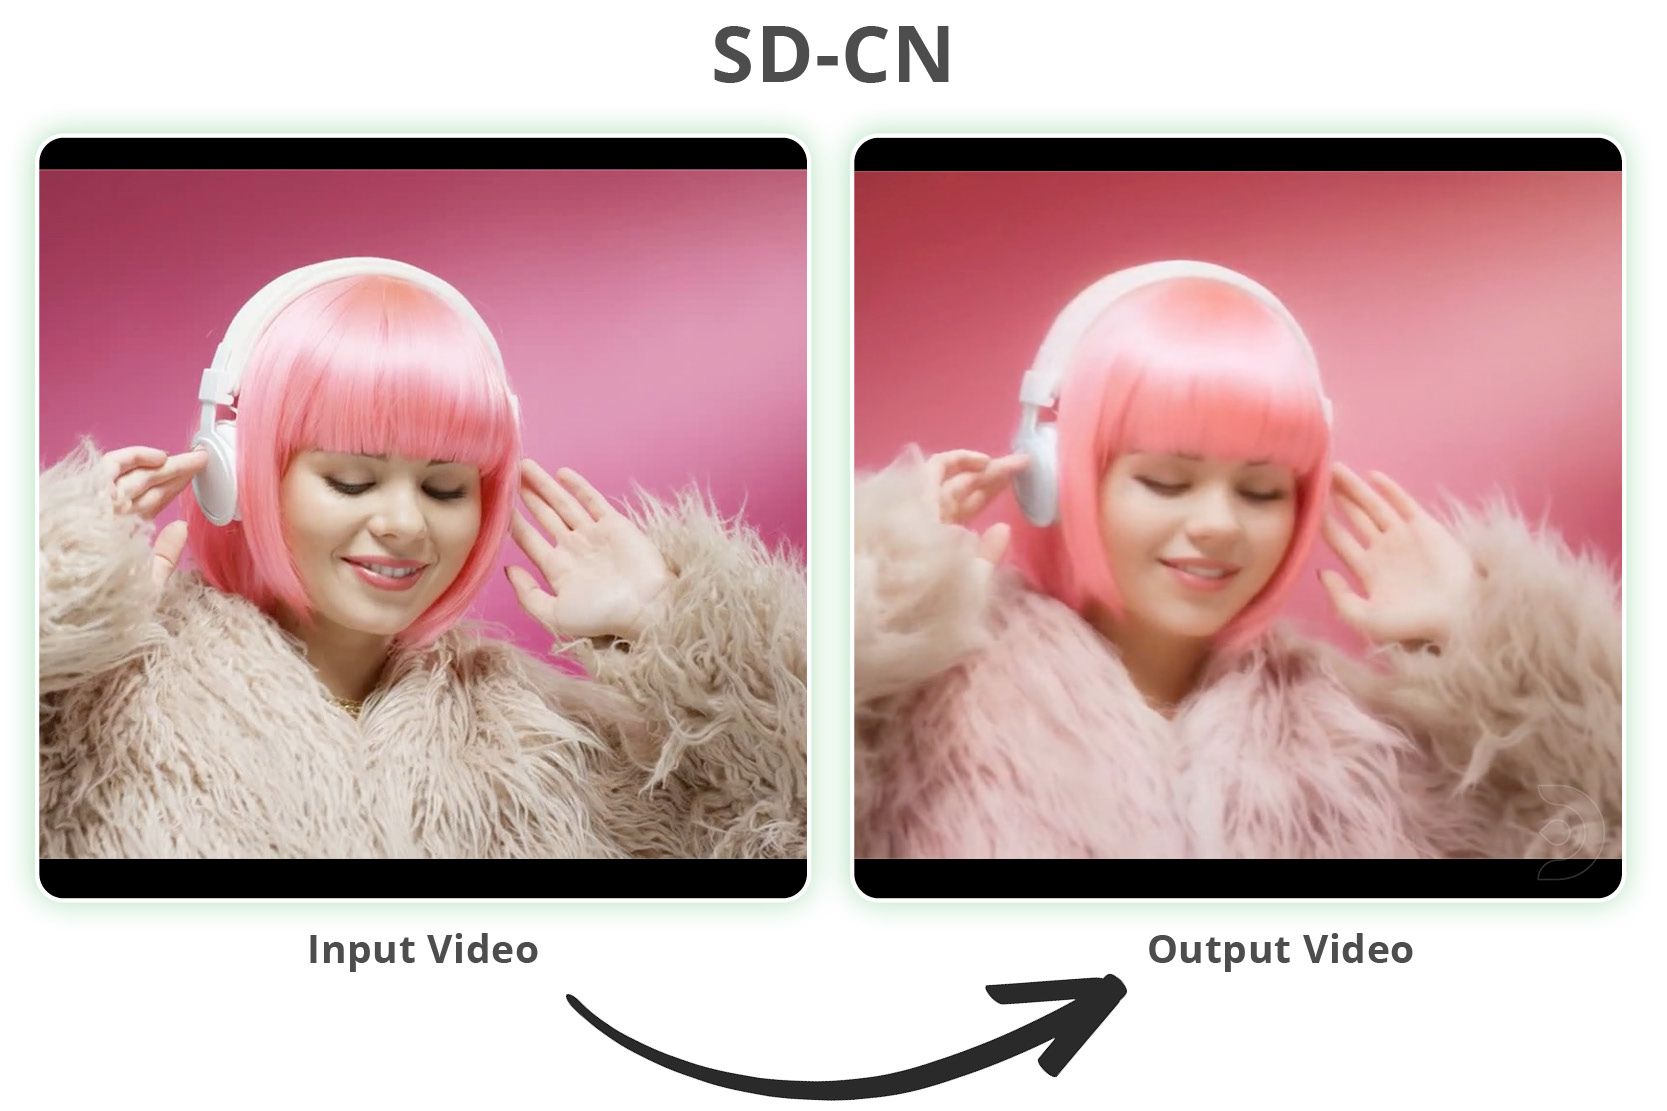
Firstly, you will need to add the SD-CN-Animation extension from the following url: https://github.com/volotat/SD-CN-Animation
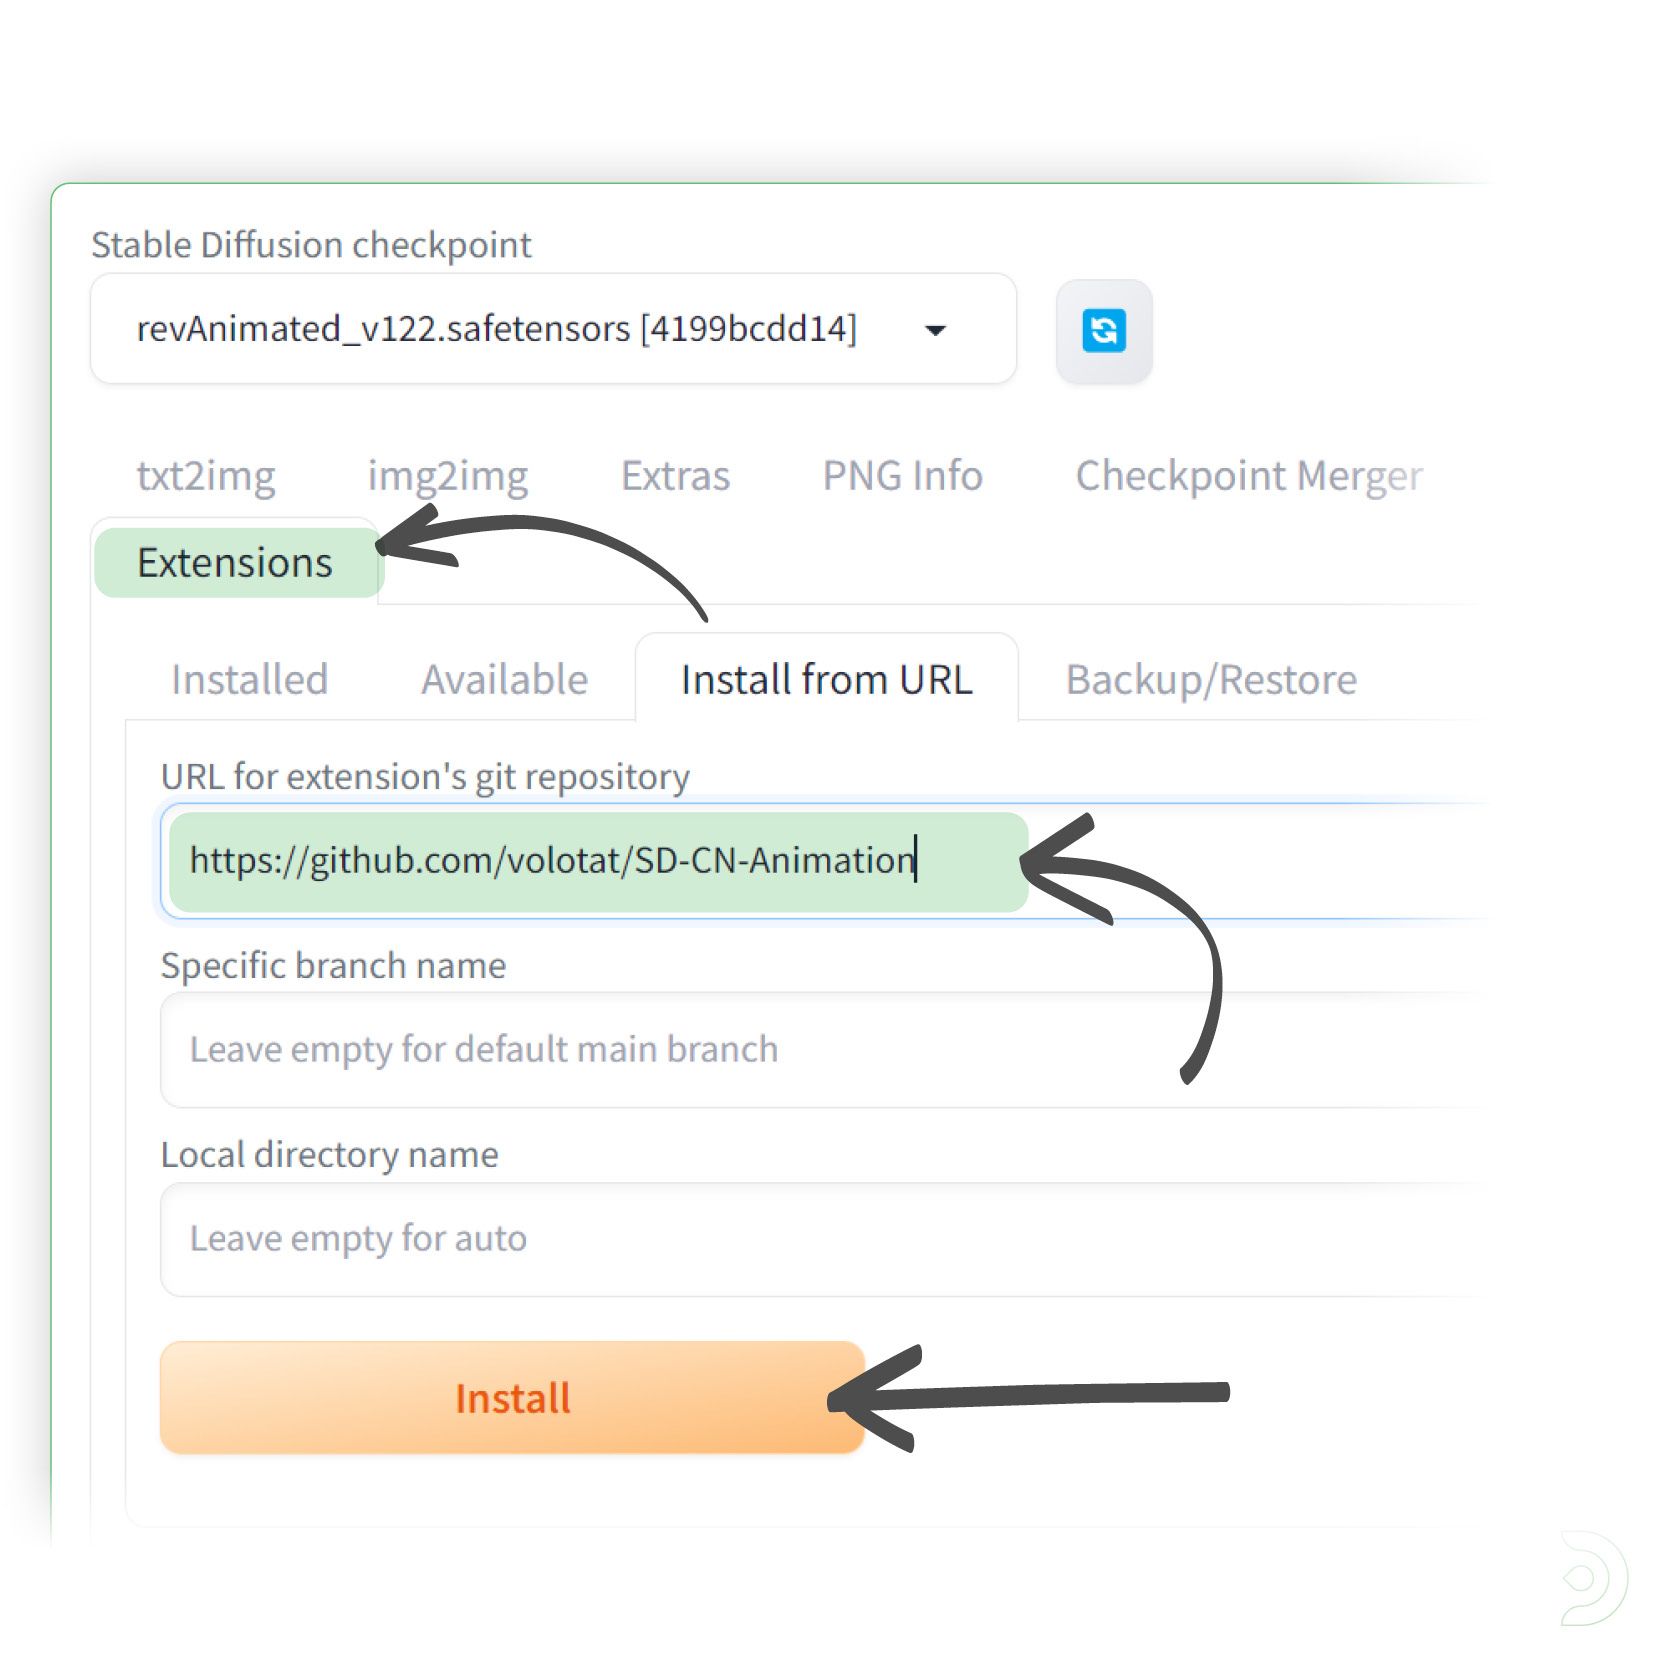
Go into the extensions tab and paste the above url into the Install from URL tab within the extensions tab and click install
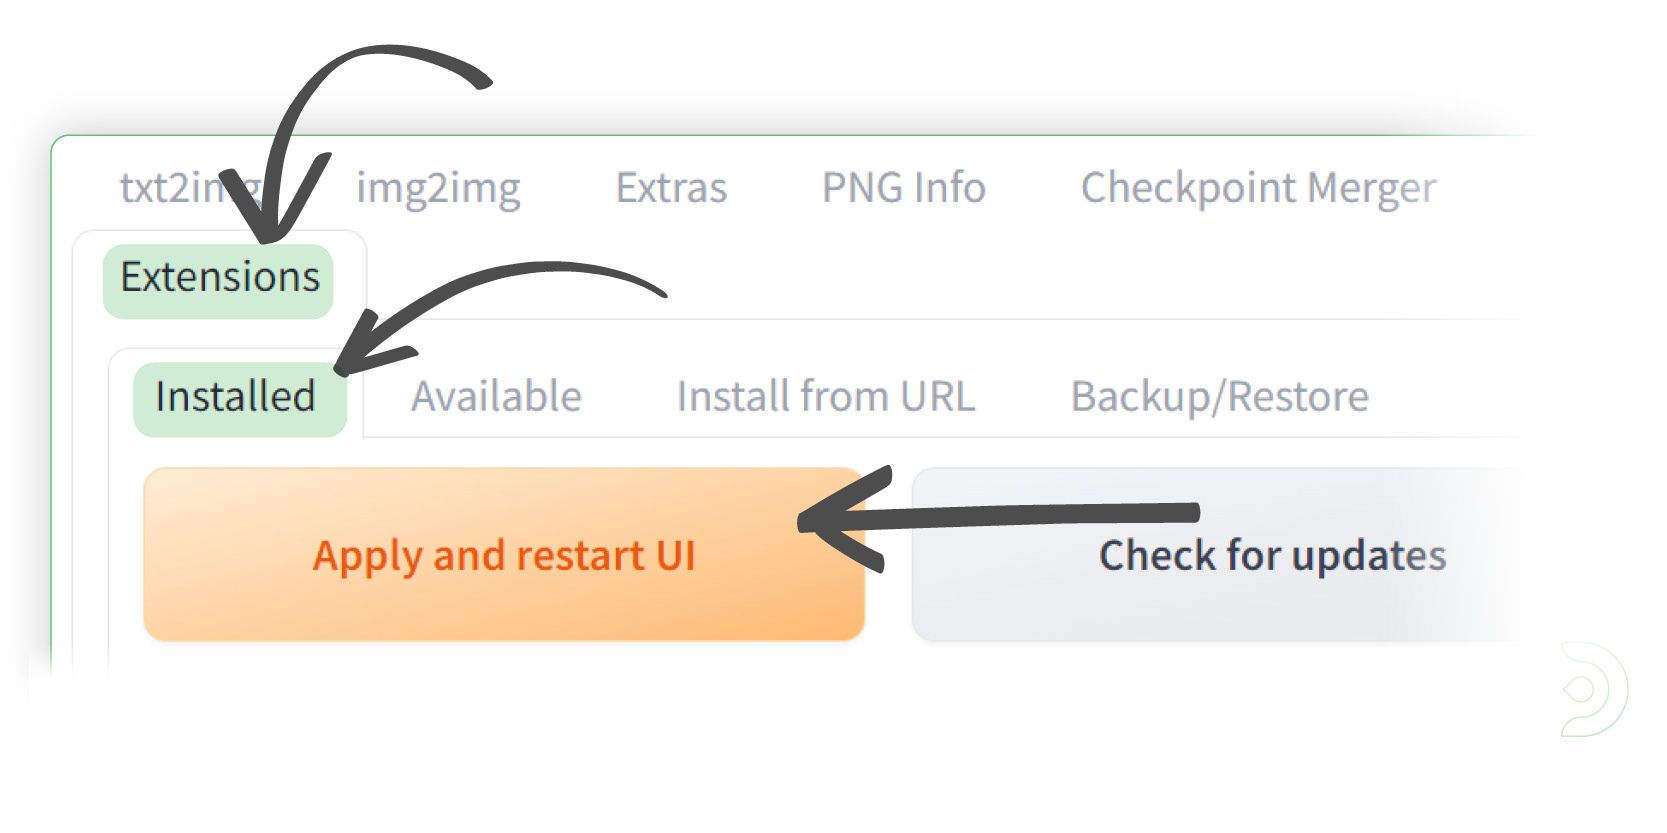
Go into the Installed tab within the Extensions tab and click Apply and restart UI
You should now see the SD-CN-Animation tab
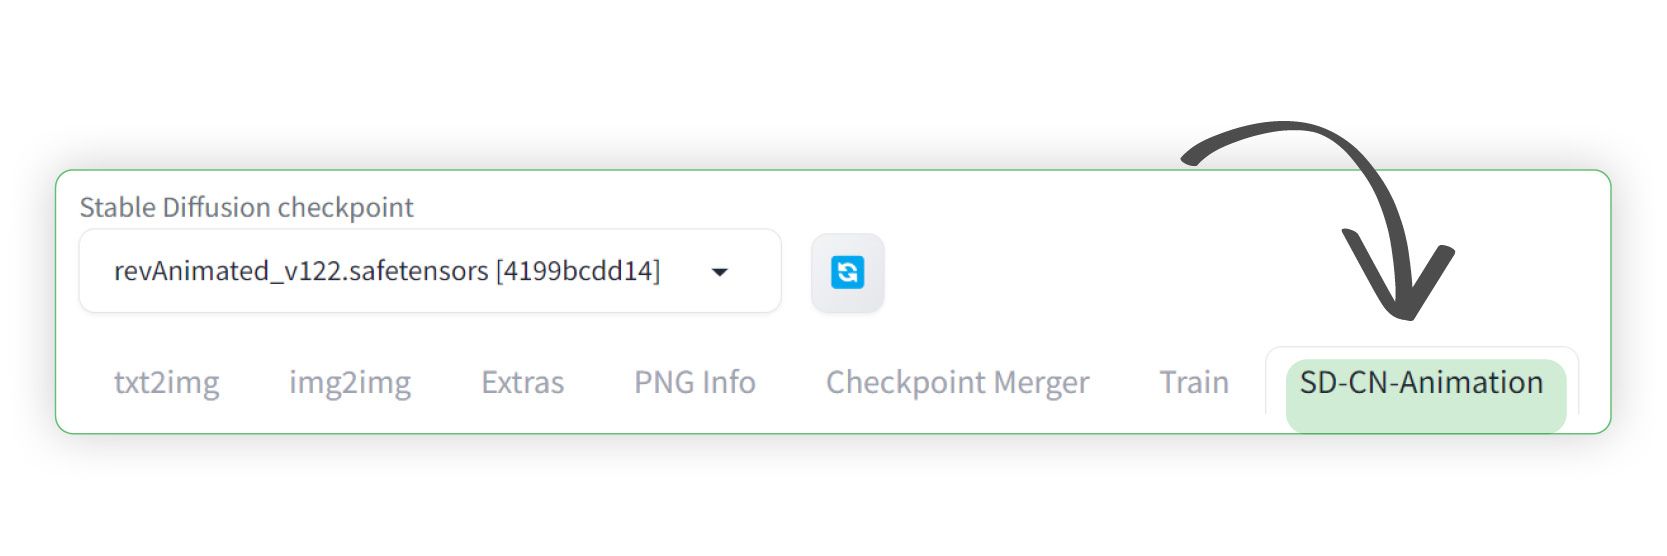
Please note that if the SD-CN-Animation tab does not show up, then I'd suggest you close down your instance of Stable Diffusion and re-launch the webui-user.bat file
Creating our Video
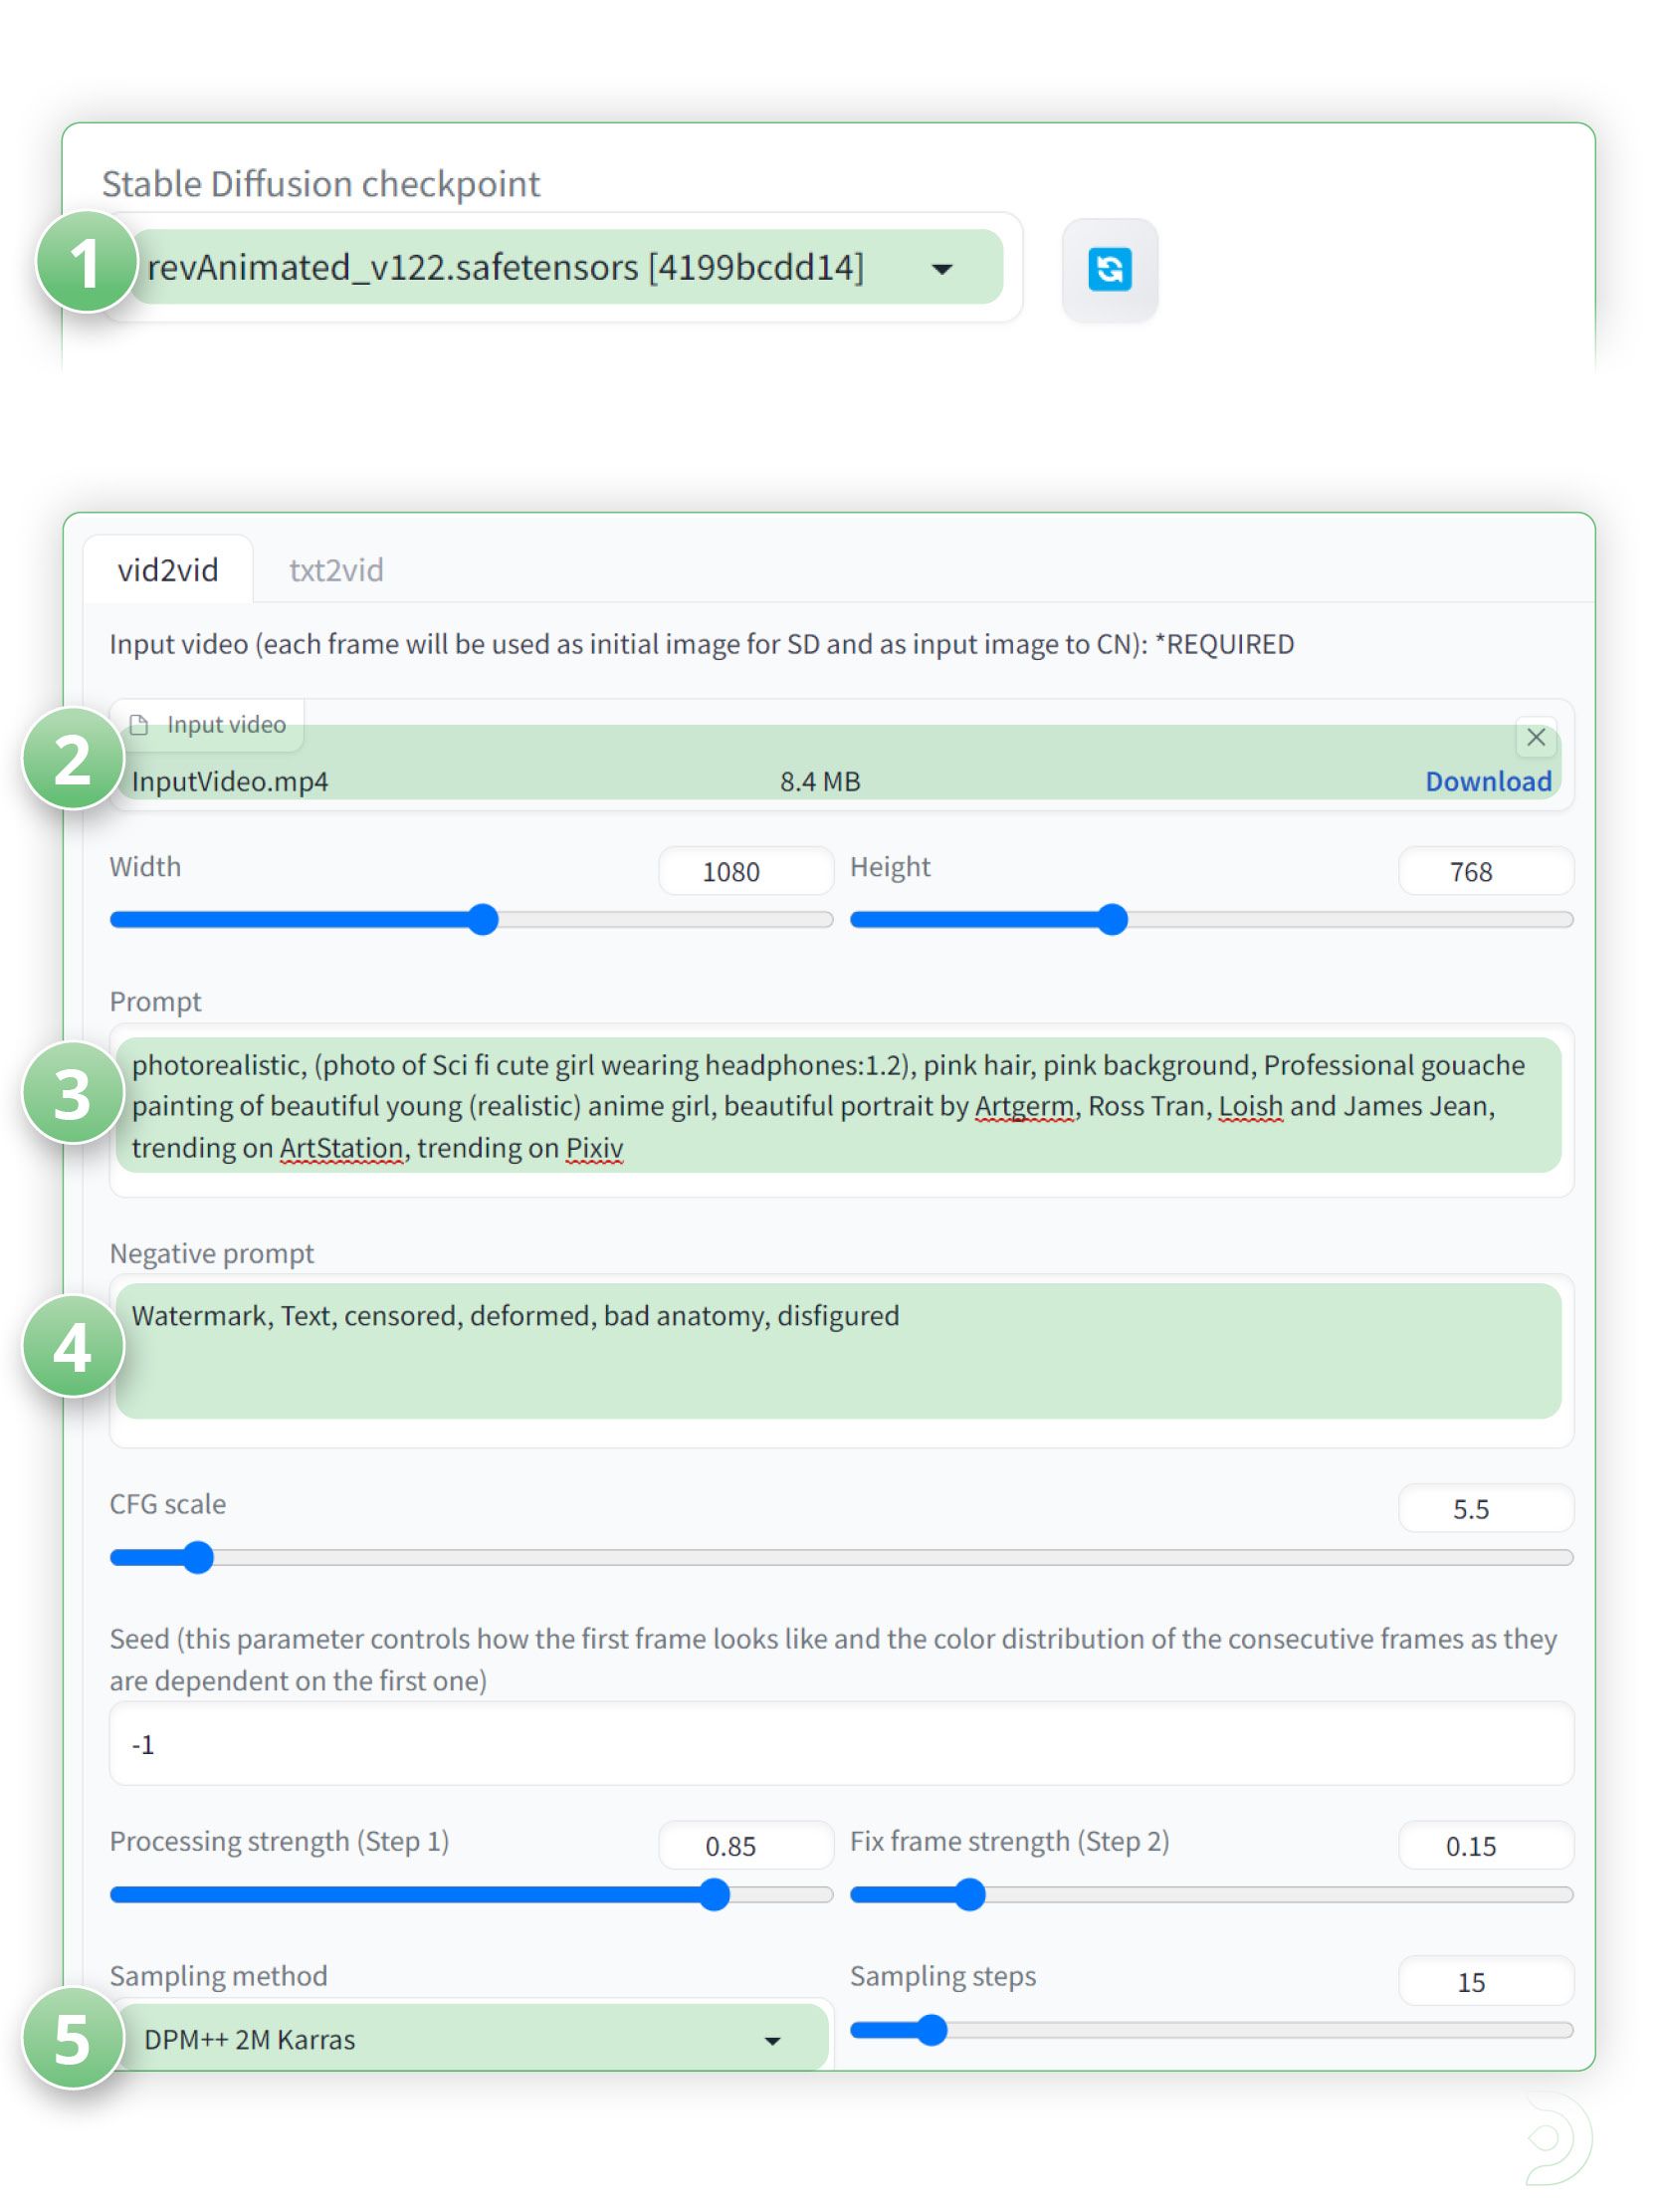
(1) Select revAnimated_v122 as the Stable Diffusion checkpoint
(2) Upload your input video
(3) Positive Prompt: photorealistic, (photo of Sci fi cute girl wearing headphones:1.2), pink hair, pink background, Professional gouache painting of beautiful young (realistic) anime girl, beautiful portrait by Artgerm, Ross Tran, Loish and James Jean, trending on ArtStation, trending on Pixiv
(4) Negative Prompt: Watermark, Text, censored, deformed, bad anatomy, disfigured
(5) Select the sampling method to DPM++ 2M Karras
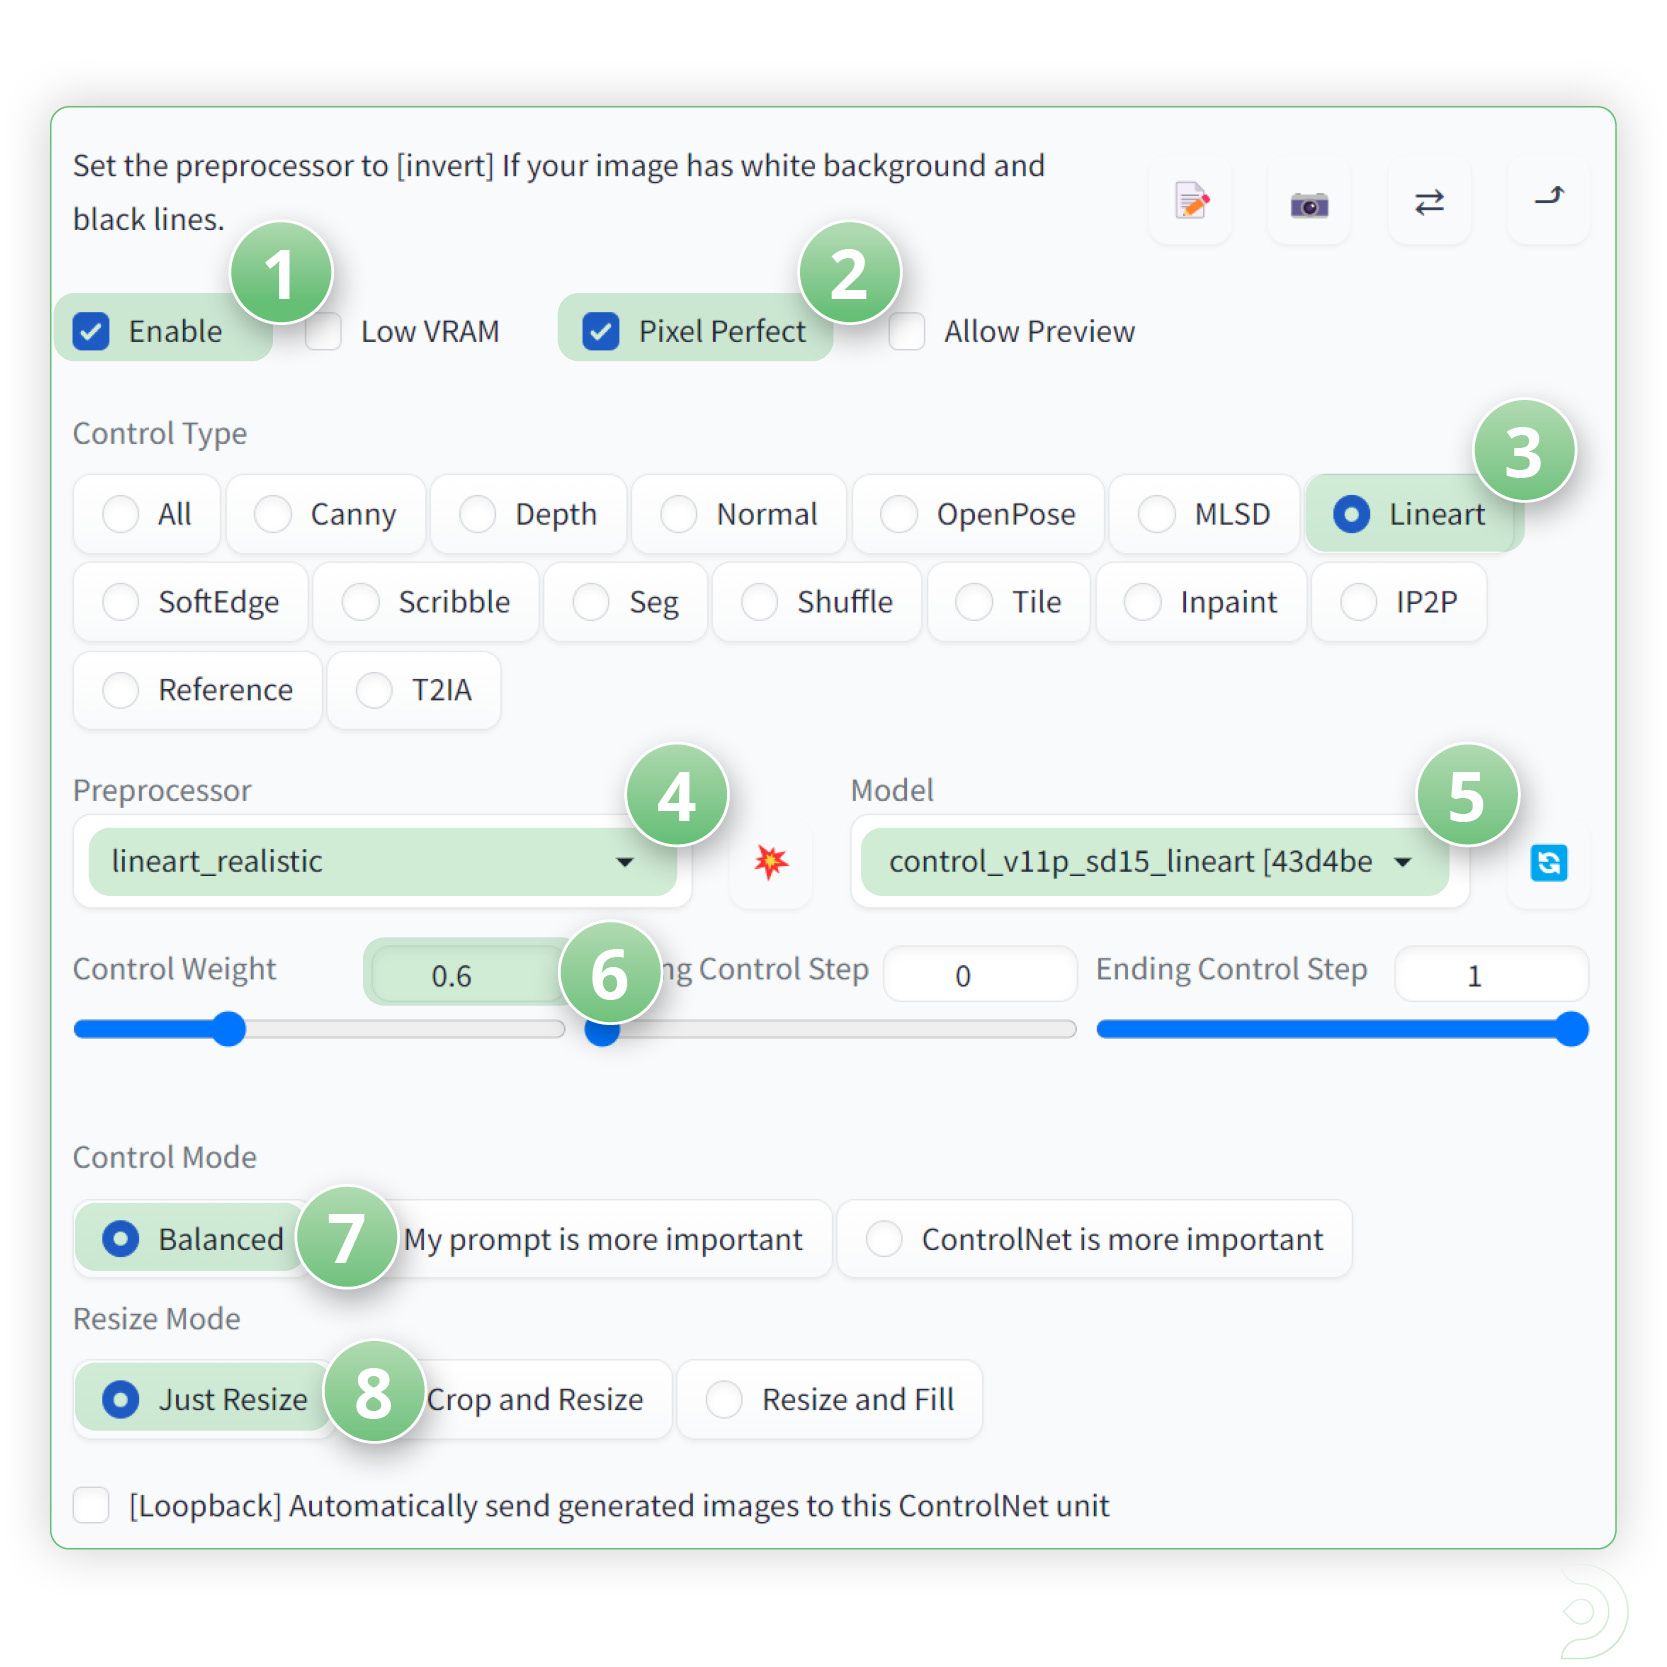
Drop down ControlNet and lets update the settings for ControlNet Unit 0:
(1) Click enable to ensure Control Net is activated
(2) And click Pixel Perfect ✅
(3) Select Lineart as the Control Type
(4) lineart_realistic as the pre-processor
(5) and control_v11p_sd15_lineart as the ControlNet model
(6) Set a control weight of 0.6
(7) a Control mode of balanced
(8) and a resize mode of Just resize
We are going to be using multiple ControlNets for this example so now we need to go into the ControlNet1 tab
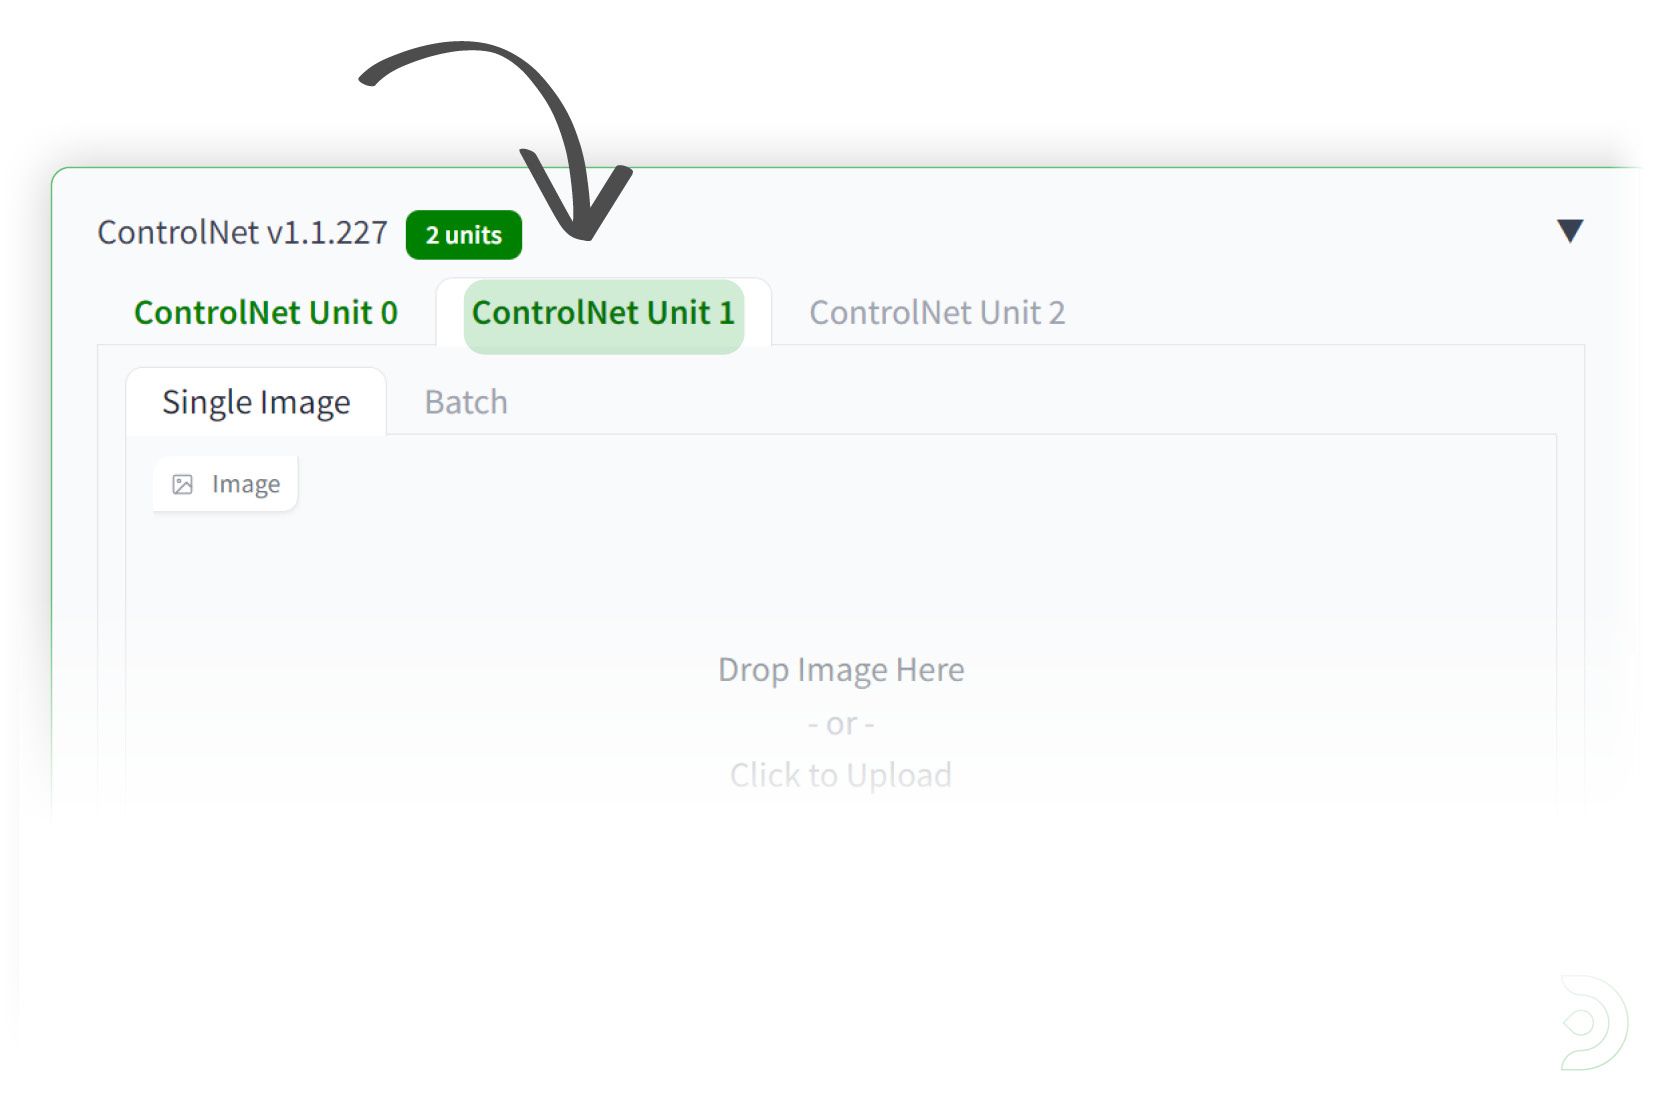
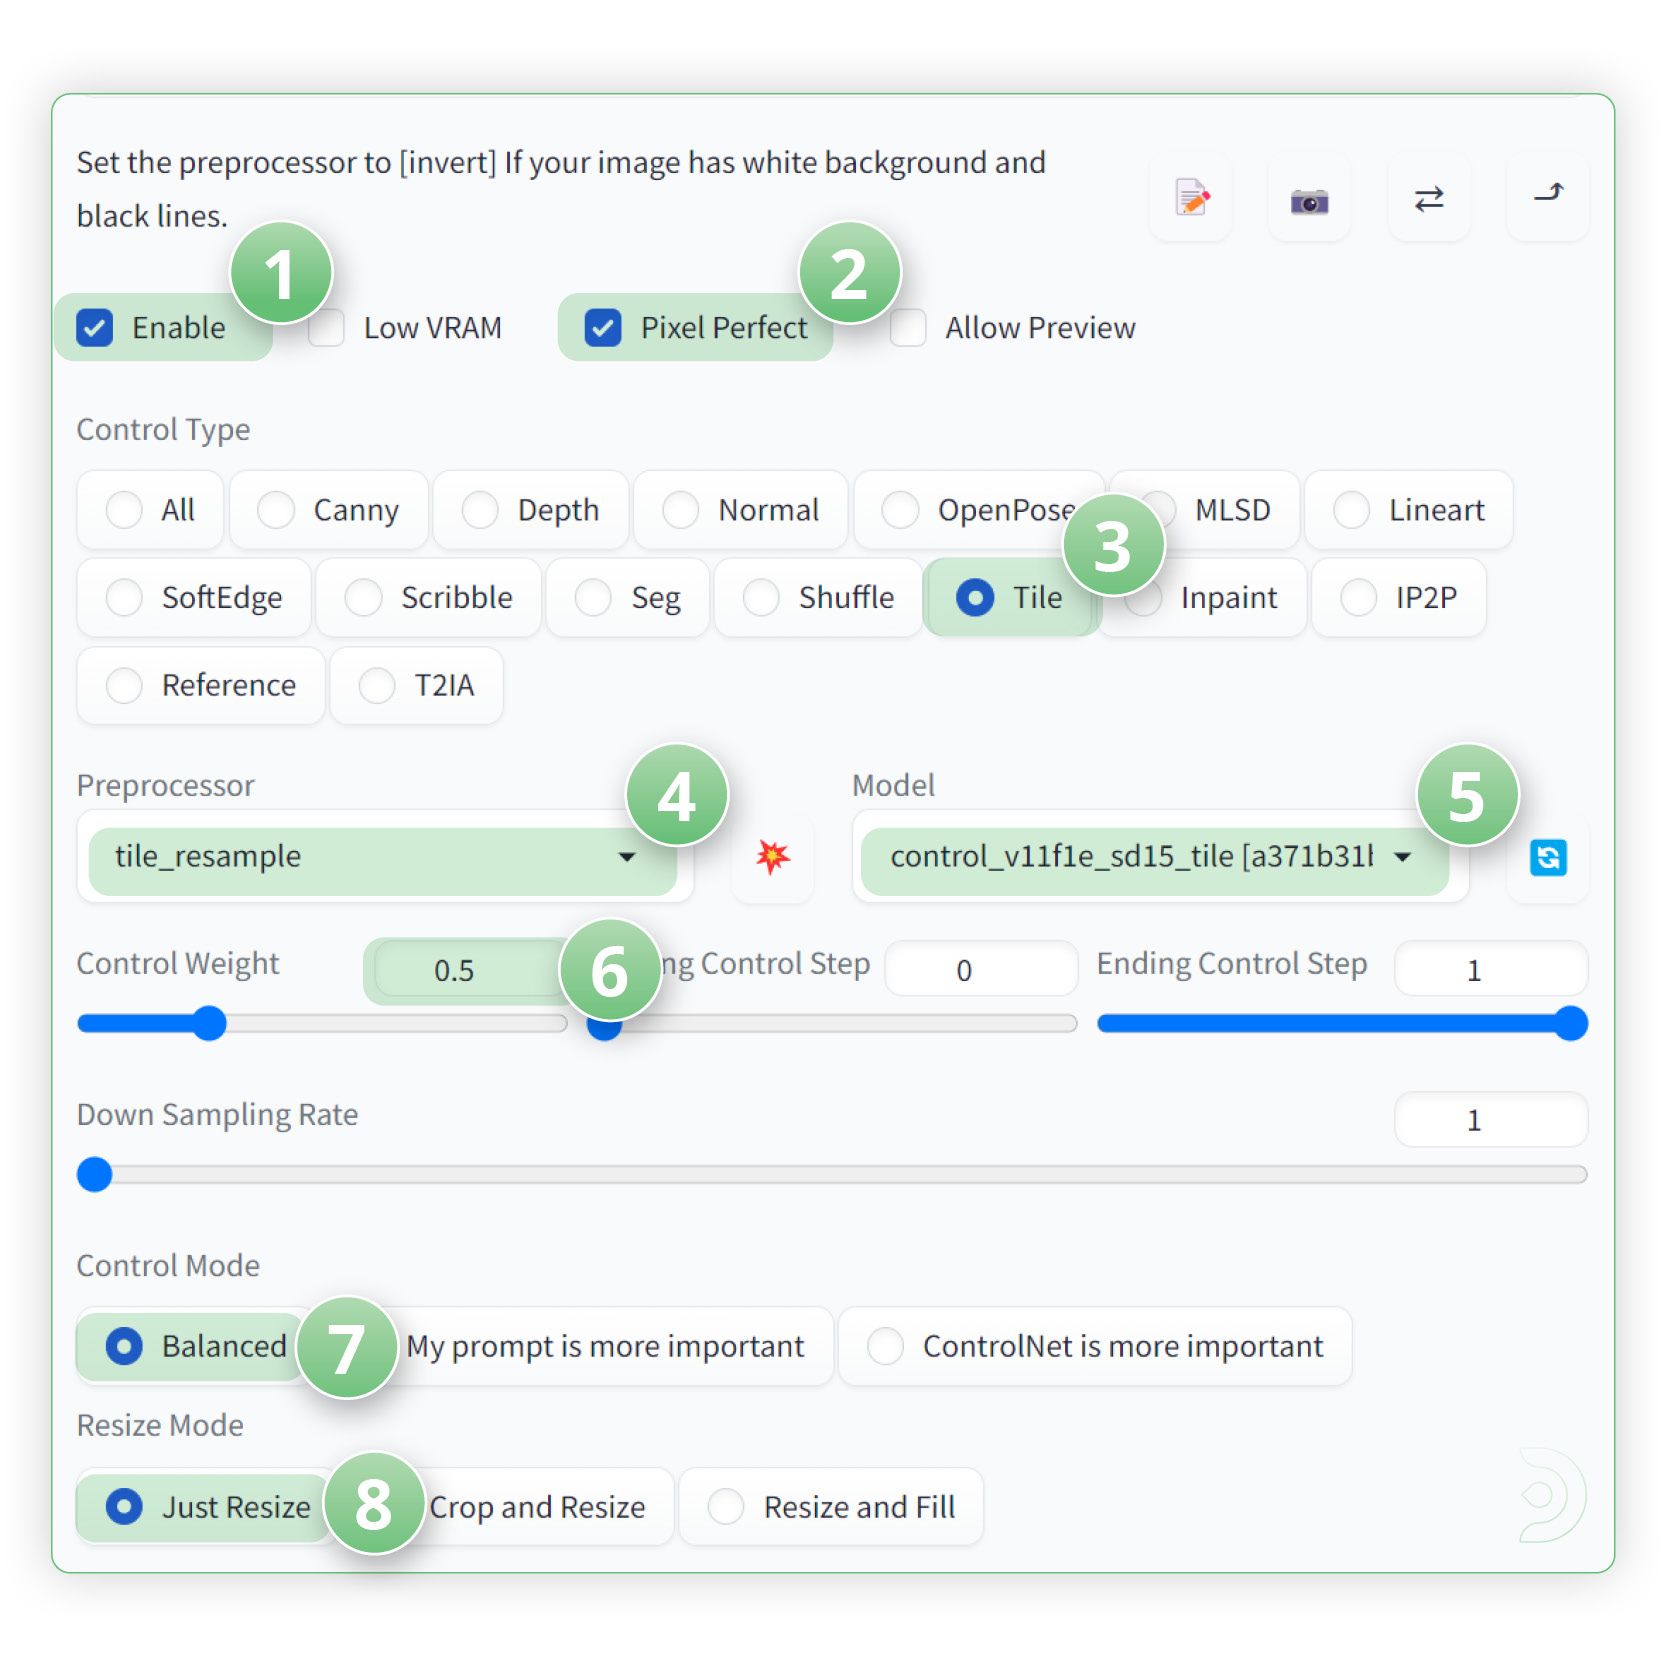
(1) Go into the ControlNet Unit 1 tab and click enable ✅ to ensure that ControlNet is activated
(2) and click Pixel Perfect.
(3) Select Tile as the Control Type,
(4) tile_resample as the pre-processor
(5) and control_v1f1e_sd15_tile as the ControlNet model
(6) Set a control weight of 0.5
(7) a Control mode of balanced
(8) and a resize mode of Just resize
Click generate to see what we have created!
If you’re having issues with installation or slow hardware, you can try any of these workflows on a more powerful GPU in your browser with ThinkDiffusion.
Original article can be found here: https://learn.thinkdiffusion.com/video-2-video-using-stable-diffusion/