Video 2 video using Stable Diffusion guide - Part 3 (by ThinkDiffusion)

Workflow 3: Temporal-Kit and Ebsynth
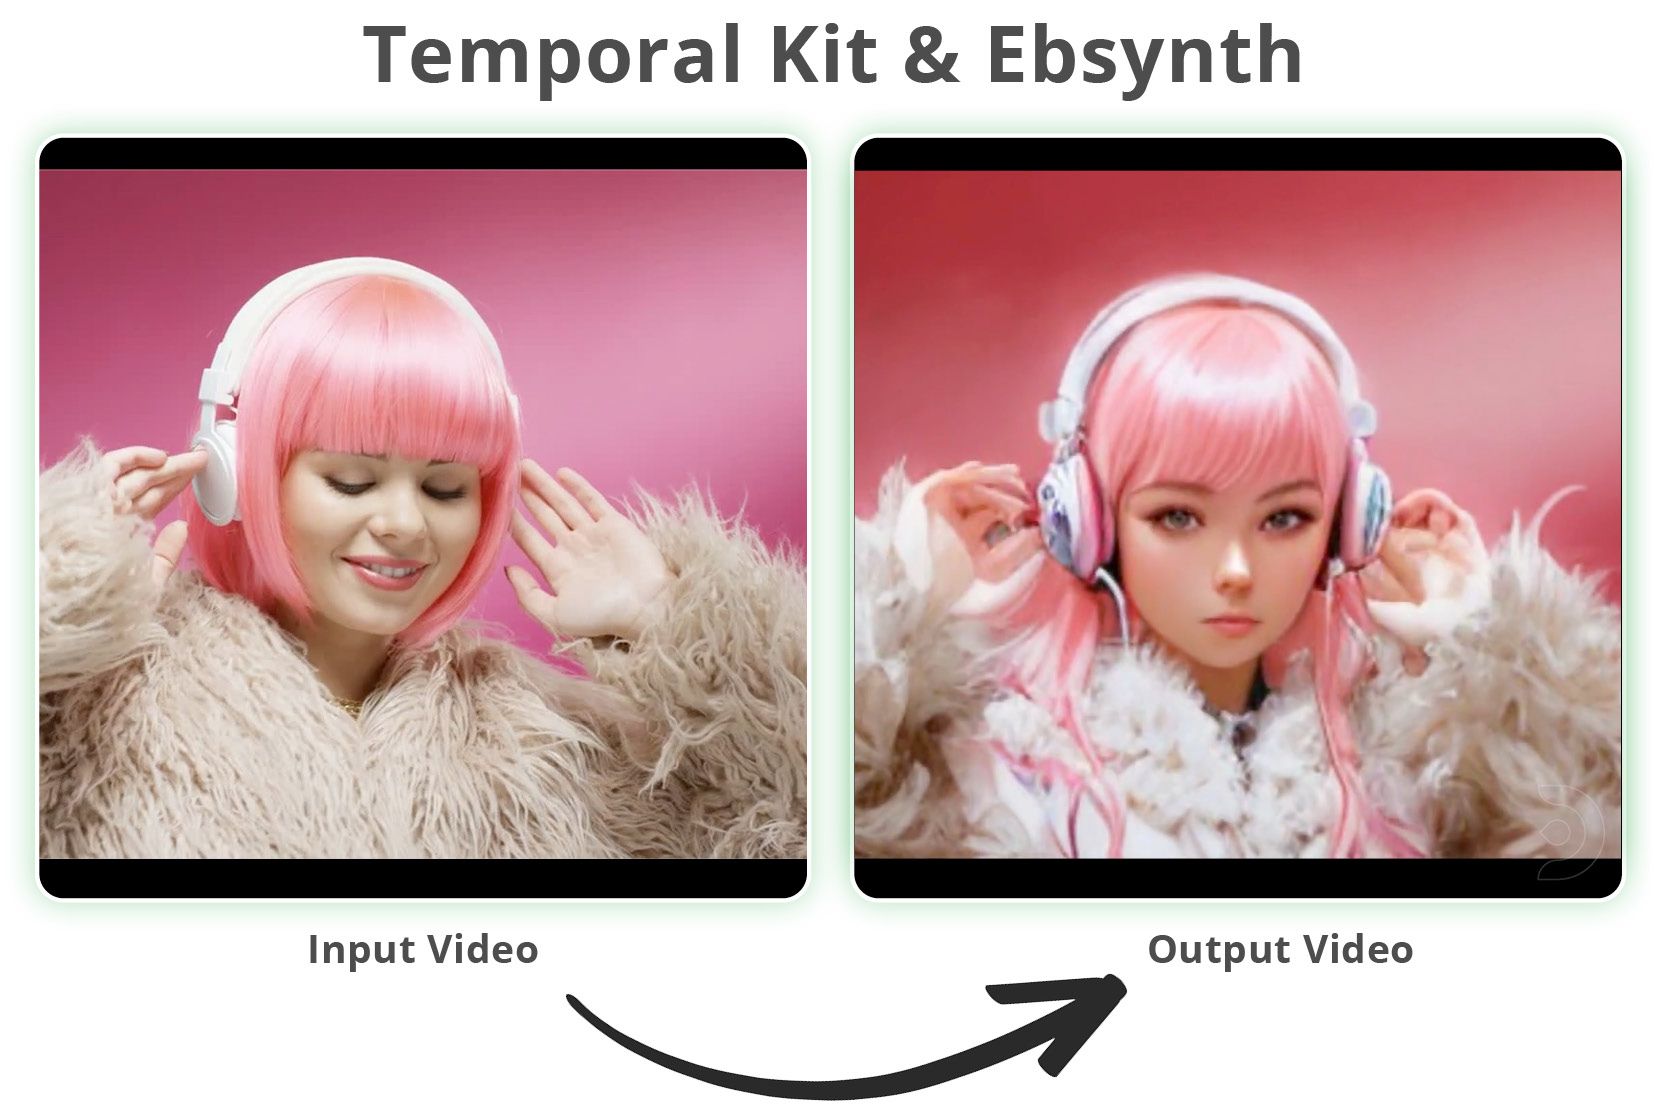
We will now move onto the final workflow for Temporal Kit and Ebsynth for video-to-video conversion. The technique involves selecting keyframes from a video and applying image-to-image stylization to create references for painting adjacent frames. This approach builds upon the pioneering work of EbSynth, a computer program designed for painting videos, and leverages the capabilities of Stable Diffusion's img2img module to enhance the results.
However, it is important to note that applying image-to-image stylization individually to each frame may yield poor results due to a lack of coherence between the generated images. To overcome this limitation, we will employ a clever trick: transforming ALL keyframes simultaneously by stitching them together into a single, large sheet.
Install Temporal-Kit ( skip step ↓ if using ThinkDiffusion)
If you're using ThinkDiffusion we've preinstalled Temporal-Kit for you - just skip ↓ down to Start Using Temporal Kit.
If you're on your local machine, you'll will need to add the Temporal-Kit extension from the following url:- https://github.com/CiaraStrawberry/TemporalKit
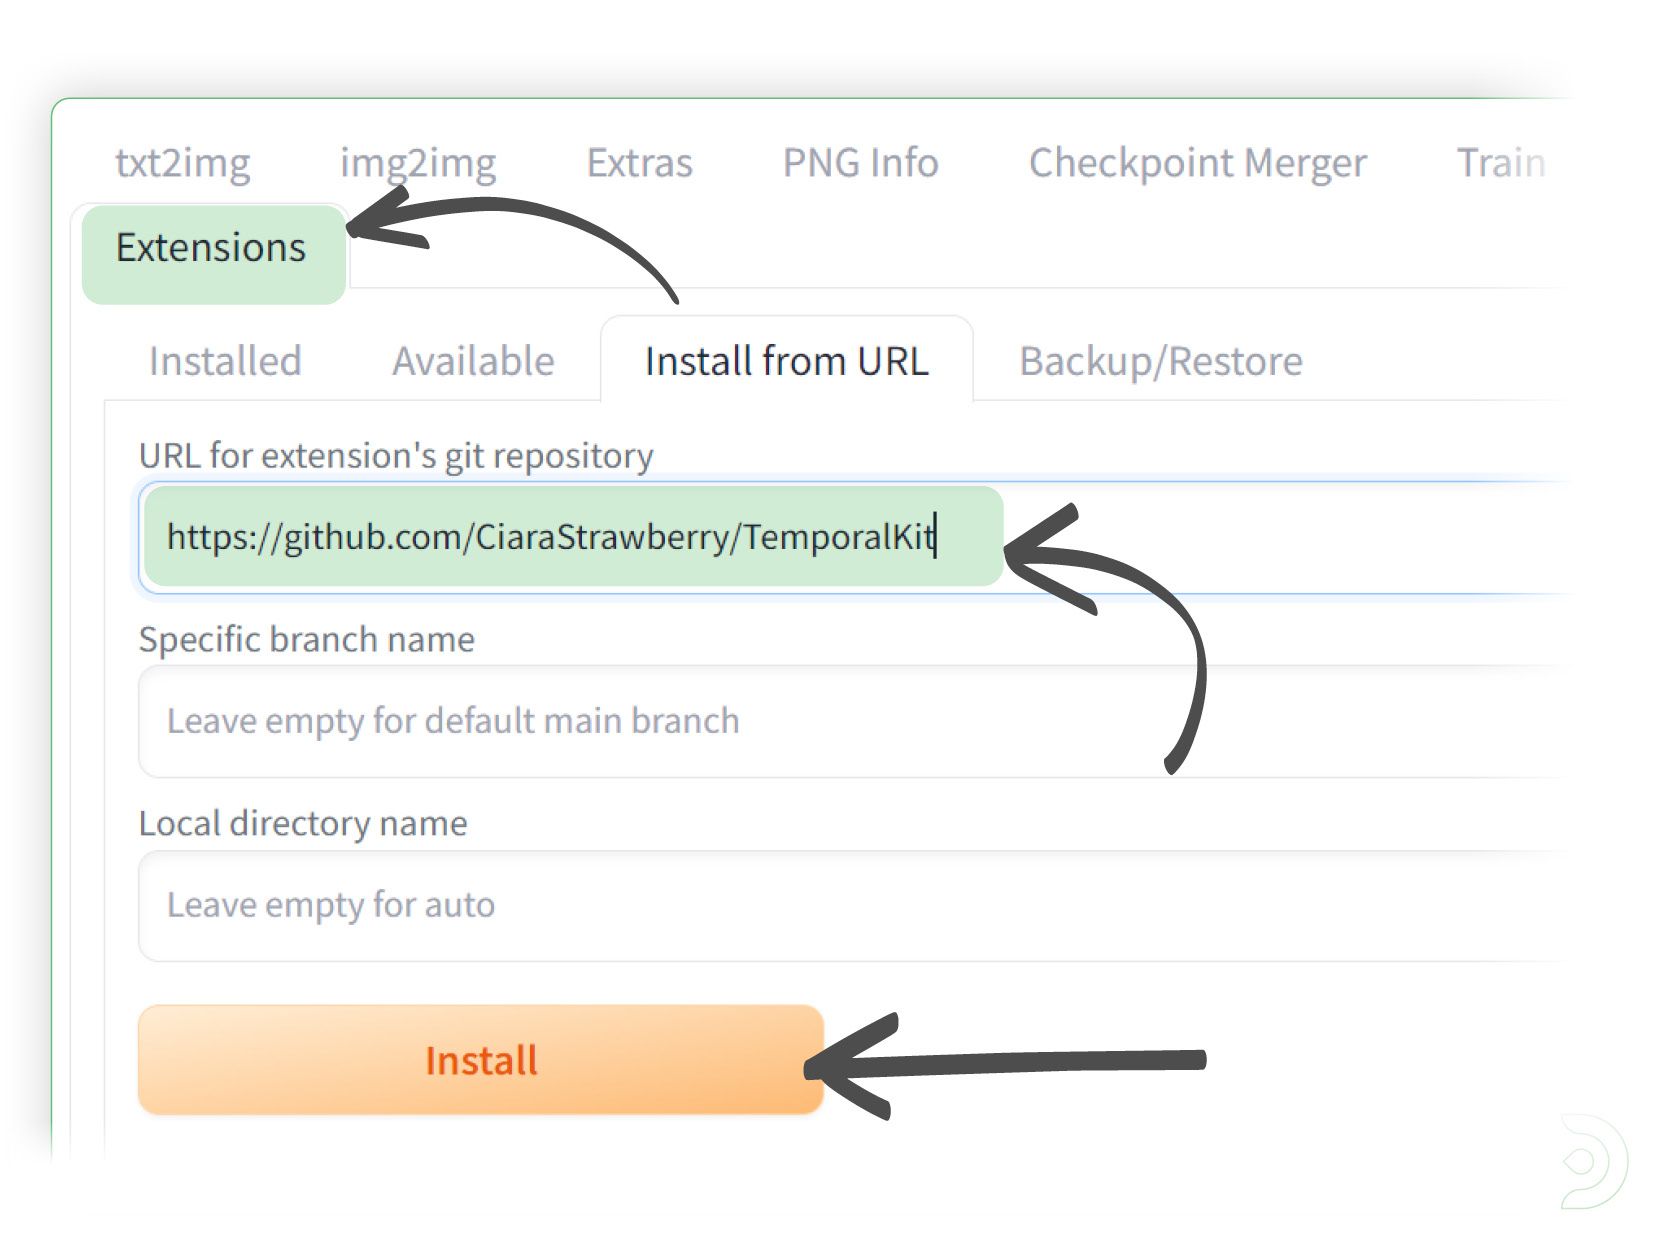
Go into the extensions tab and paste the above url into the Install from URL tab within the extensions tab and click install
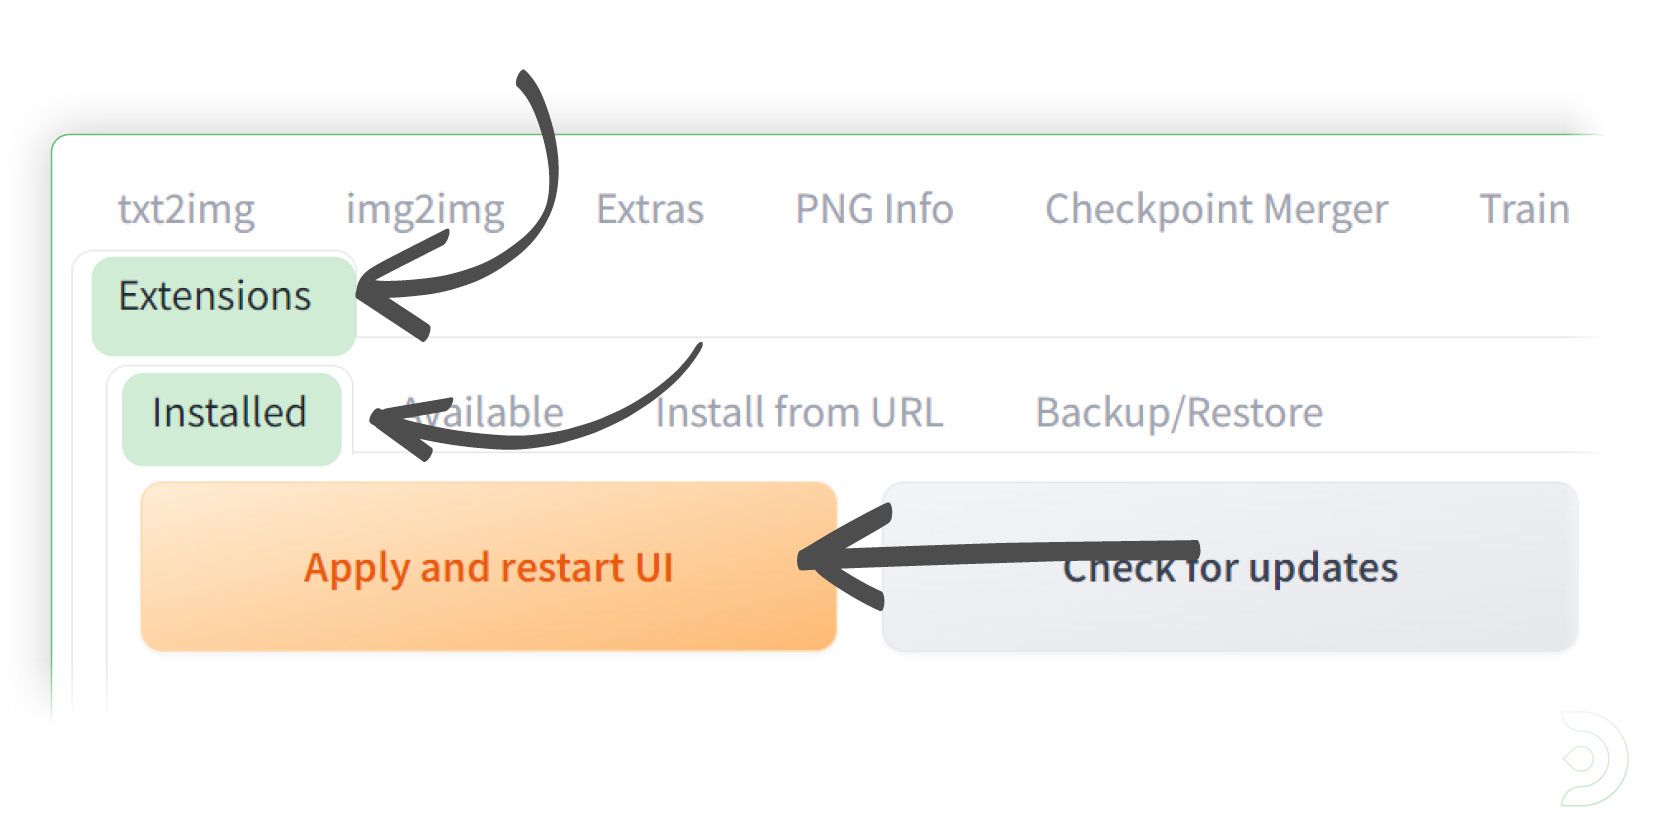
Go into the Installed tab within the Extensions tab and click Apply and restart UI
You should now see the Temporal-Kit tab
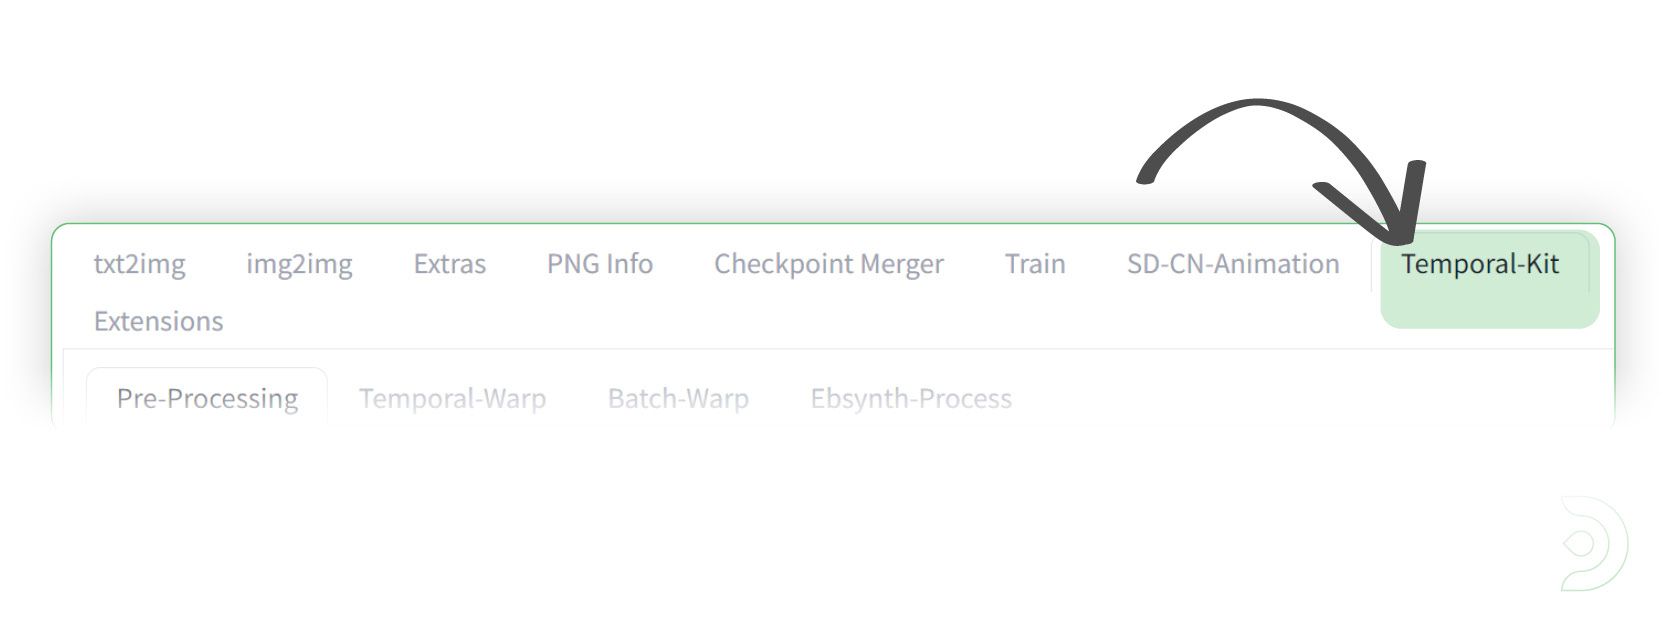
Please note that if the Temporal-Kit tab does not show up, then I'd suggest you close down your instance of Stable Diffusion and re-launch the webui-user.bat file
Install FFmpeg ( skip step ↓ if using ThinkDiffusion)
To use FFmpeg with Temporal Kit locally, you need to install it and add it to the system's PATH.
If you're using ThinkDiffusion we've preinstalled it for you - just skip ↓ down to the next step.
Follow the steps below for a windows install:
Visit the FFmpeg download page https://ffmpeg.org/download.html and download the program suitable for your platform.
After downloading, you should have a zip file. Extract its contents to reveal the "ffmpeg" or "ffmpeg.exe" file. This is the FFmpeg program you need.
To allow Temporal Kit to access FFmpeg from anywhere, it must be added to the PATH.
Press the Windows key and type "environment". Select the option that says "Edit environment variables for your account".
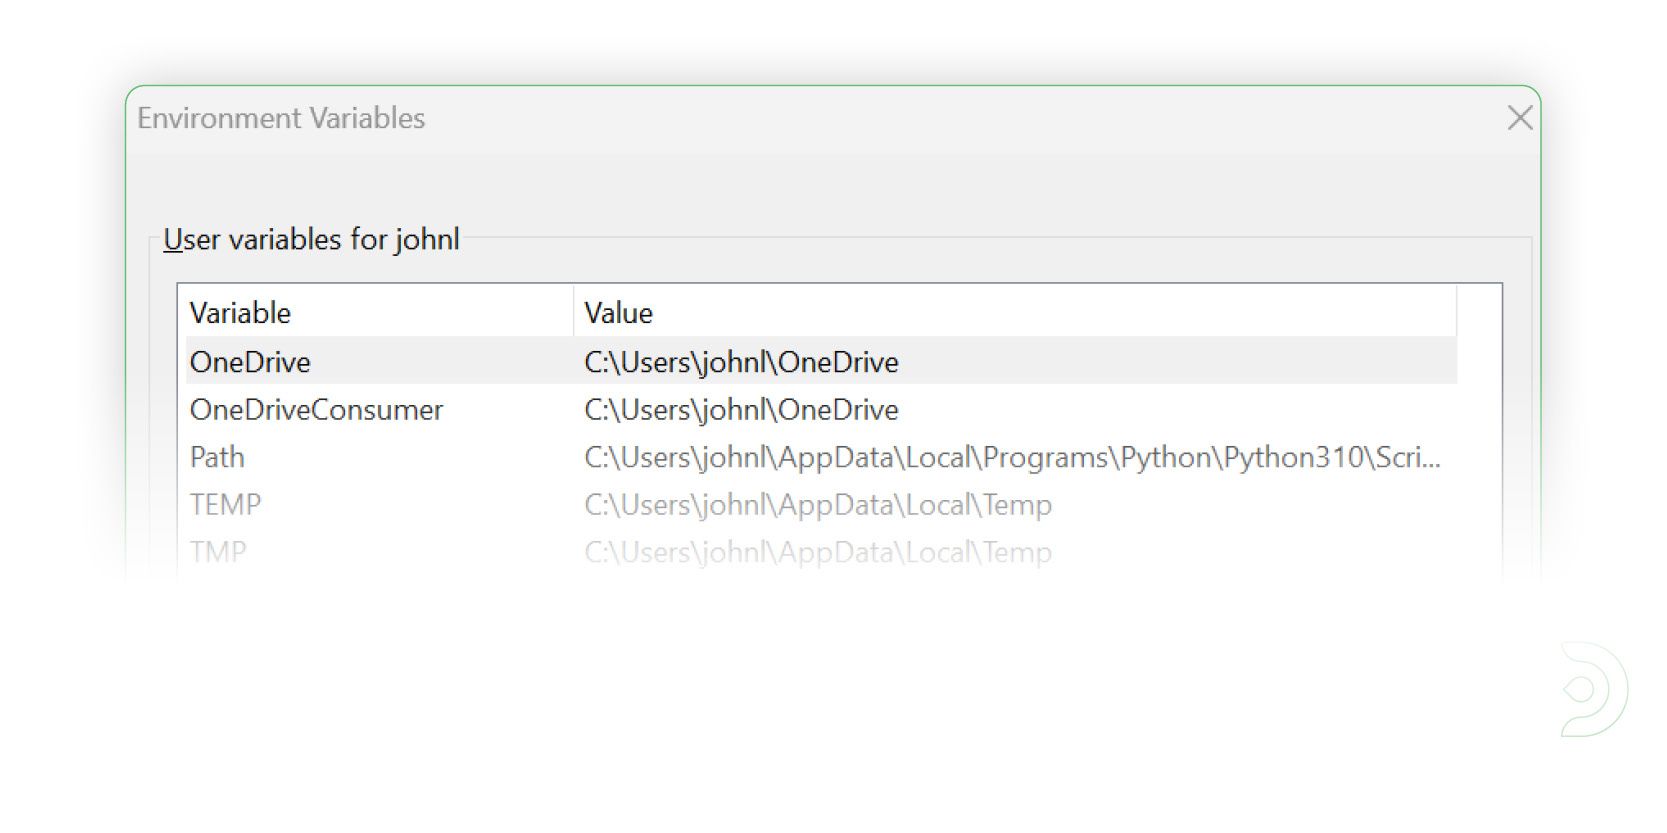
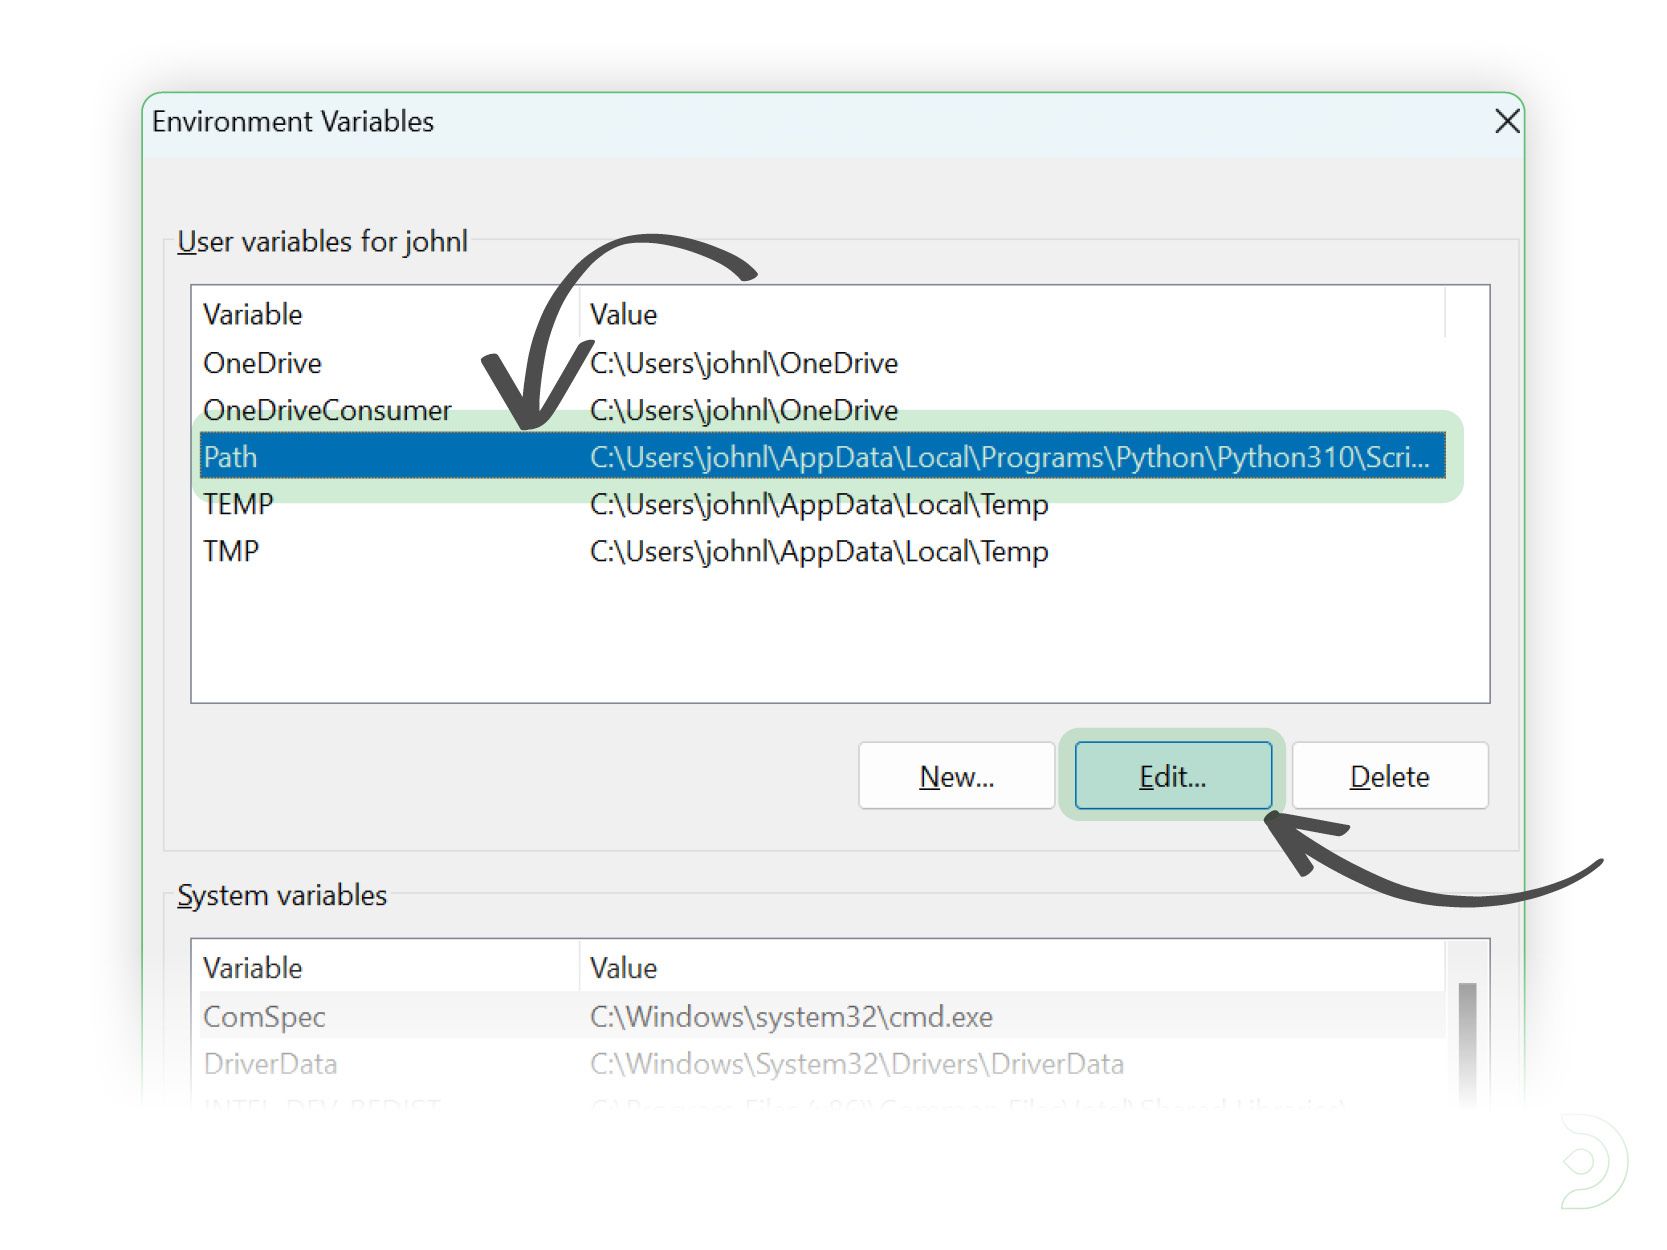
In the Environment Variables window that opens, locate the "Path" variable under the "User variables" section and click "Edit".
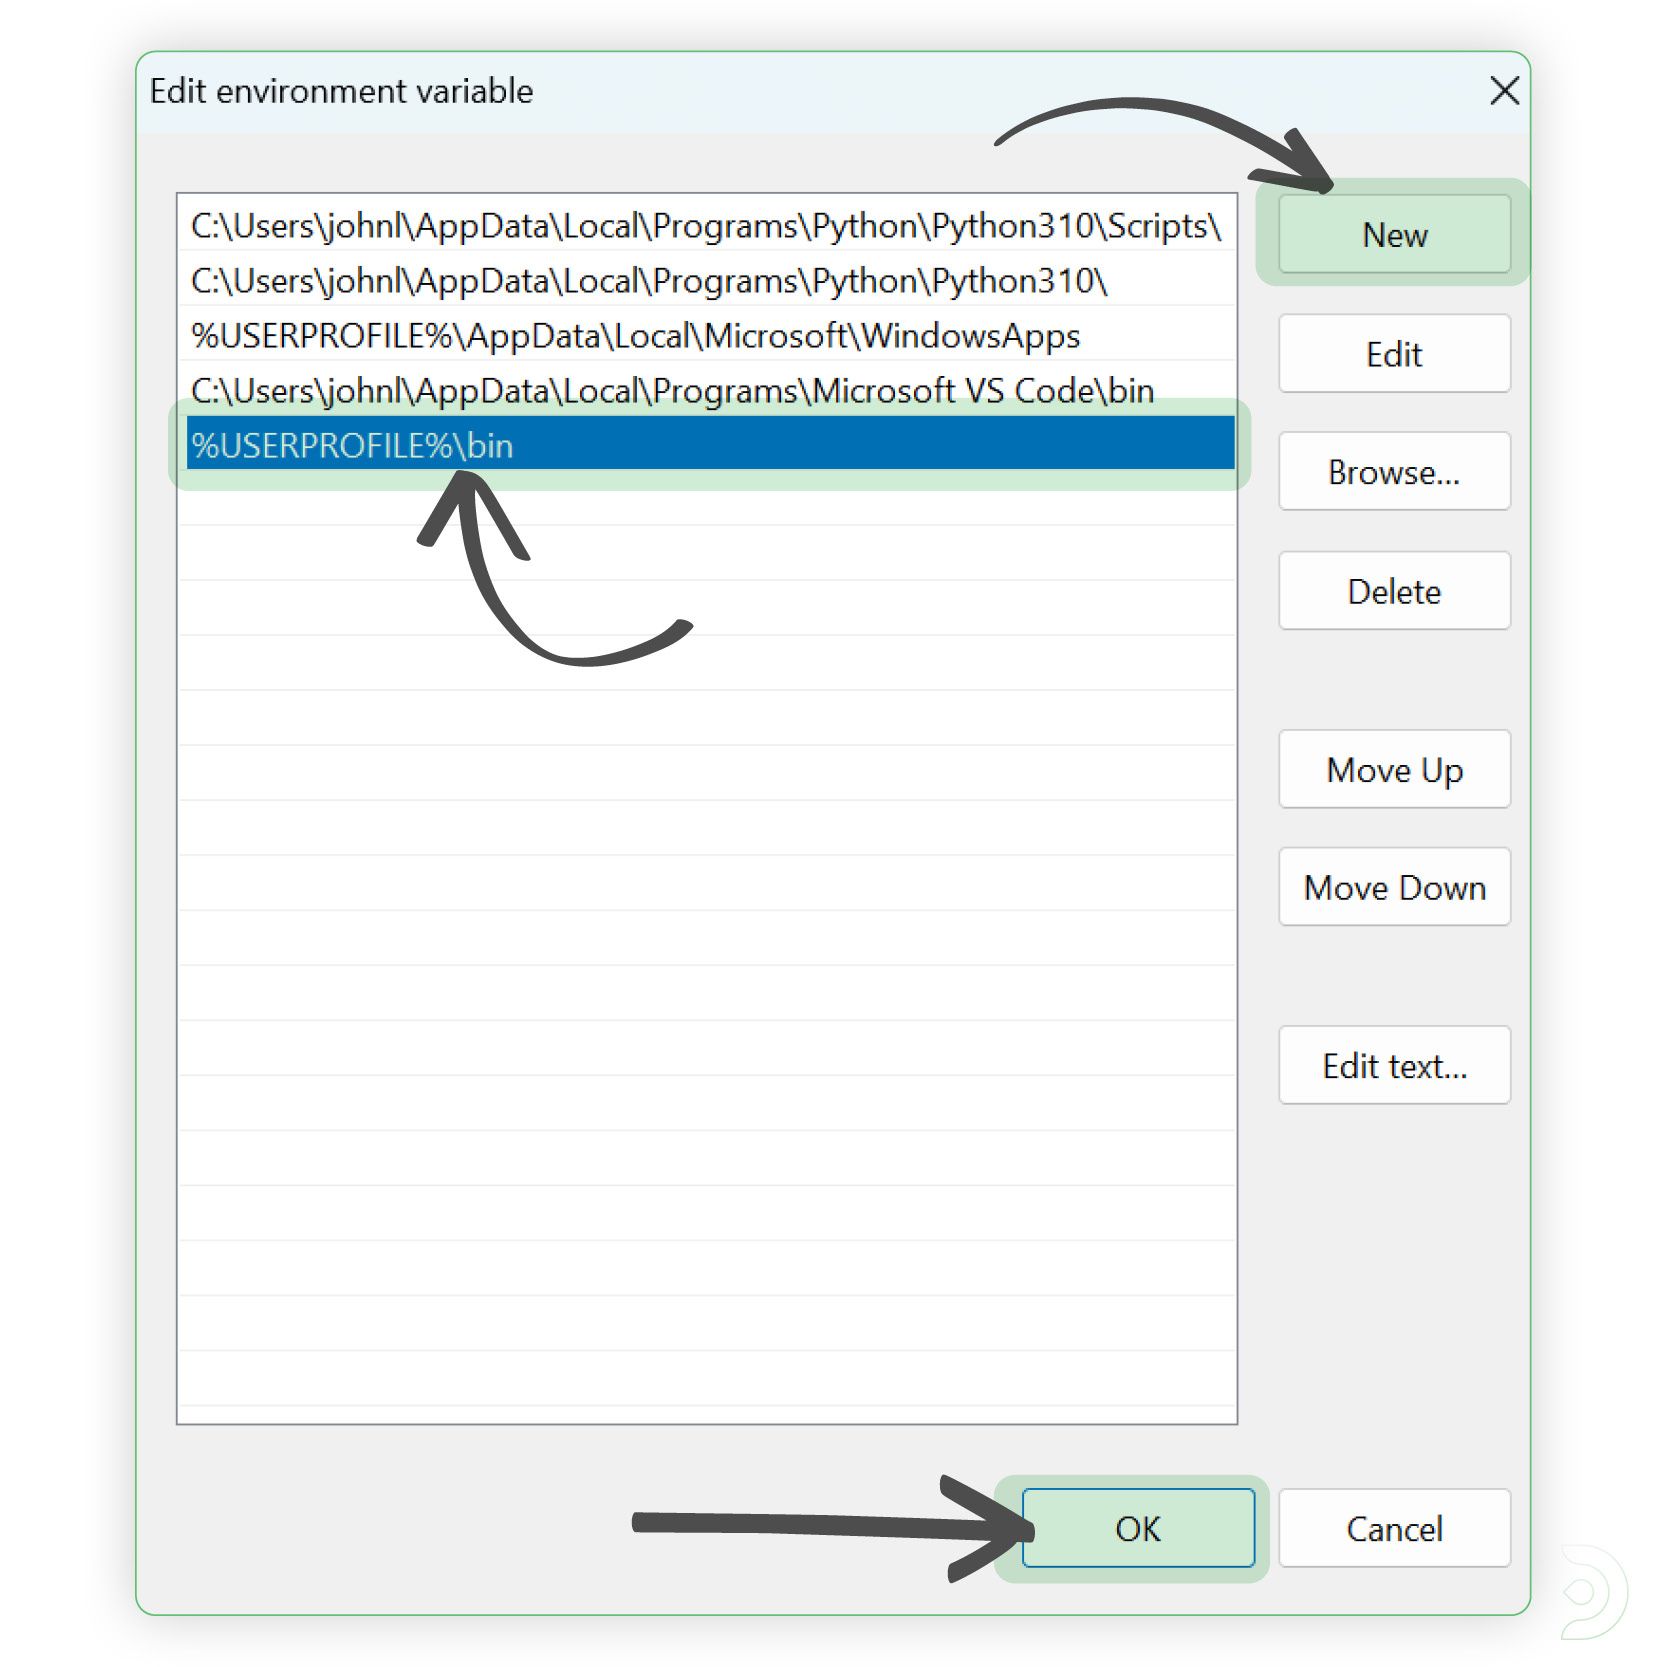
Click "New" and add the following entry: "%USERPROFILE%\bin". This will create a new folder called "bin" in your home directory.
Save the changes by clicking "OK" in each window.
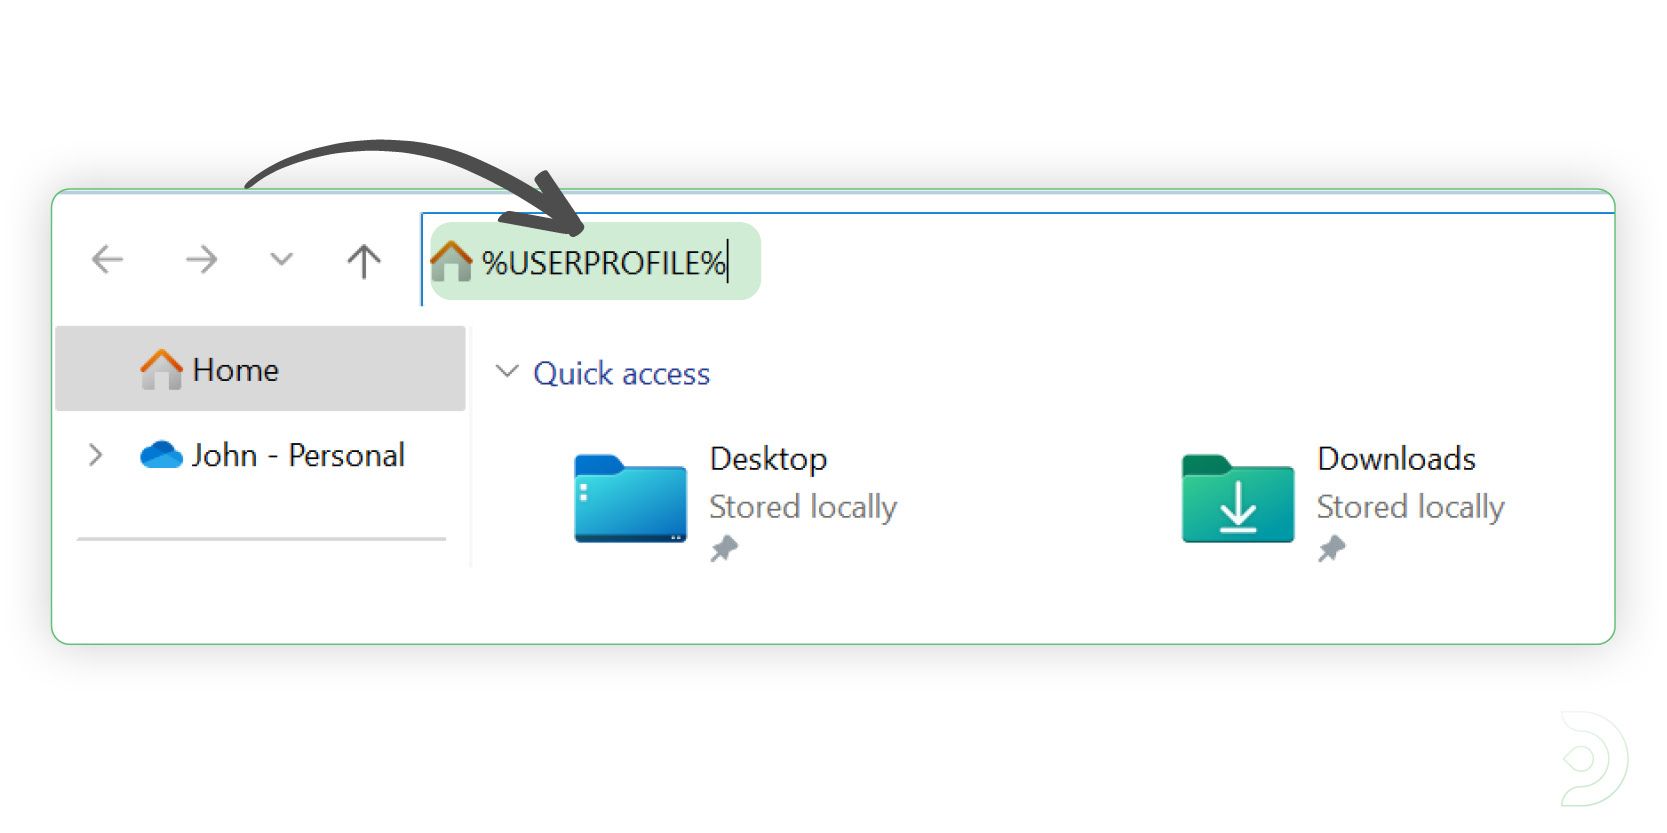
Open File Explorer and type "%USERPROFILE%" in the address bar. Press Enter to navigate to your home folder.
Create a new folder called "bin".
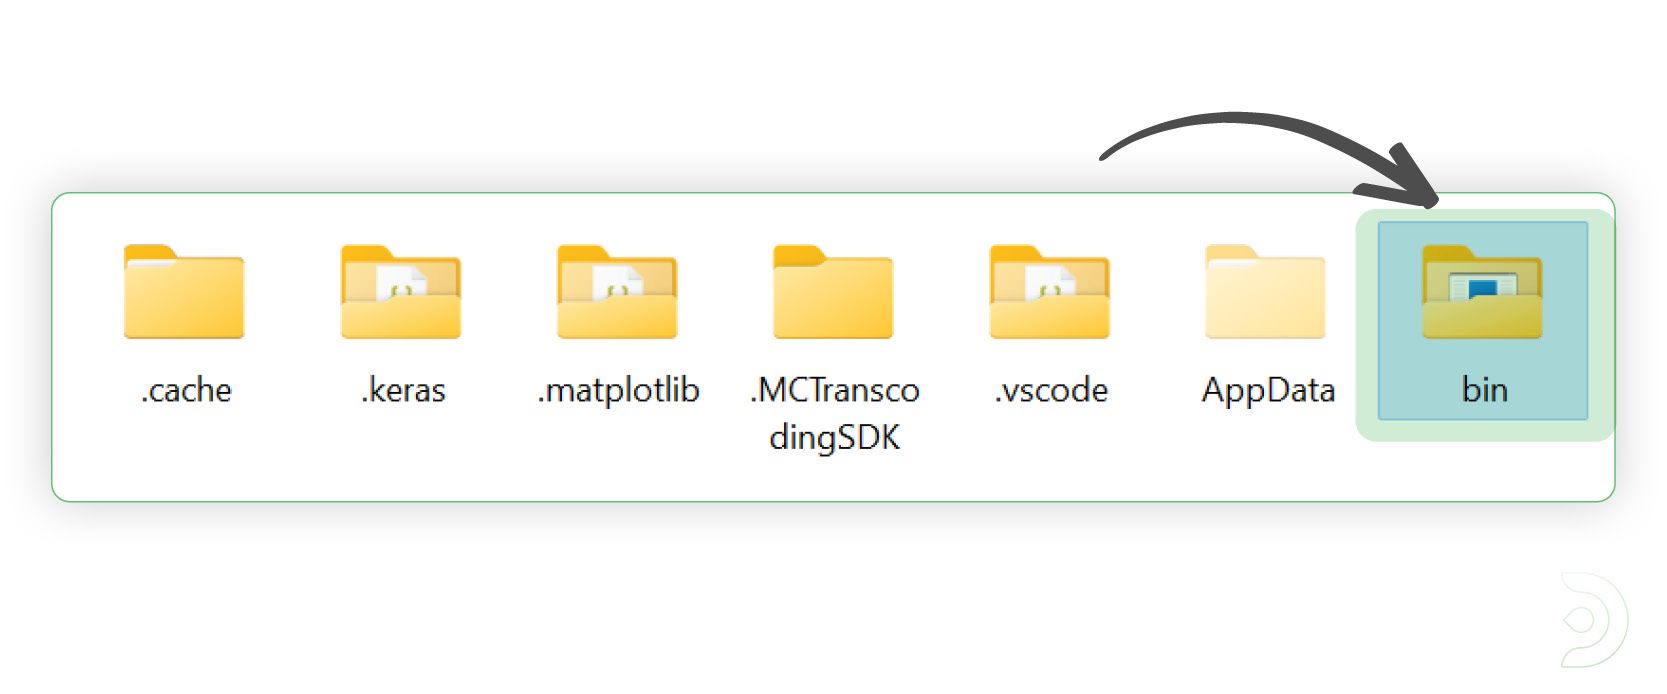
Move the "ffmpeg.exe" file into this newly created "bin" folder.
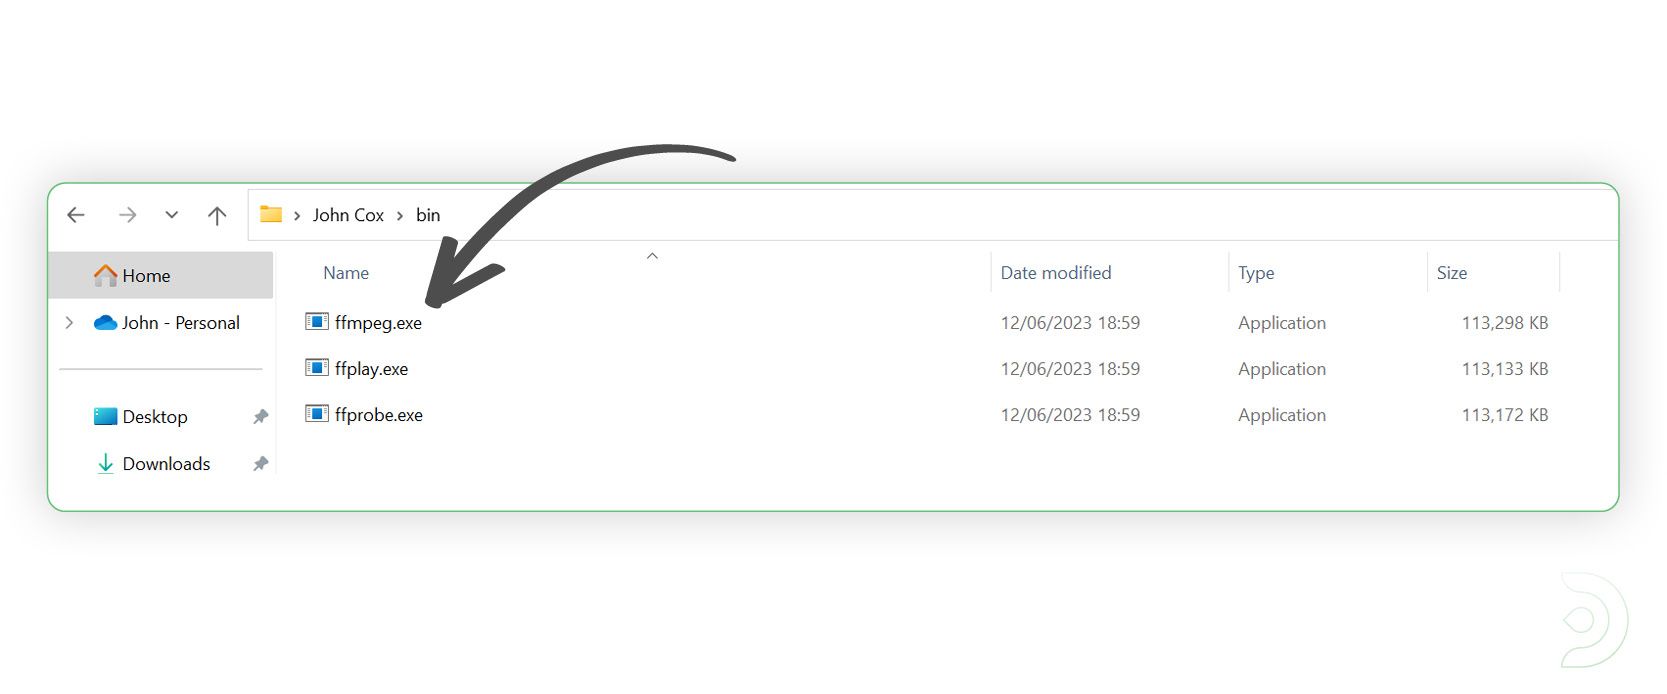
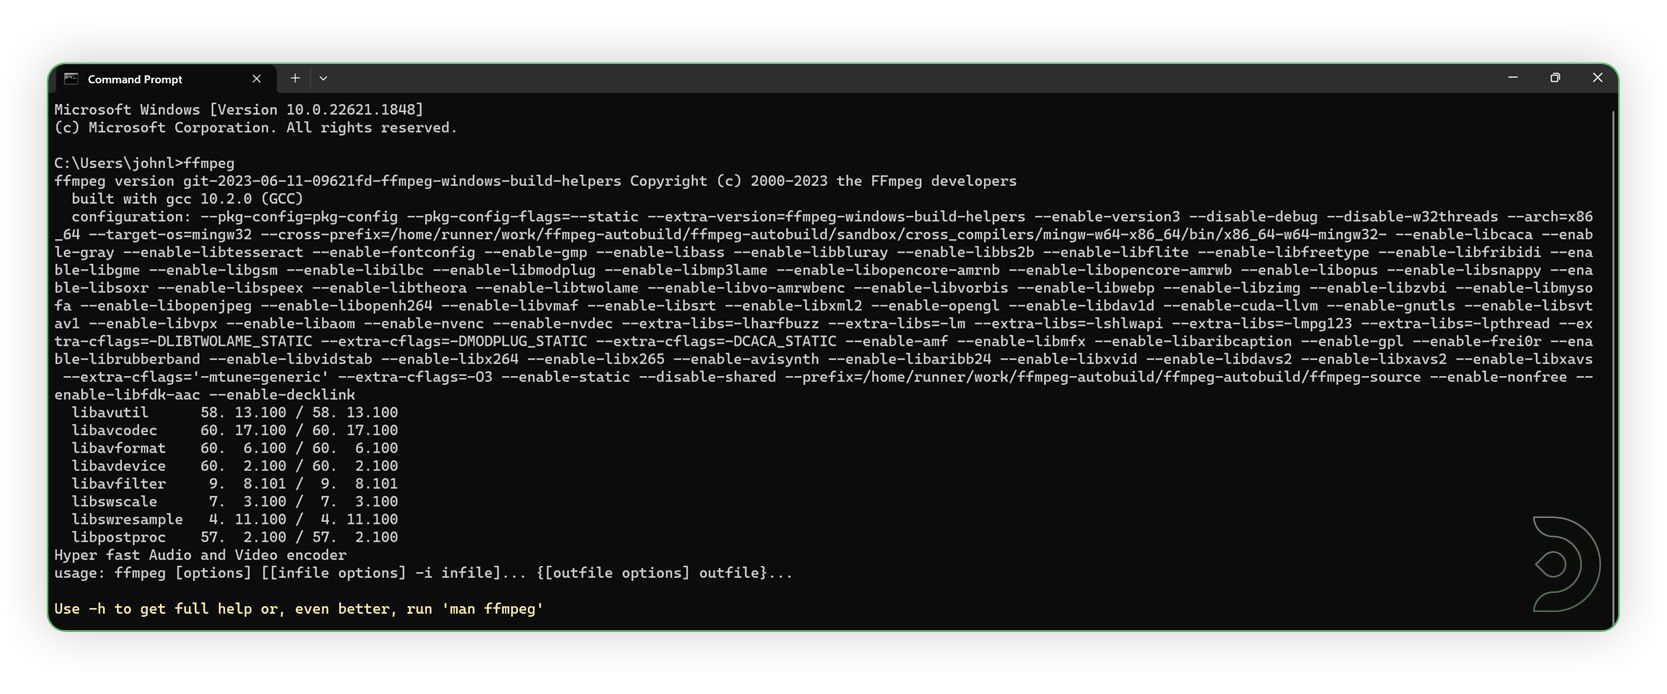
Congratulations! FFmpeg is now installed and accessible via the system's PATH. To test, open a command prompt by pressing the Windows key, typing "cmd", and pressing Enter.
In the command prompt, type "ffmpeg" and press Enter. If everything is set up correctly, you should see FFmpeg's help page displayed.
Start using Temporal Kit
With FFmpeg installed ( or if using Think Diffusion which is pre-installed ) you can start experimenting!
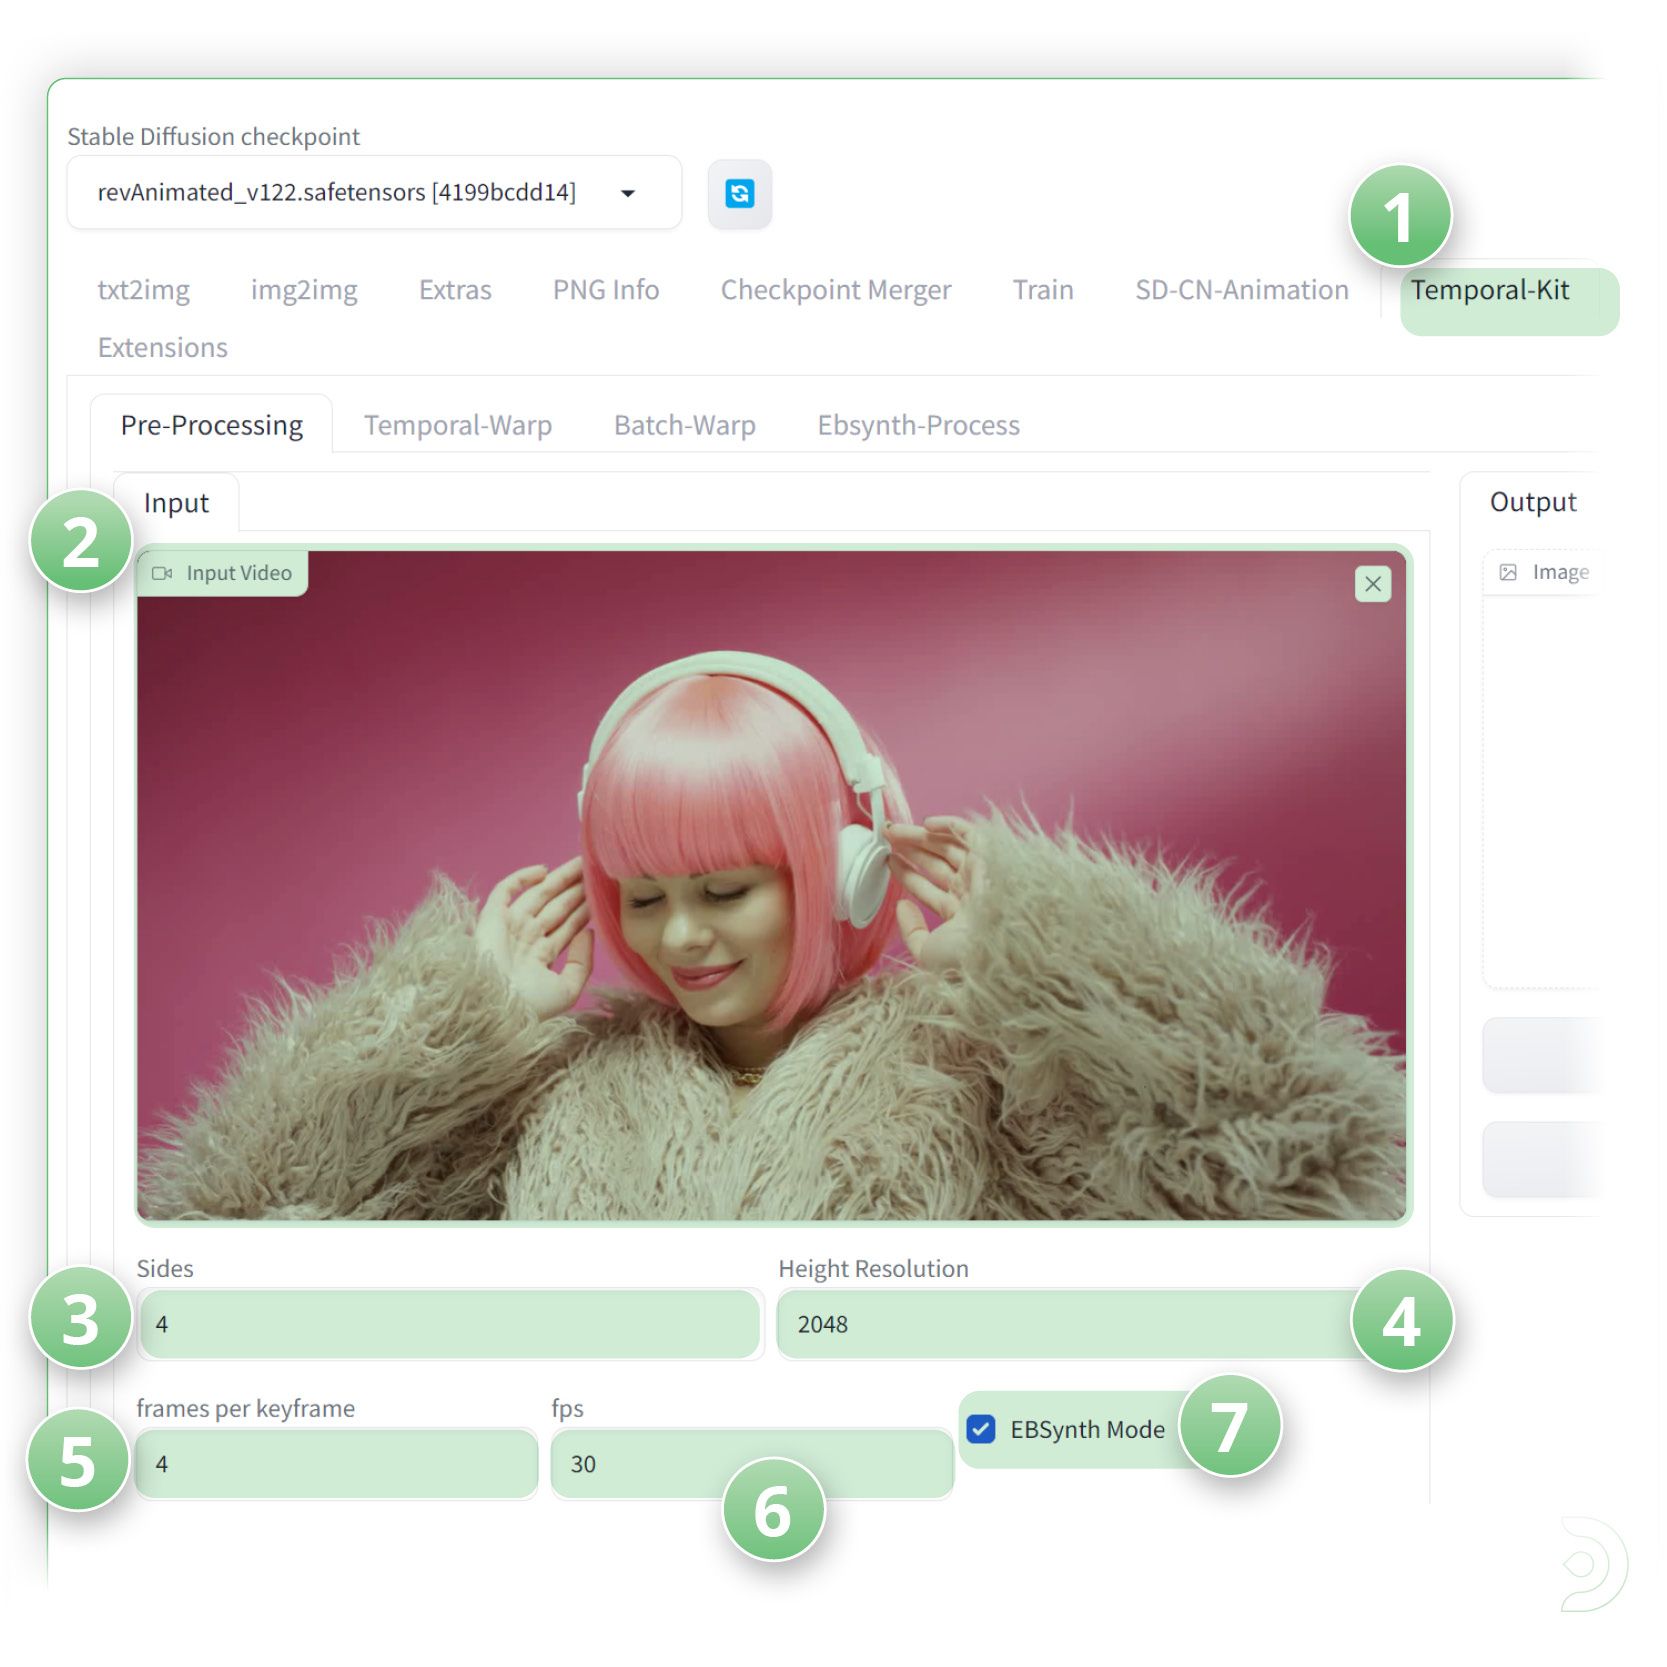
(1) Now go to the Temporal-Kit tab and follow along to these steps:
(2) Upload your input video (Please note that at the time of writing .mov files are not supported within temporal-kit so it is recommended to use a .mp4 file)
(3) Set the sides to 4, which will generate a 4x4 grid
(4) Set our resolution to 2048
(5) Set the frames per keyframe to 4
(6) Set the frames per second (fps) to 30
(7) Select the EBSynth Mode checkbox ✅
Set our target folder to where you want the keyframes to be outputted to. I have used C:\temporalkit\video but this can be any valid path that Stable Diffusion recognizes.
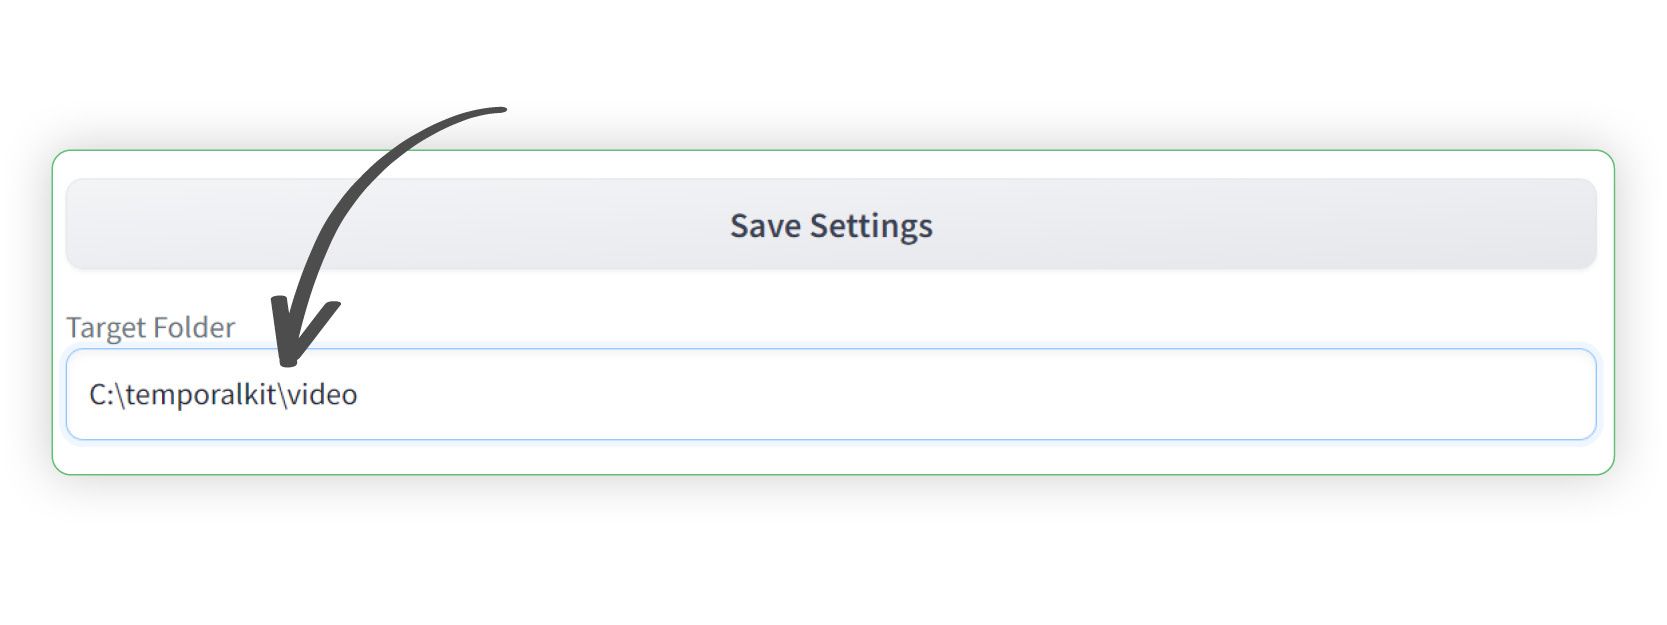
Click run to generate our 4x4 keyframes.
We should now see our 4x4 keyframes as shown below.
Click save settings and click the send to Img2Img button.
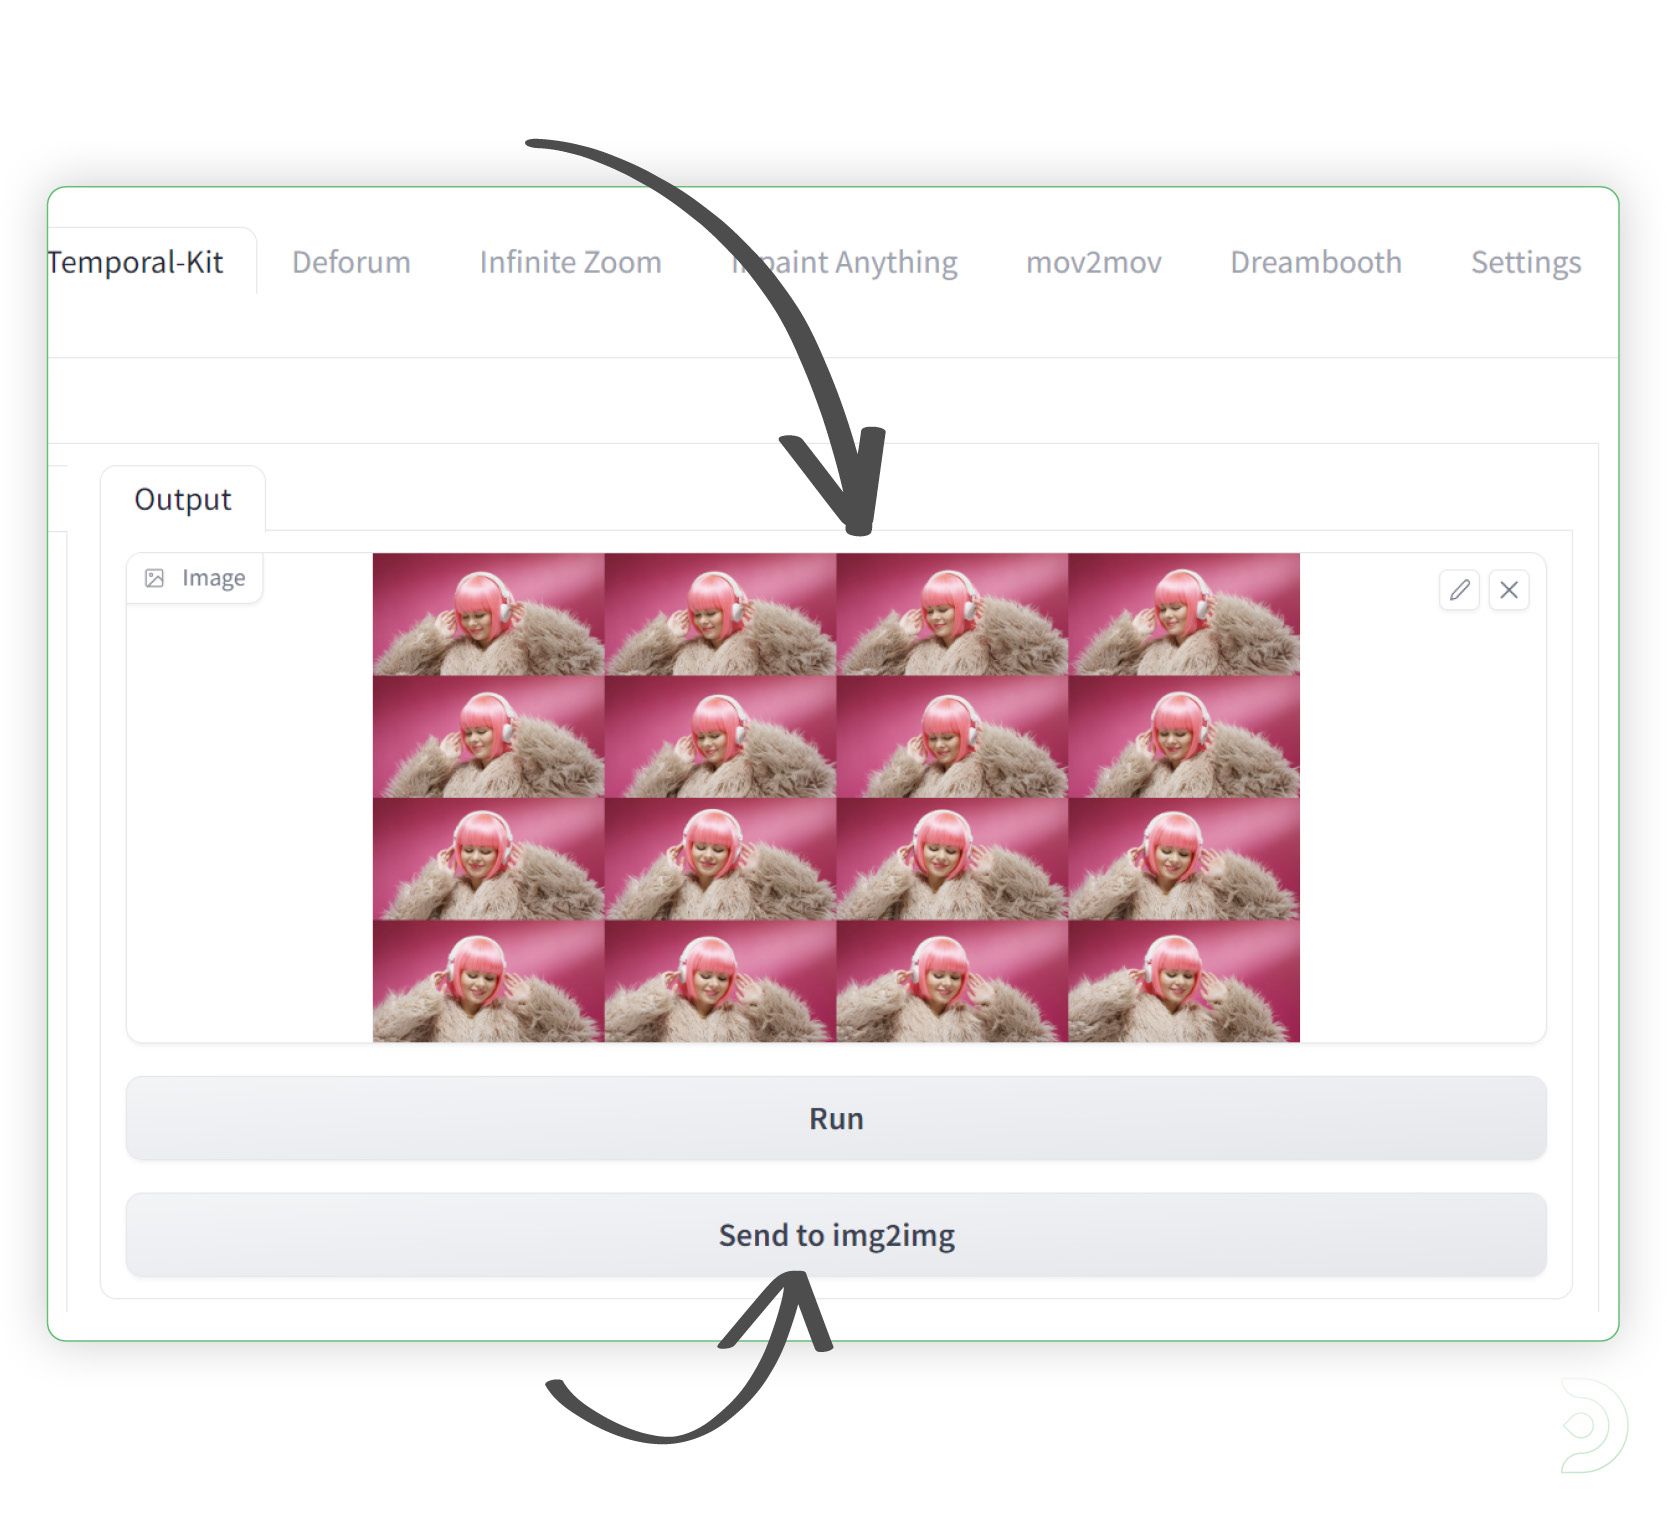
Your 4x4 images should now be shown.
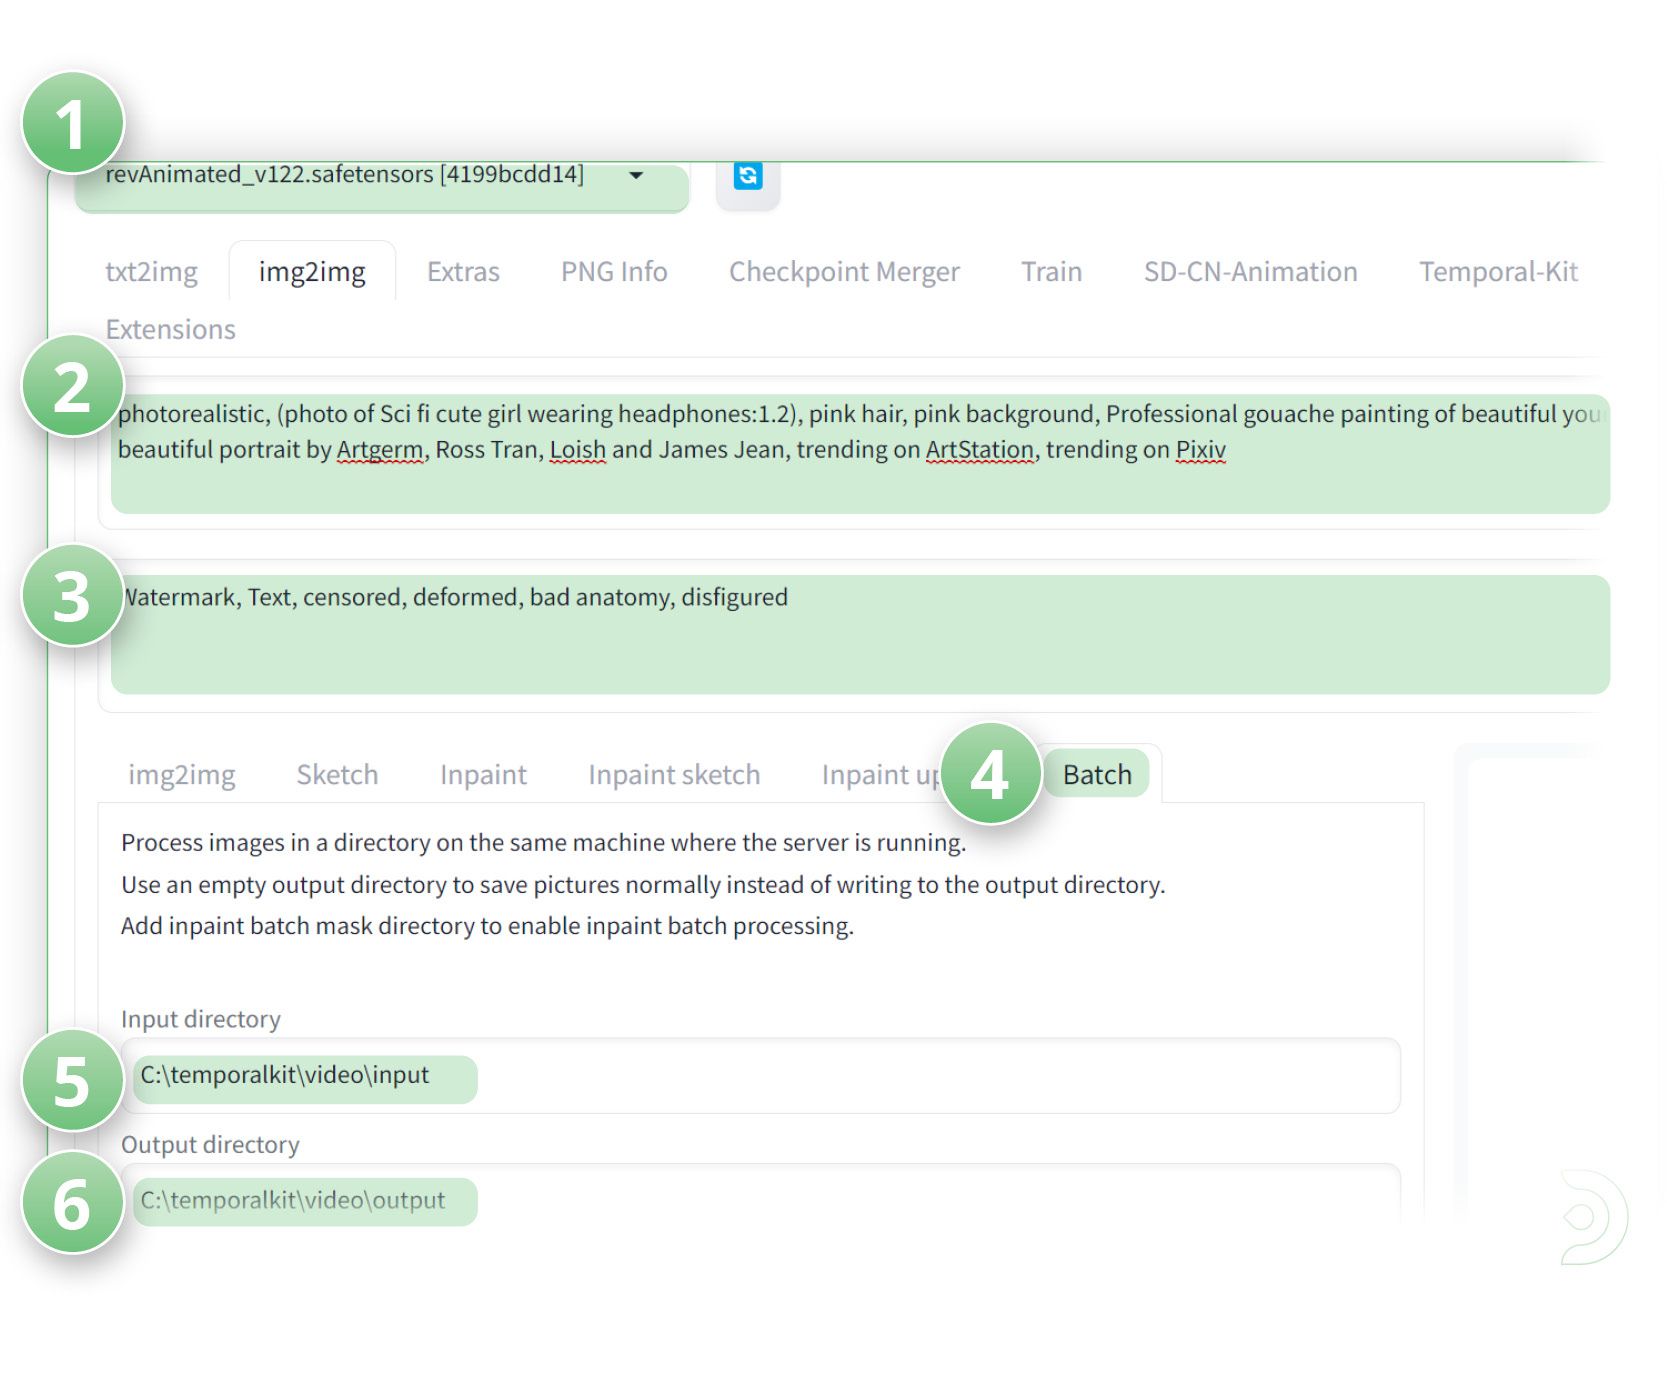
(1) Select revAnimated_v122 as the stable diffusion checkpoint model
(2) Positive Prompts: photorealistic, (photo of Sci fi cute girl wearing headphones:1.2), pink hair, pink background, Professional gouache painting of beautiful young (realistic) anime girl, beautiful portrait by Artgerm, Ross Tran, Loish and James Jean, trending on ArtStation, trending on Pixiv
(3) Negative Prompts: Watermark, Text, censored, deformed, bad anatomy, disfigured
(4) Go into the Batch tab
(5) Set your input directory, I have used C:\temporalkit\video\input
(6) Set your output directory, I have used C:\temporalkit\video\output
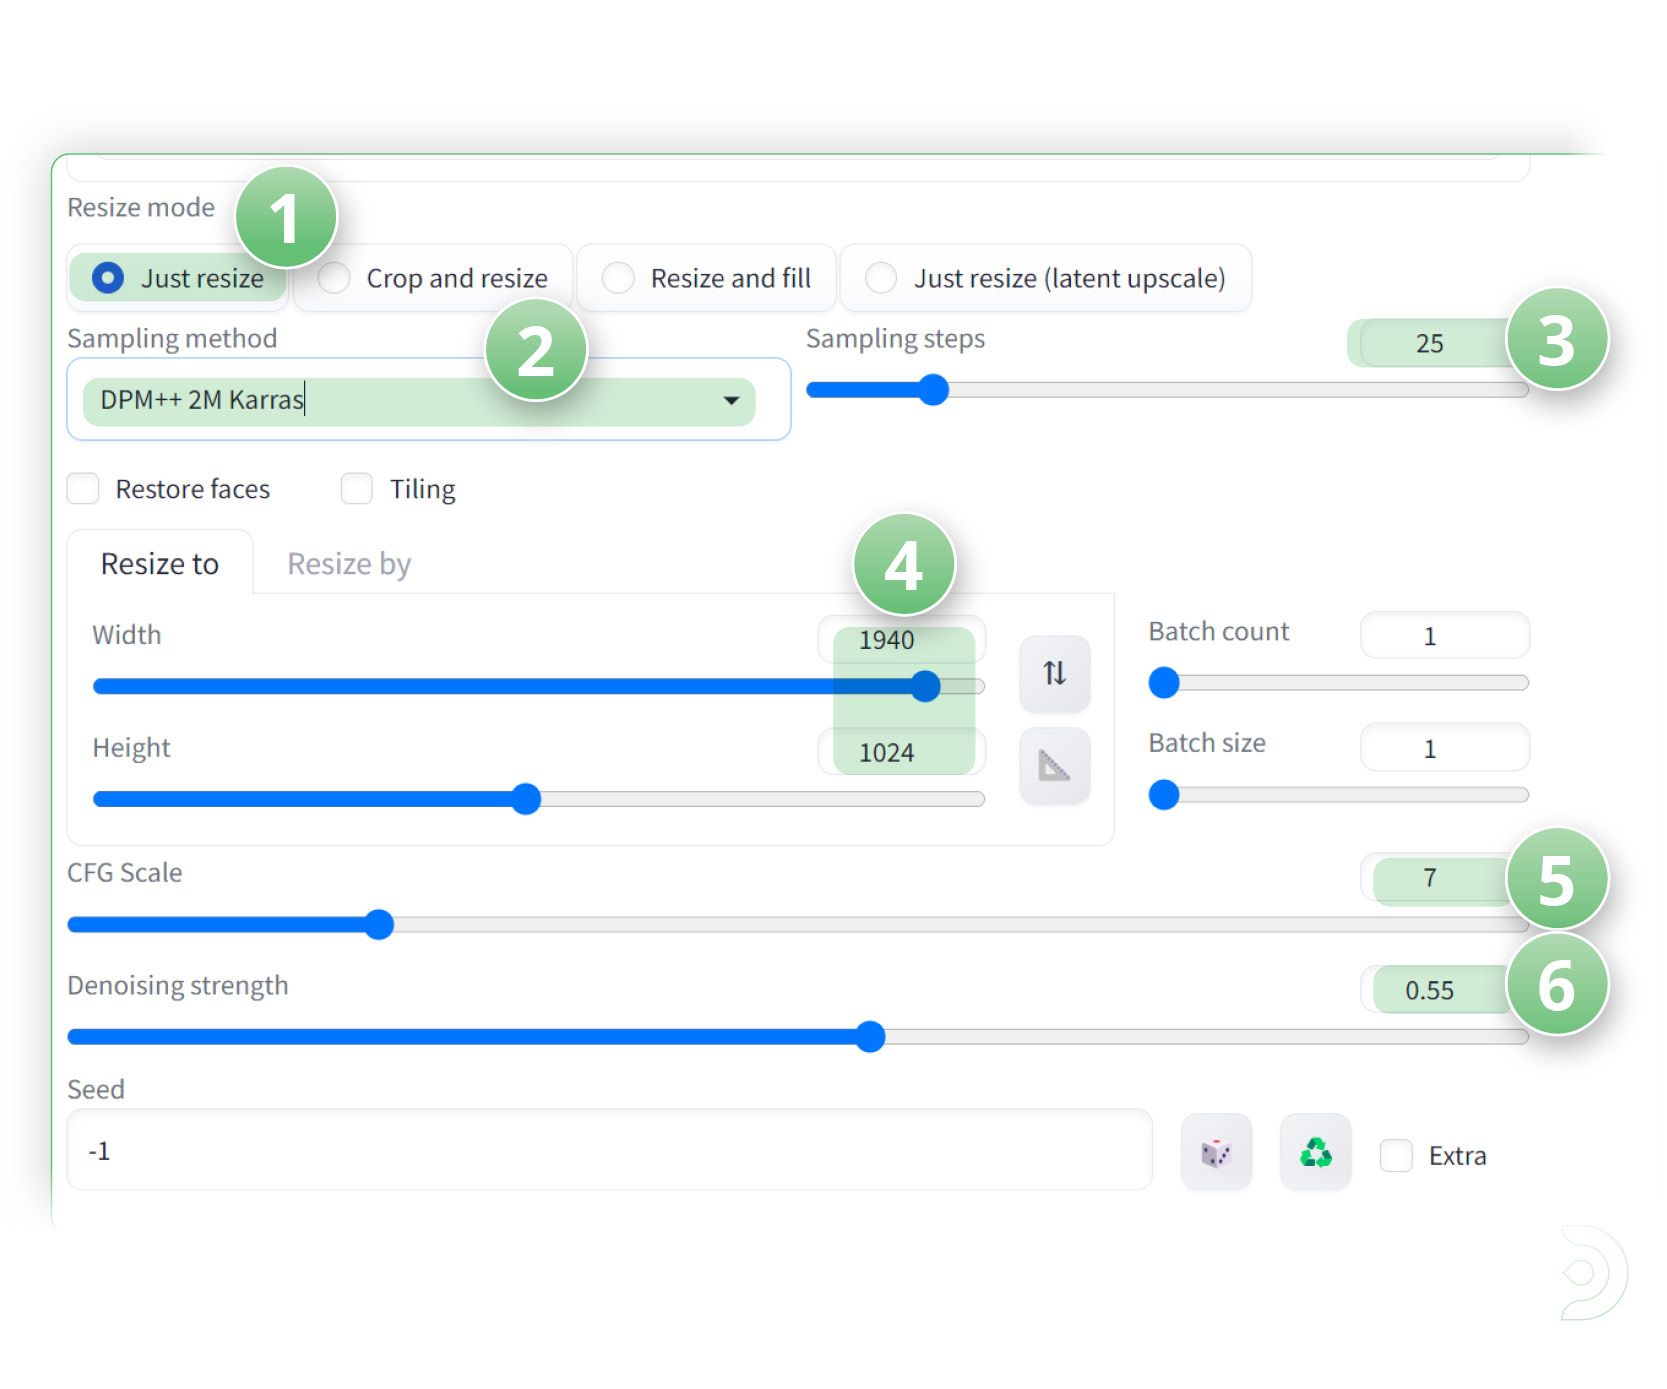
(1) Set the resize mode to Just Resize
(2) the sampling steps to 25
(3) the sampling method to DPM++ 2M Karras
(4) Set the width and height accordingly to your video
(5) CFG scale of 7
(6) and the denoising strength to 0.55
(1) Drop down the control net option
(2) and click enable to ensure the ControlNet is activated.
(3) Select the Pixel Perfect checkbox ✅
(4) Set the Control Type to Tile
(5) the Preprocessor to tile_resample
(6) and the control net model to control_v11f1e_sd15_tile
(7) Set the control mode to Balanced
(8) and the Resize mode to Just Resize
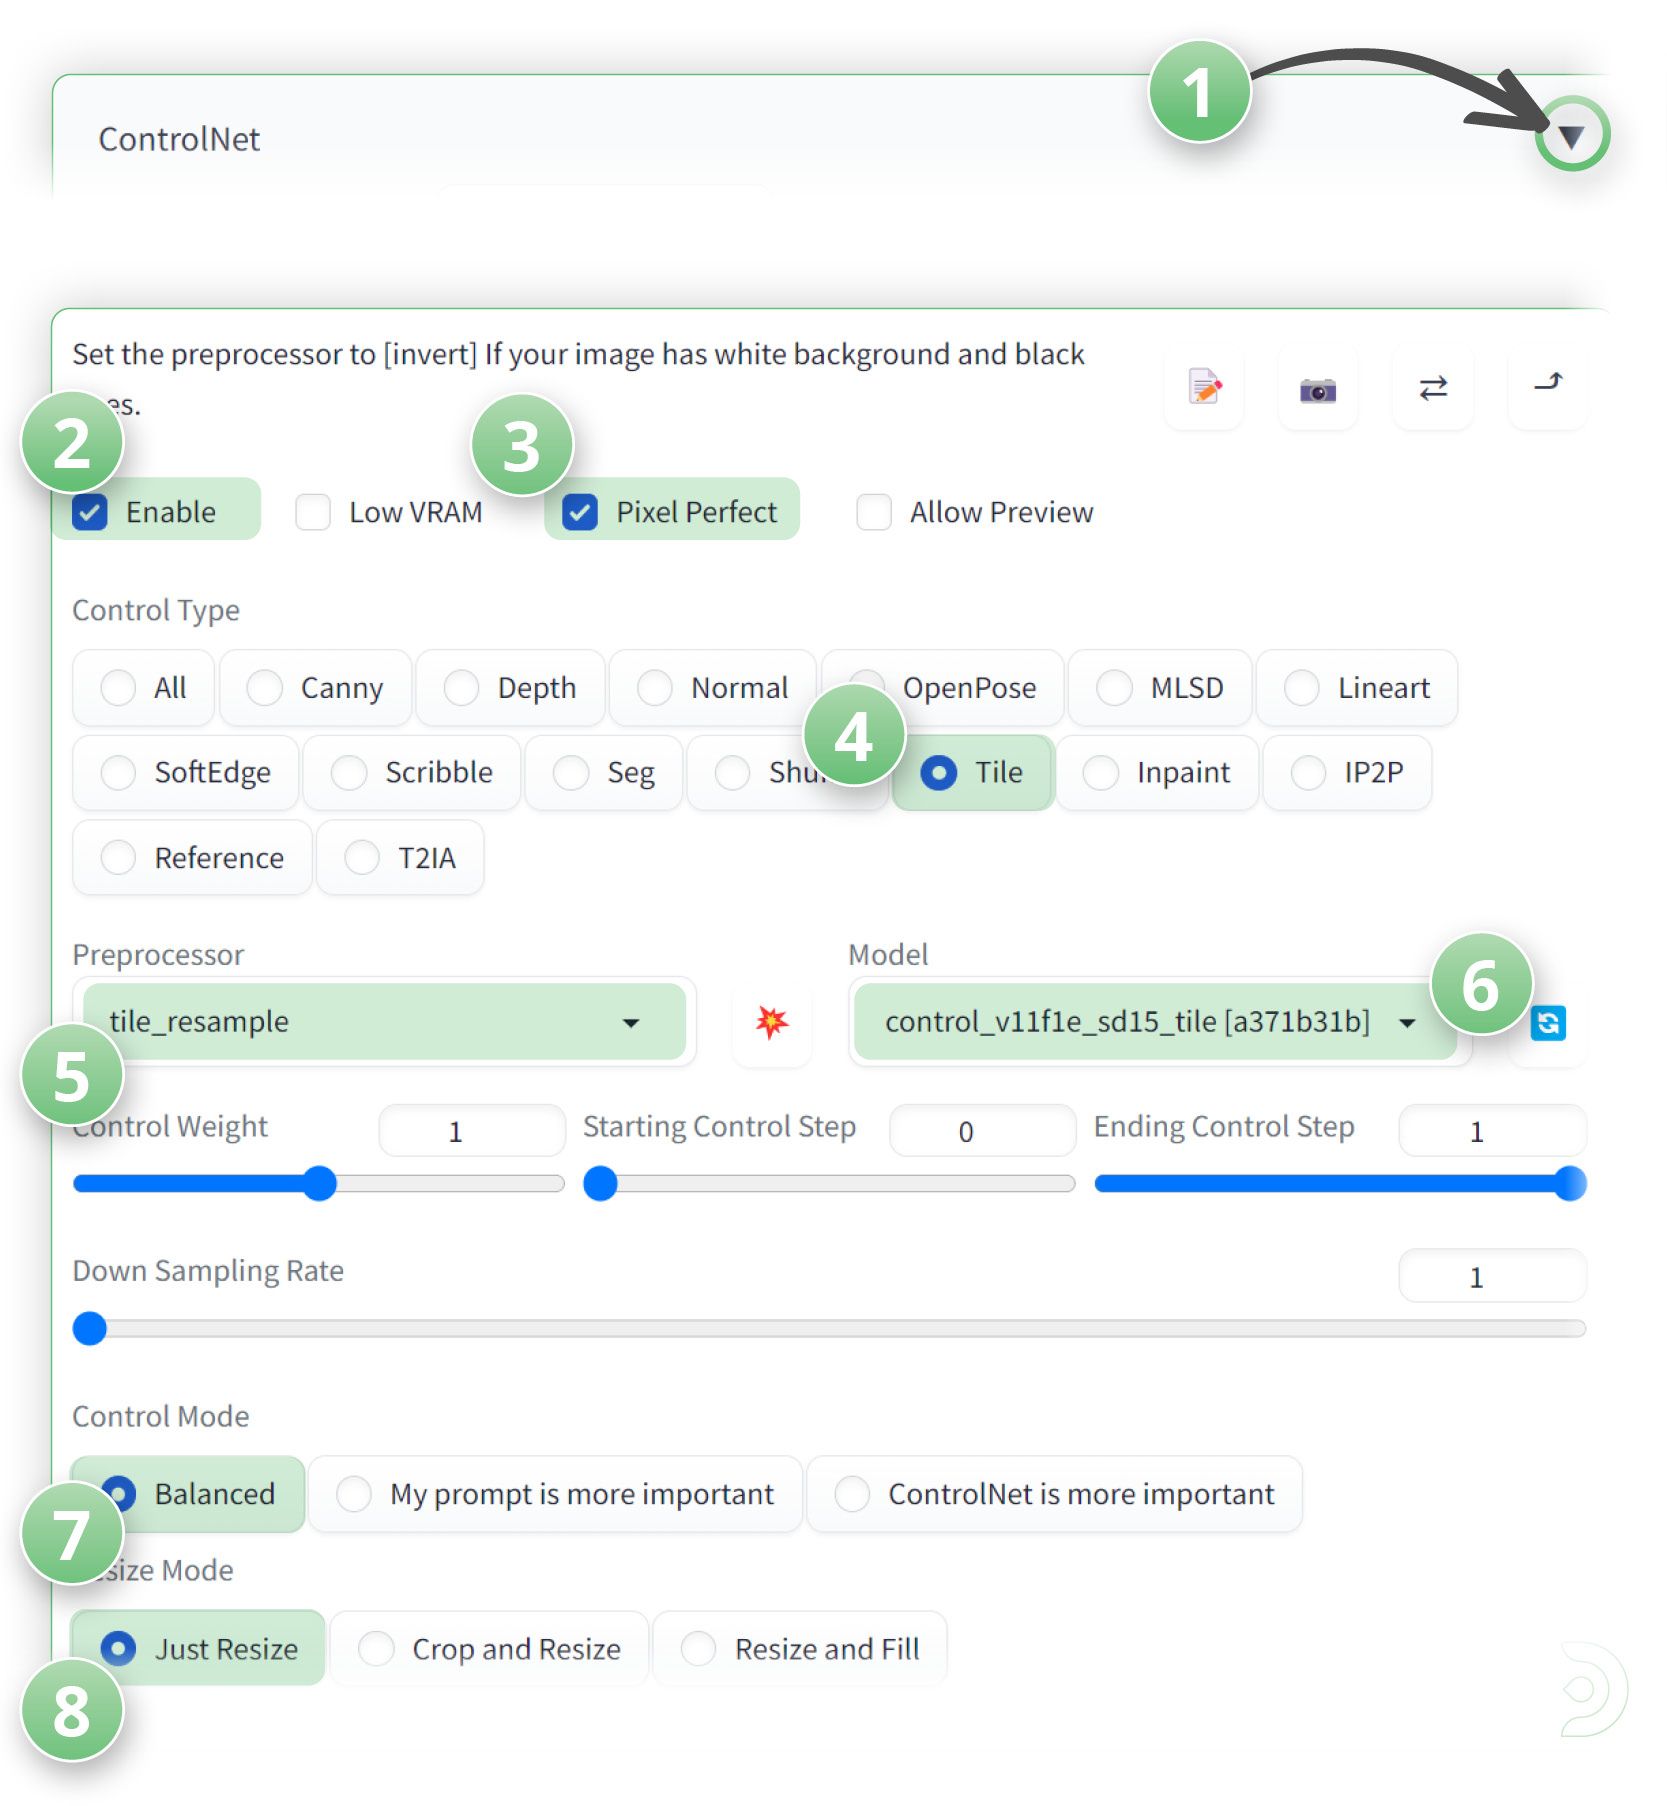
Now click generate
We should now see our image in our output folder
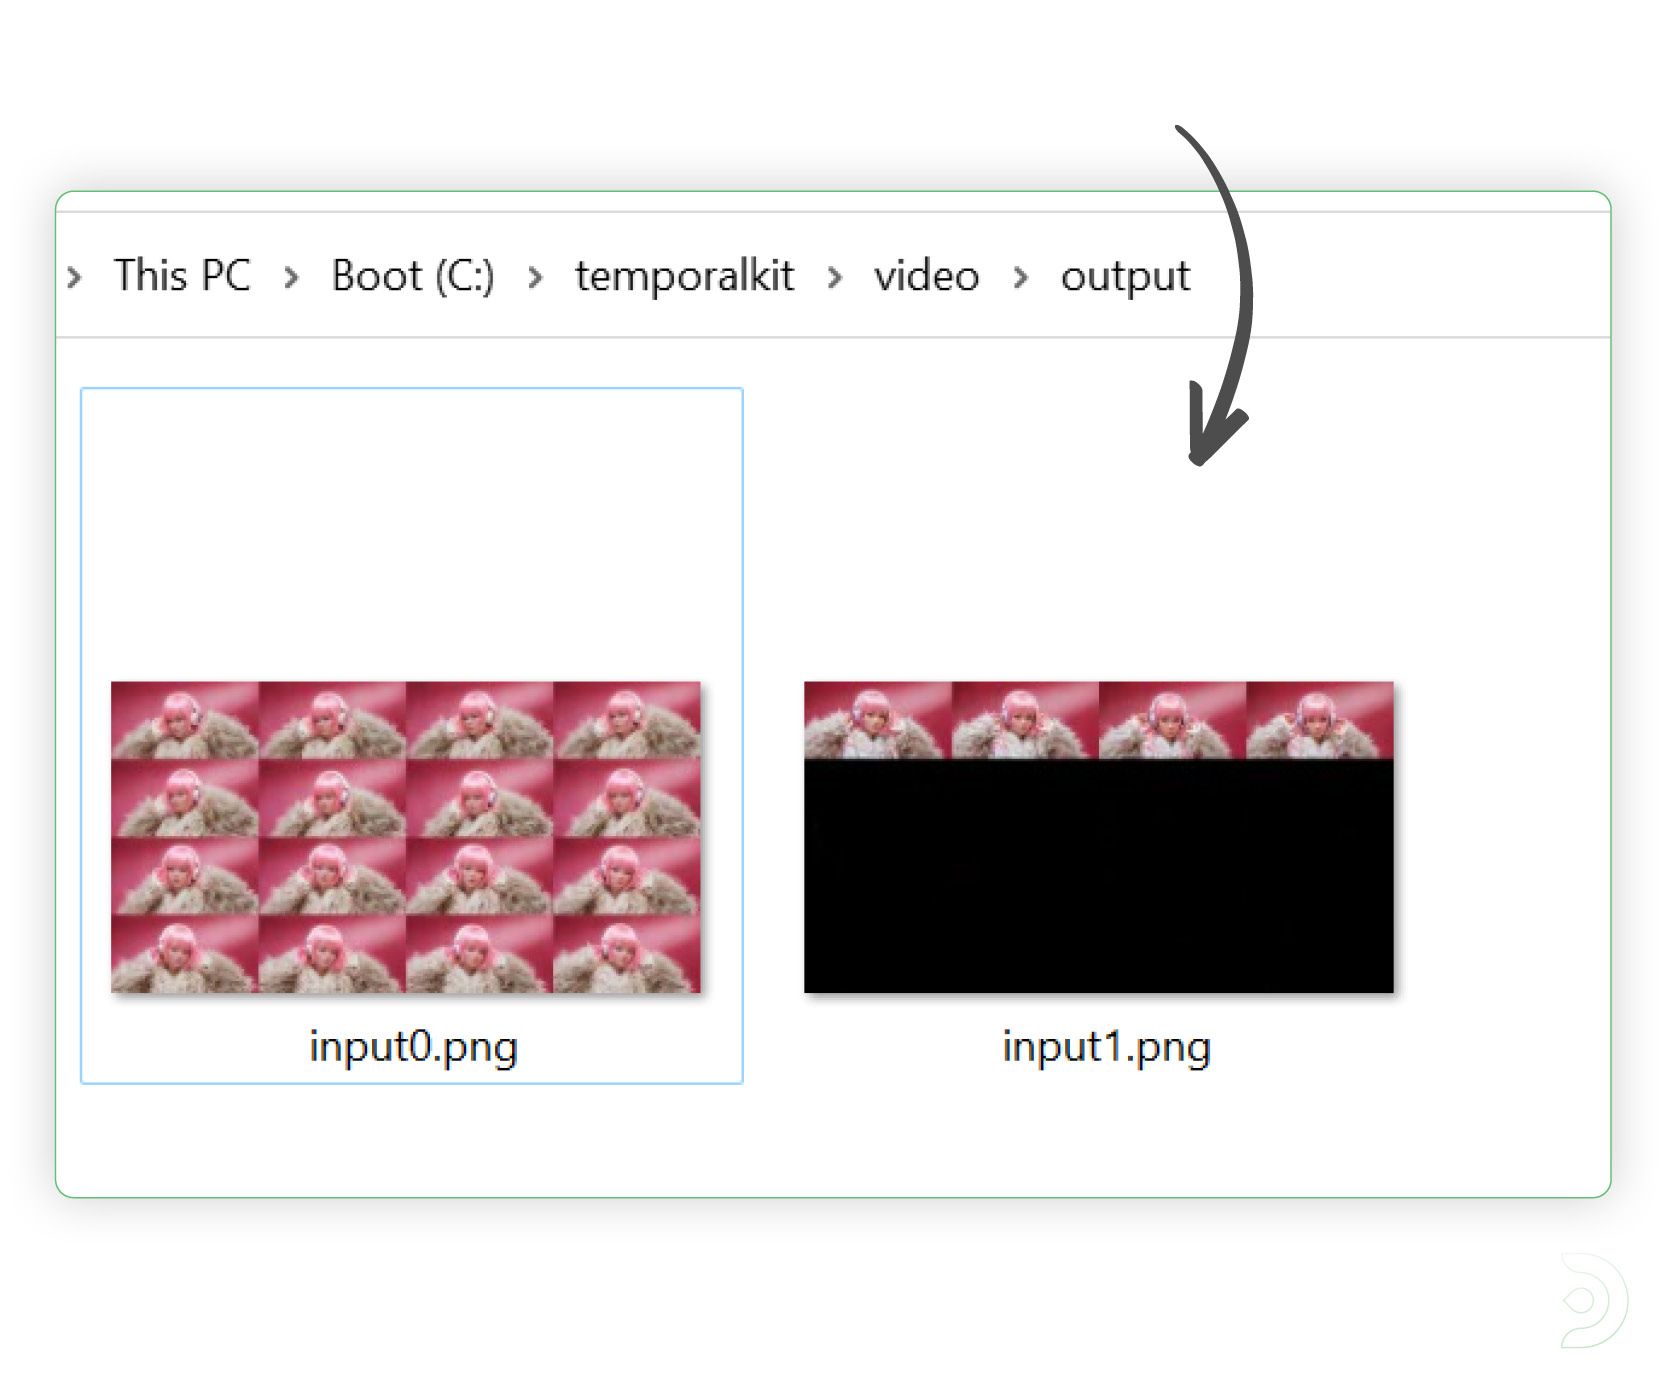
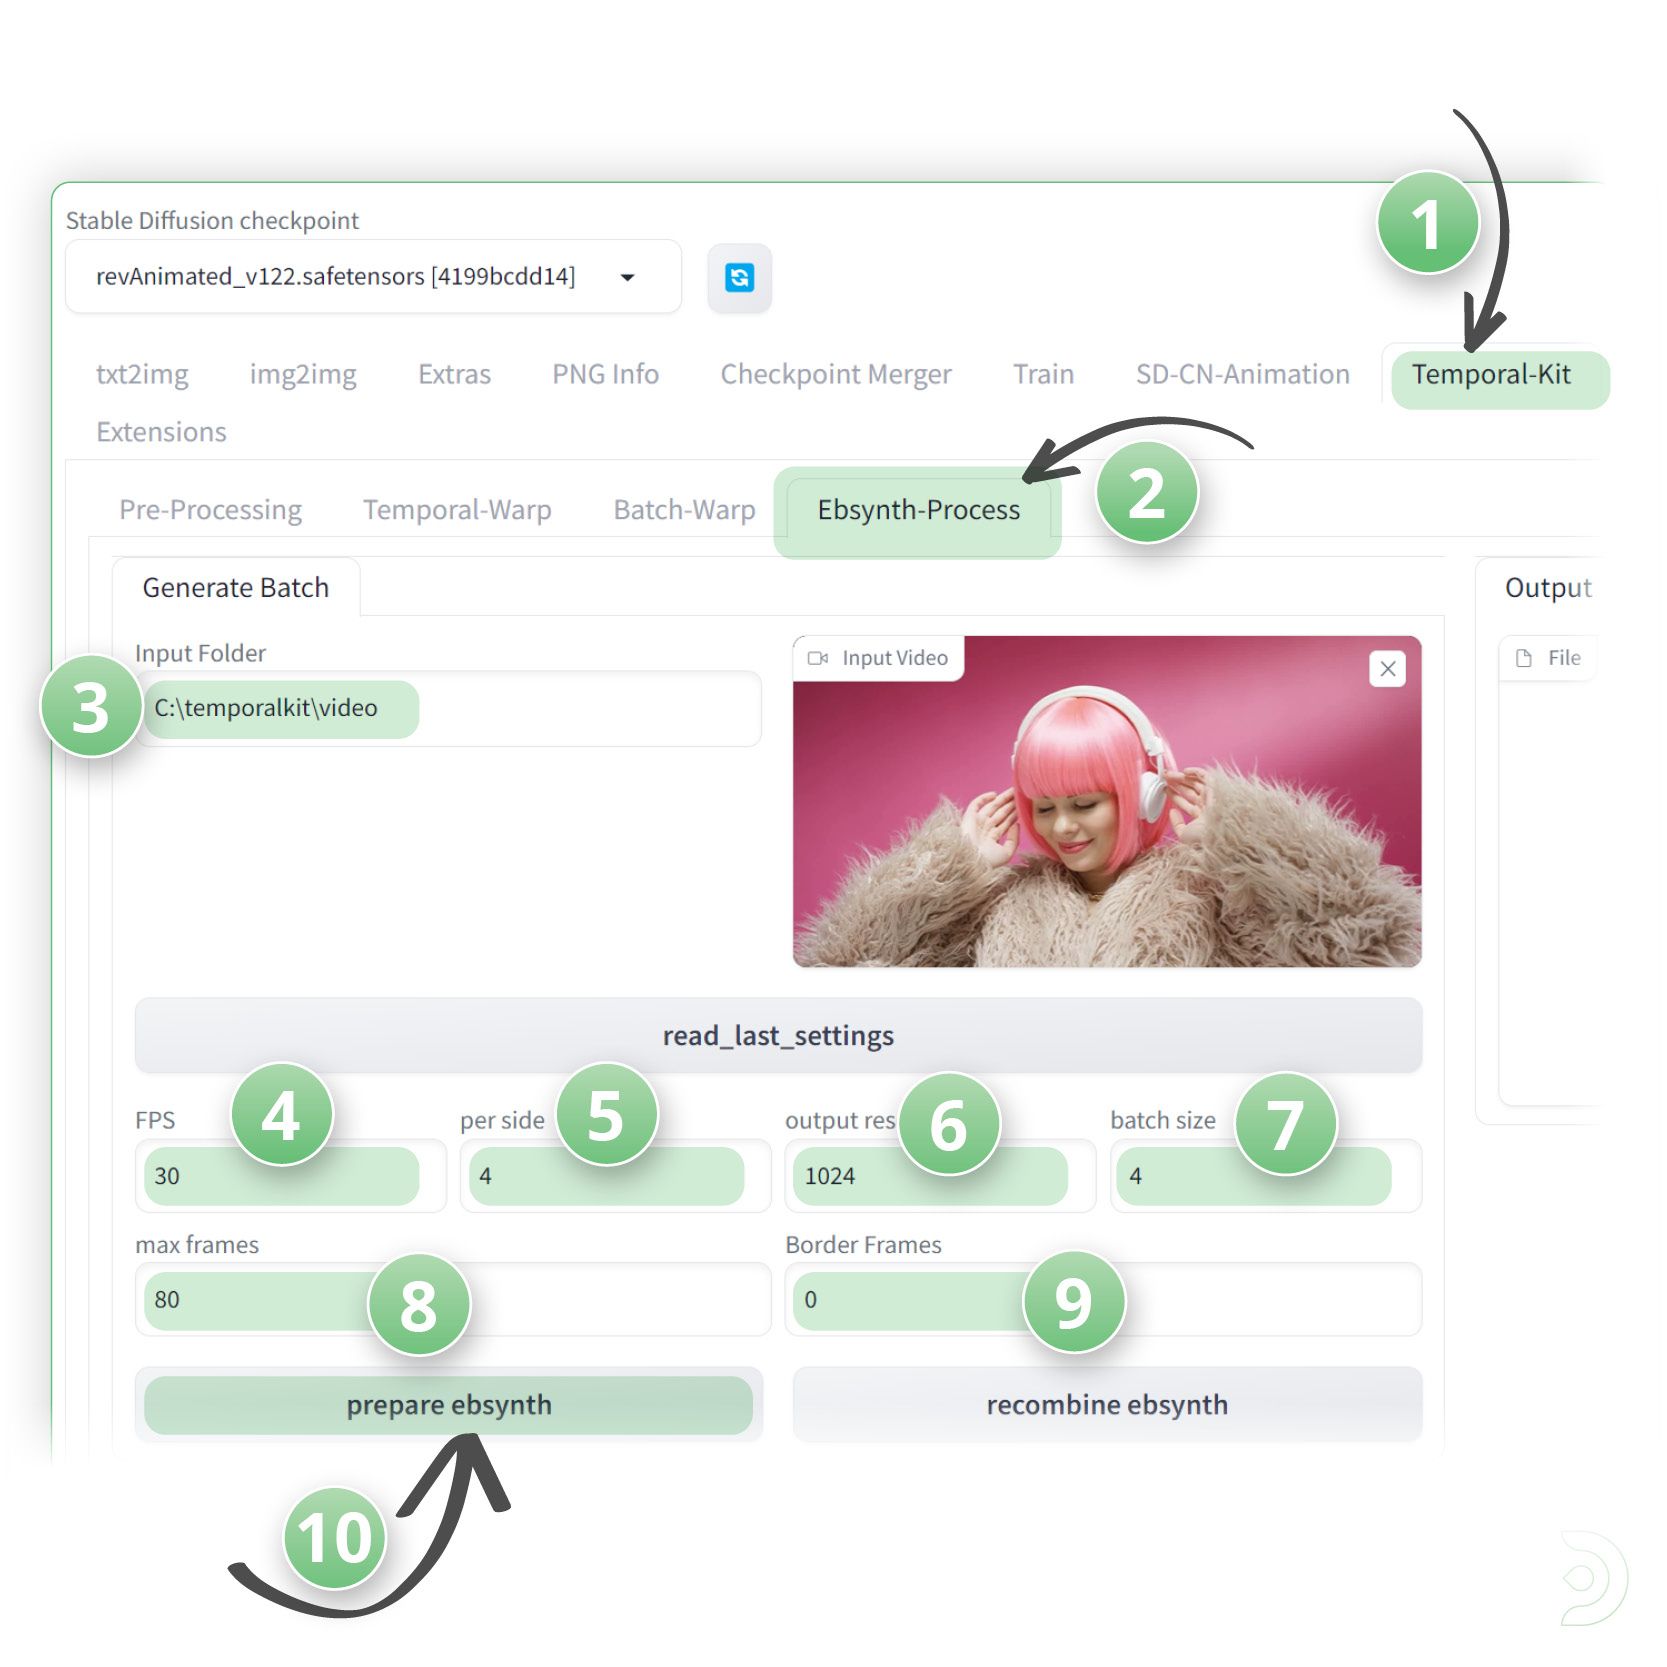
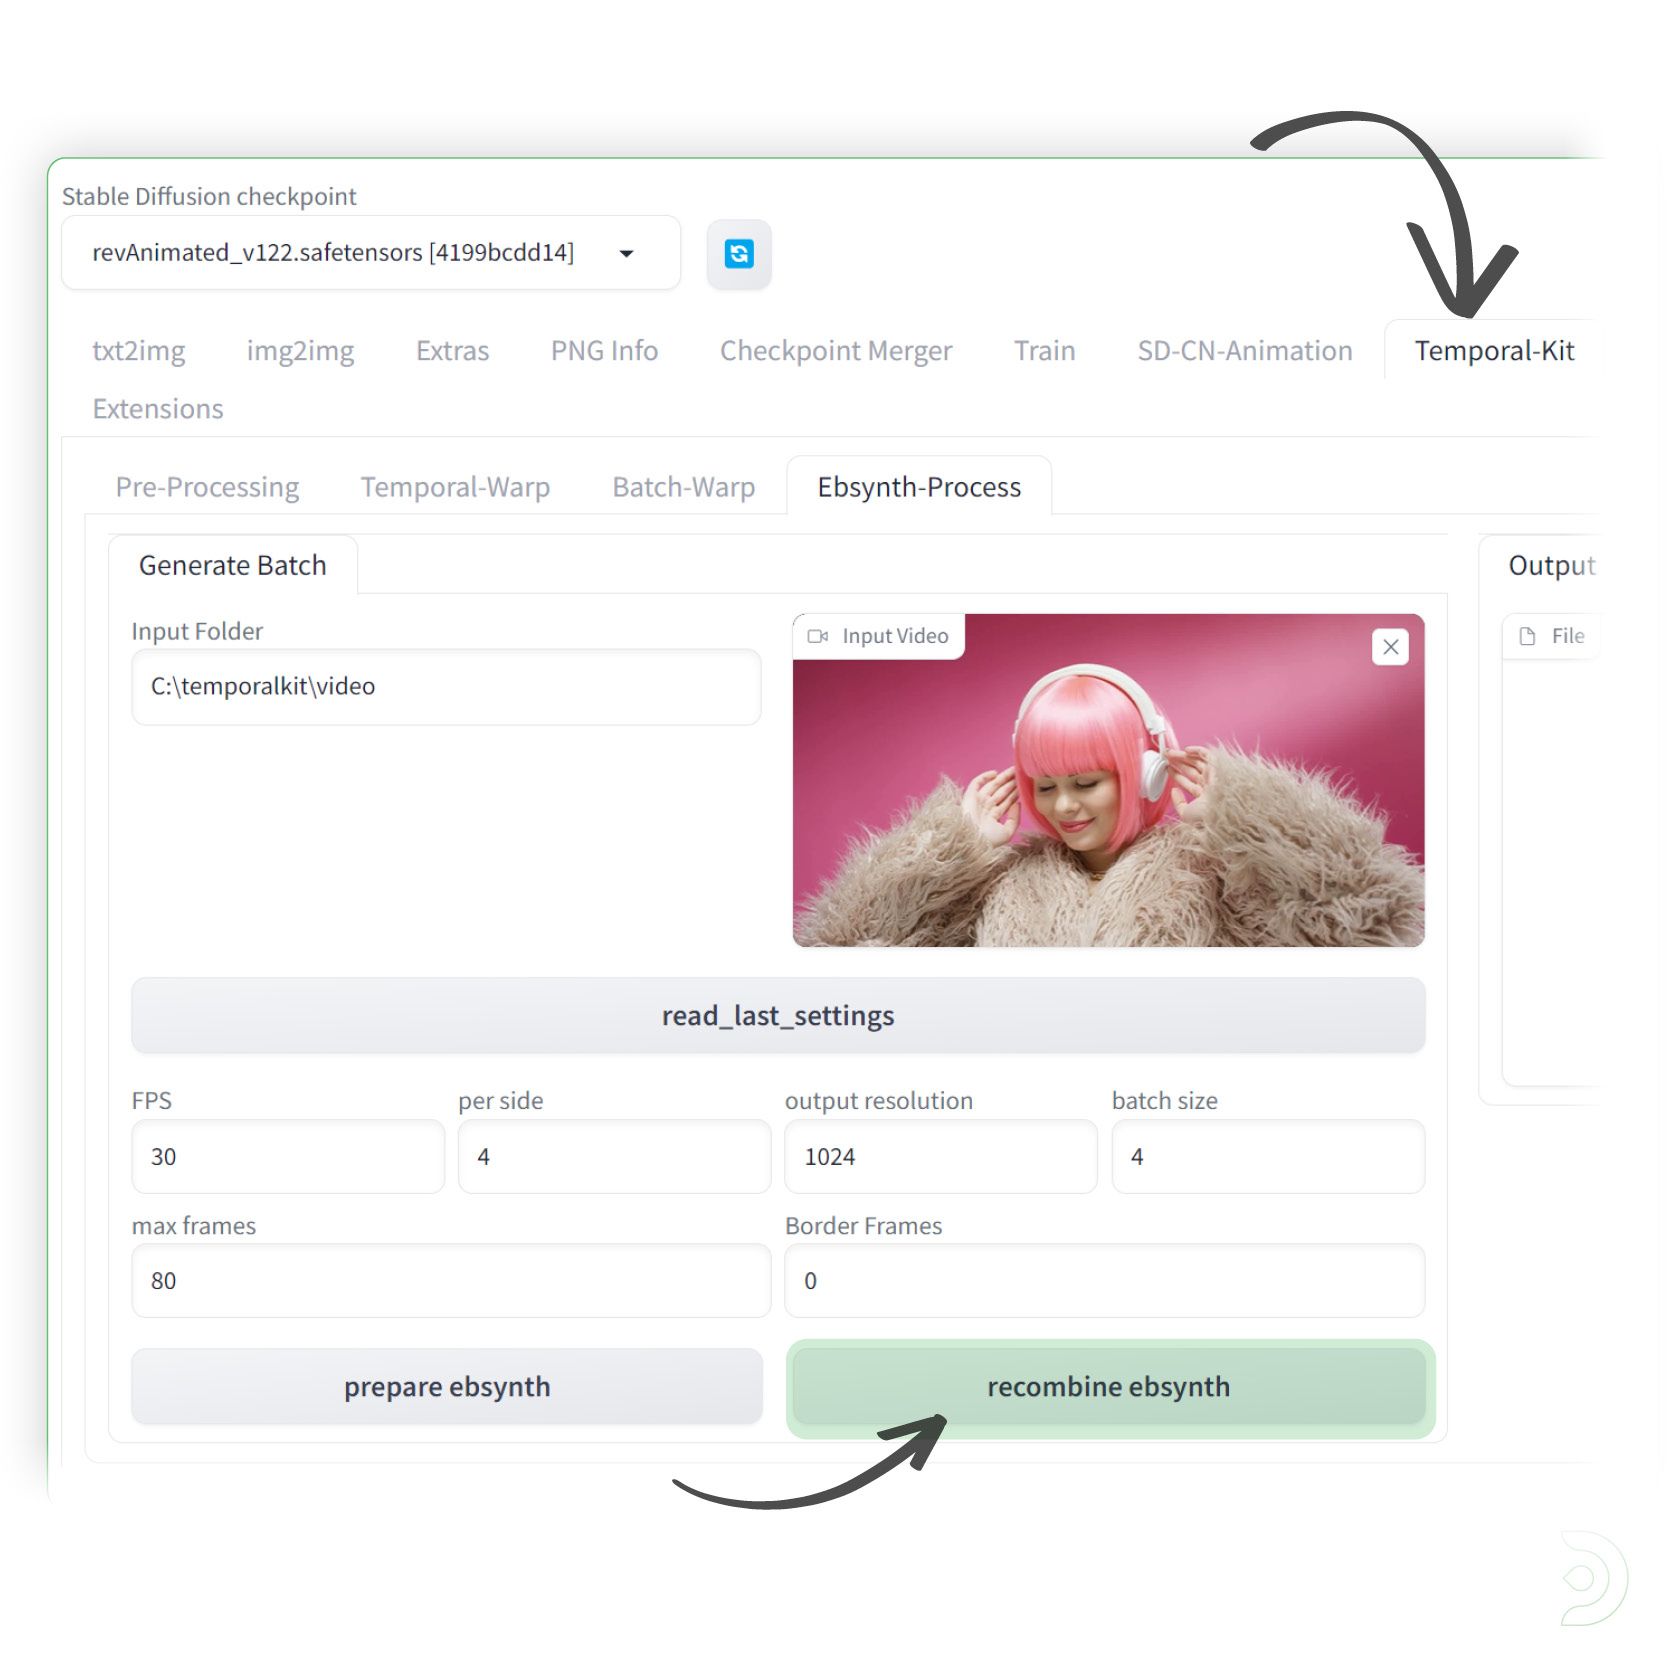
(1) Now, within the TemporalKit tab
(2) head over to the Ebsynth-Process tab
(3) and set the input folder to C:\temporalkit\video
(4) Set the FPS to 30
(5) per side to 4
(6) output resolution of 1024
(7) a batch size of 4
(8) max frames to 80
(9) and border frames to 0
(10) Click prepare ebsynth
After clicking prepare ebsynth and we should see our keys folder and frames folder populated with our images
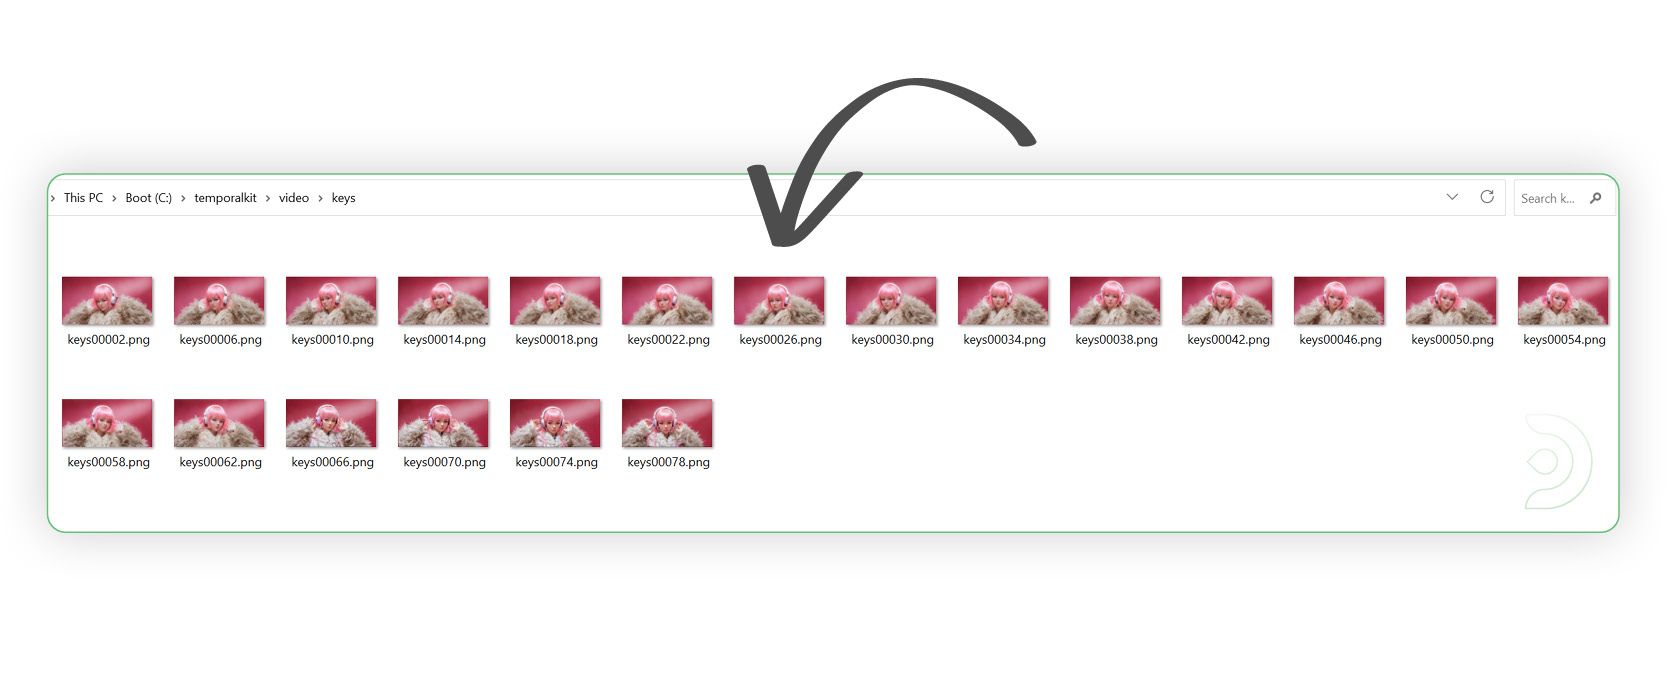
We now need to upload our images to Ebsynth, which is an external programme that can be downloaded from the follwing link: https://ebsynth.com/
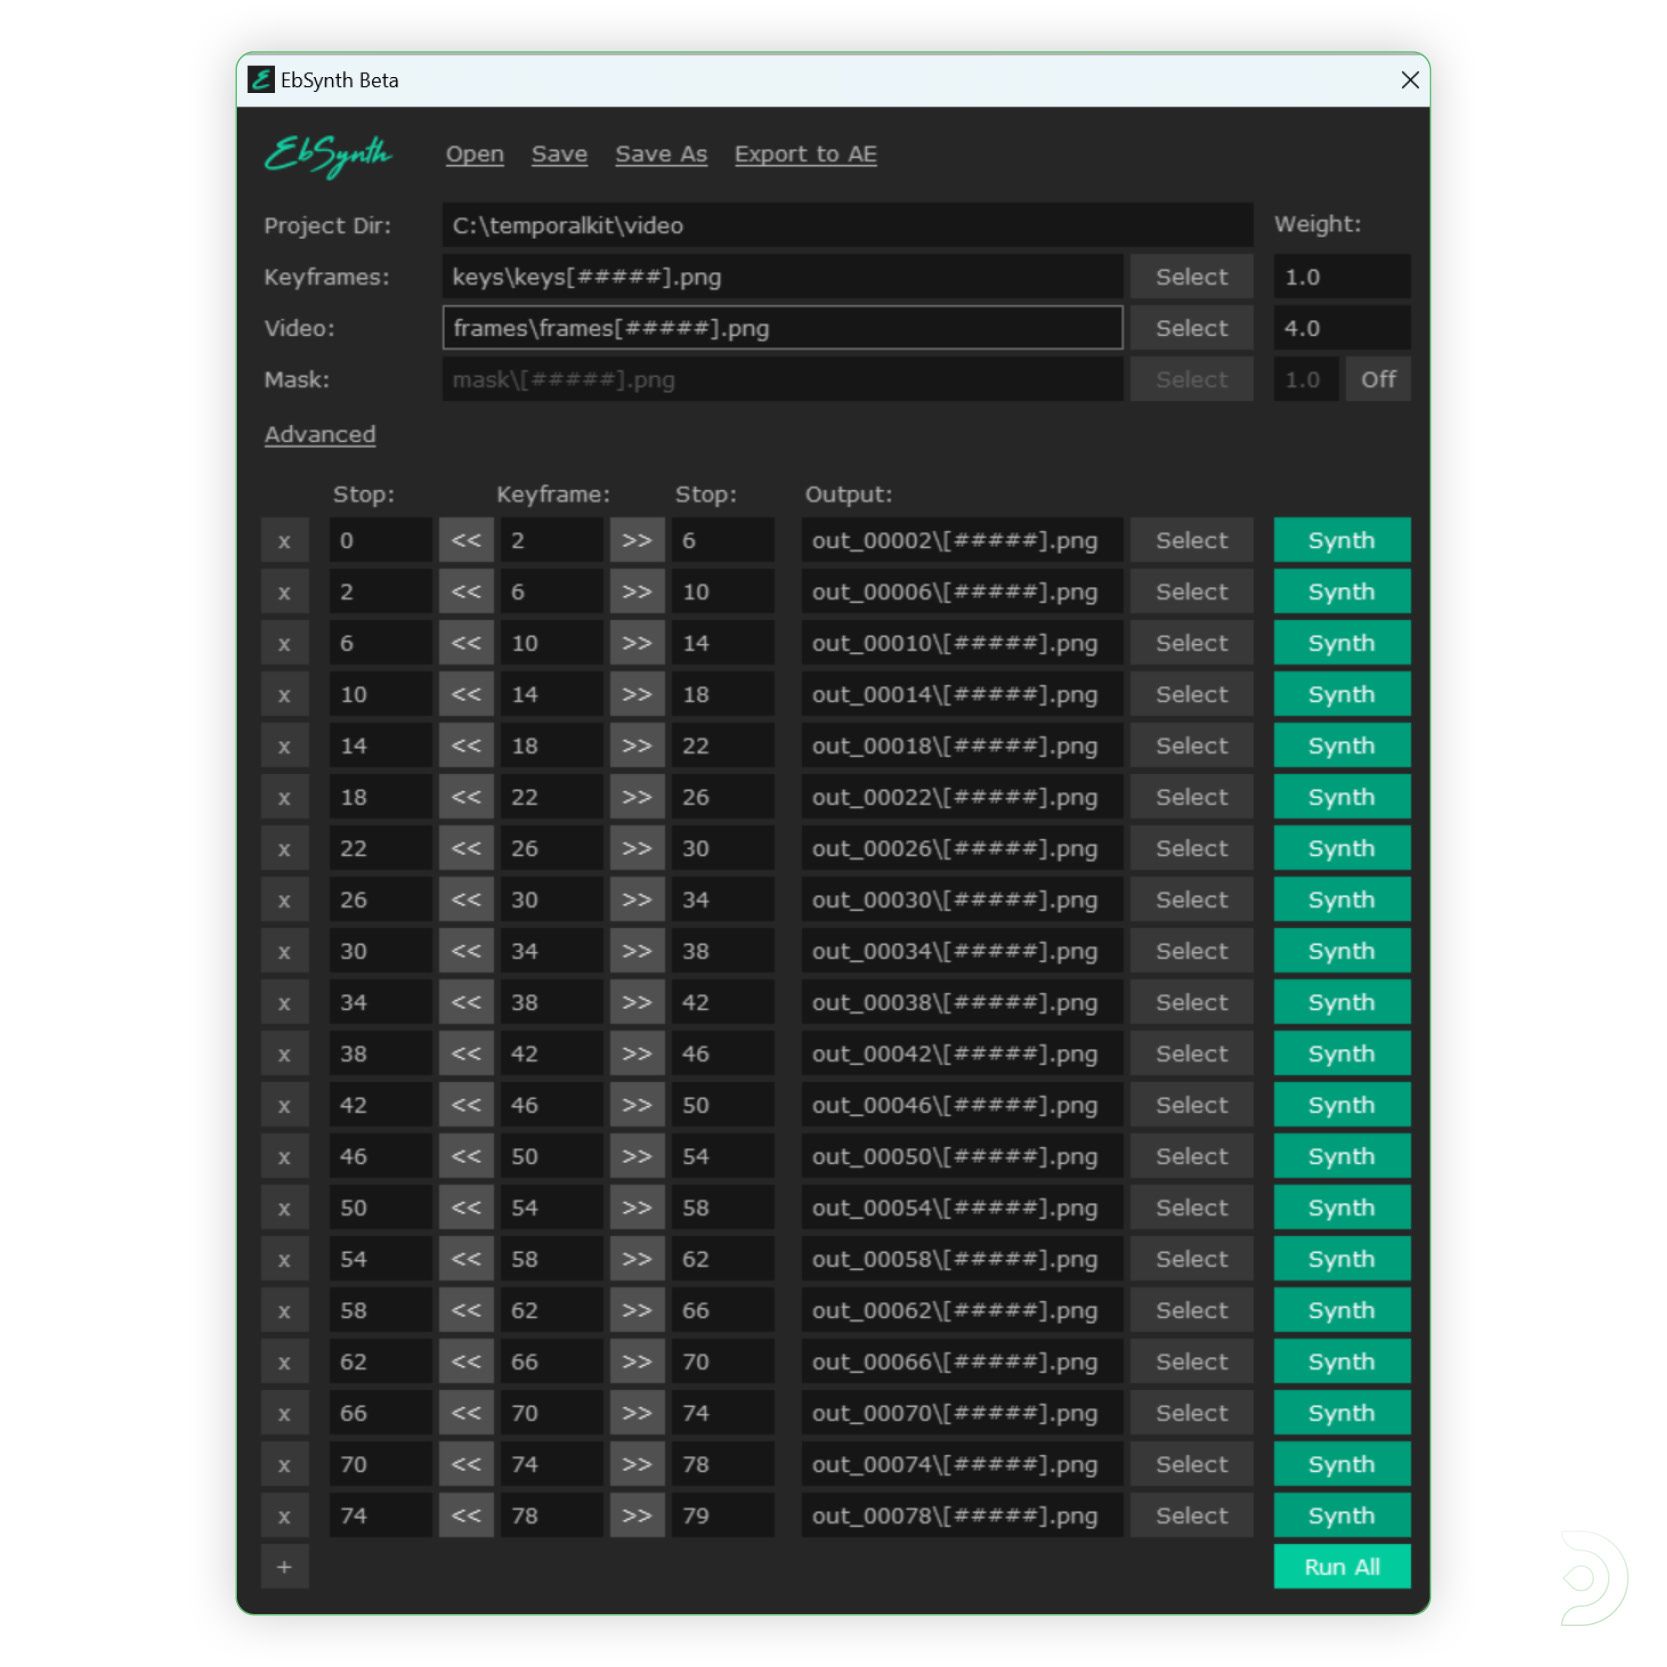
Once installed, open Ebsynth and drag the images from your keys folder to the keyframes text box within Ebsynth
Drag the images from your frames folder to the video text box
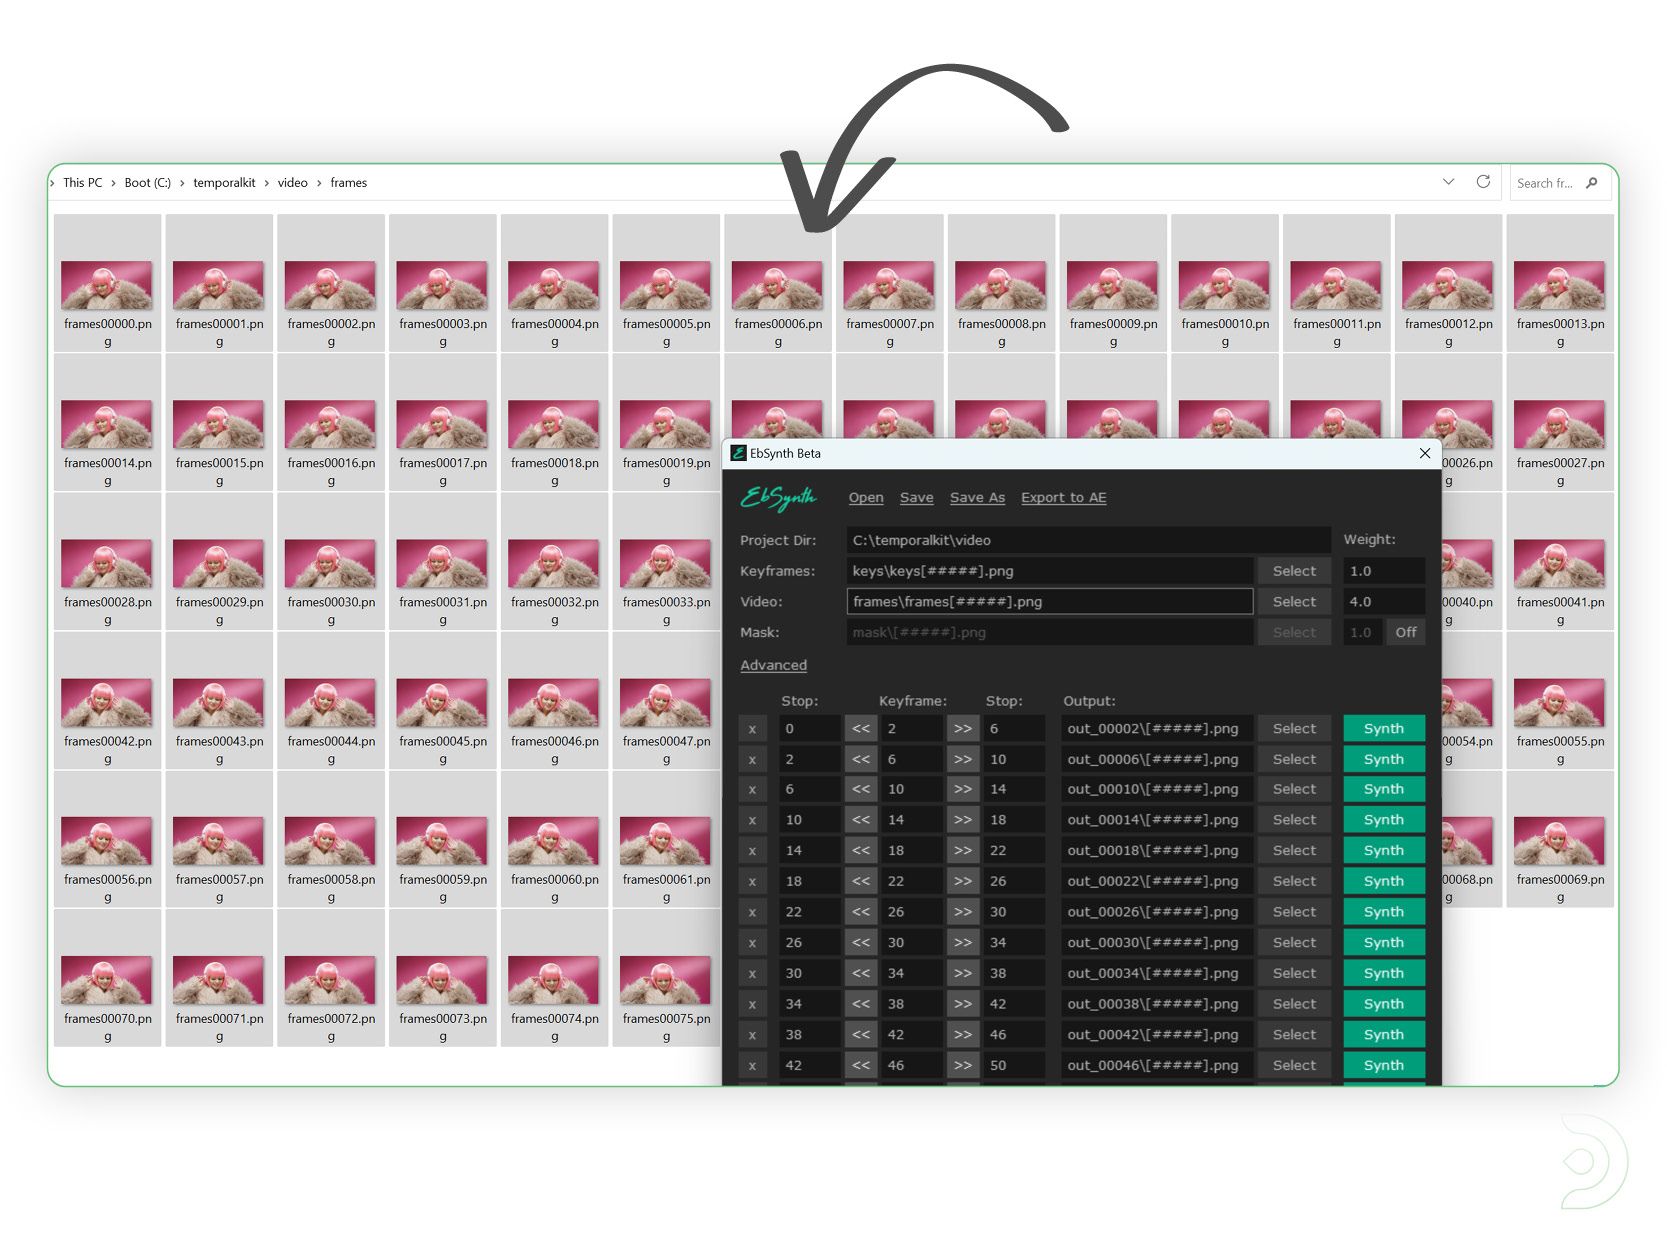
Click Run All
Once it has finished processing, within the Temporal-Kit tab, simply click recombine ebsynth to generate the finished video!
Here is our final result! (check the original article)
If you’re having issues with installation or slow hardware, you can try any of these workflows on a more powerful GPU in your browser with ThinkDiffusion.
You can find the original article here: https://learn.thinkdiffusion.com/video-2-video-using-stable-diffusion/