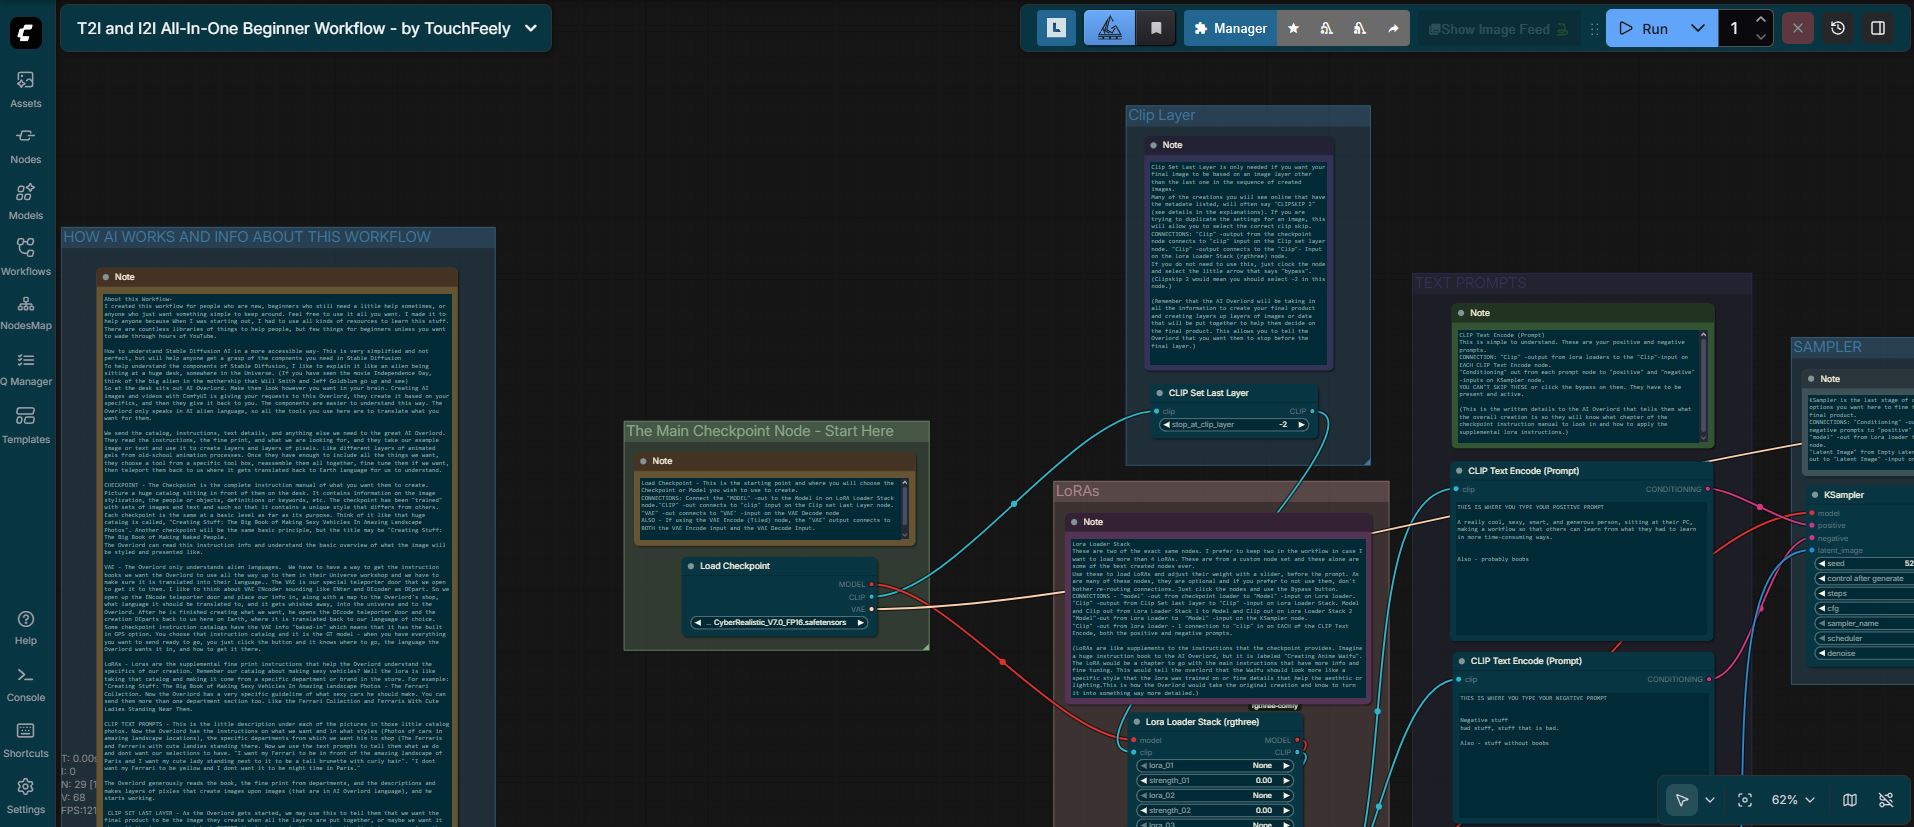
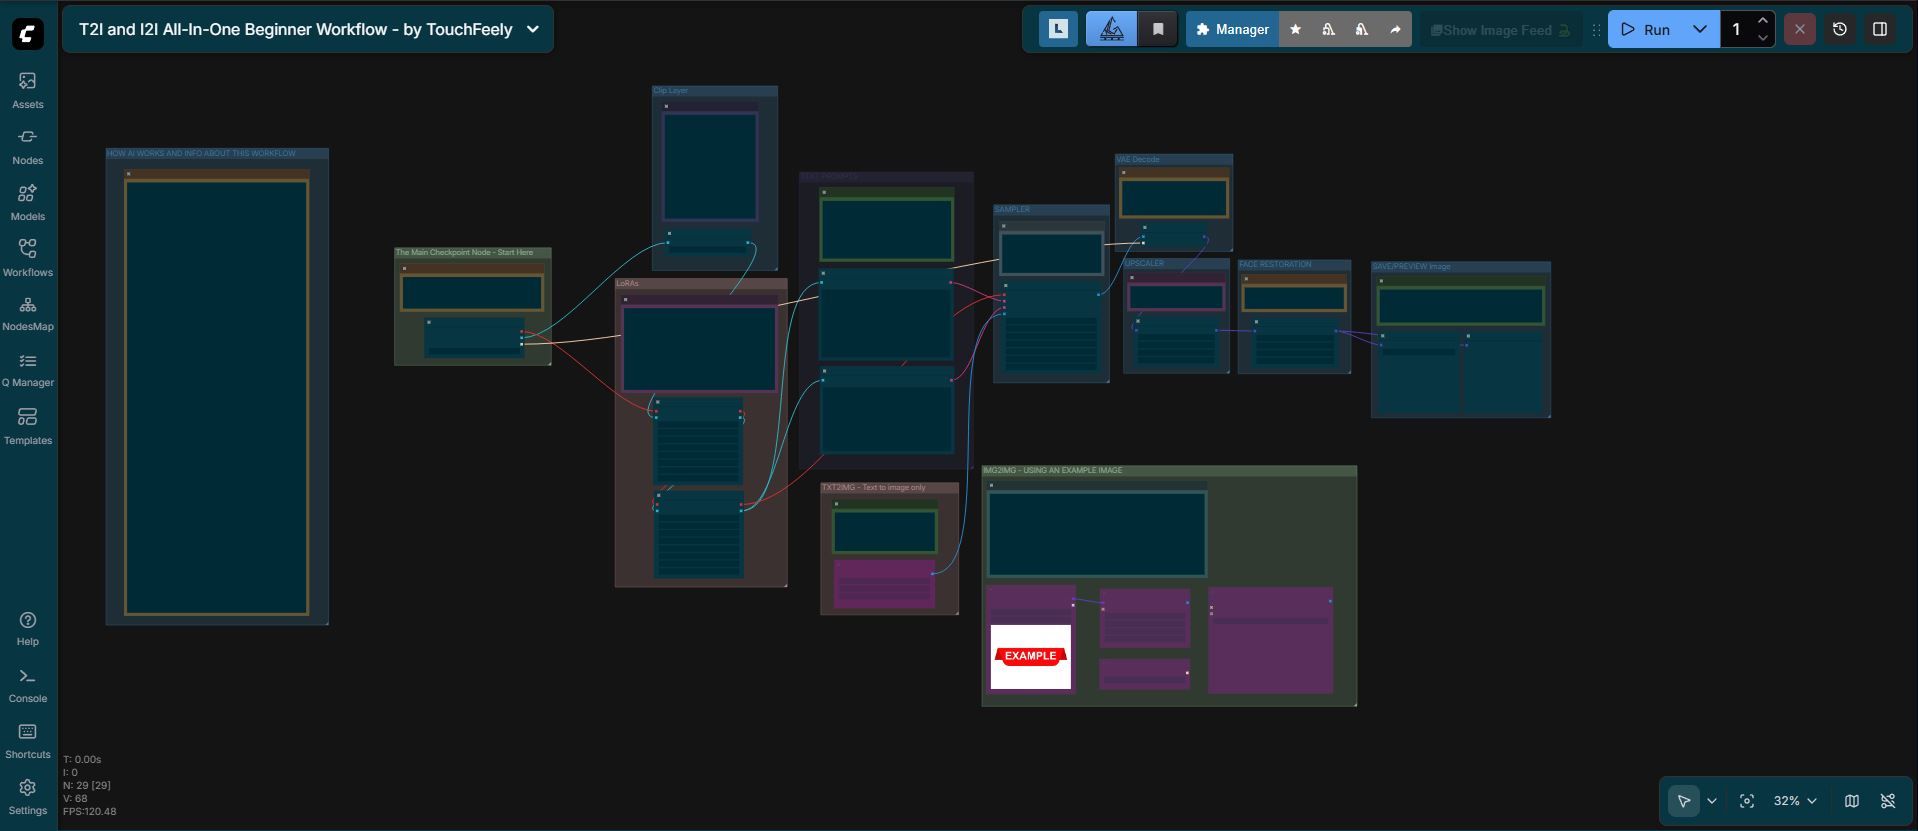
This is a comprehensive, all-in-one workflow for creating Img2Img or Txt2Img models. Great for beginners or advanced users to keep handy for quick and simple image generation.
There is extensive text instruction and a complete beginner-friendly description of how Stable Diffusion image creation works. If you want to read the description of how image generation AI works without having to download and use the workflow, I have pasted it below for your convenience.
If there is something else you would like to understand better as a beginner, please leave me a comment or message me or something. I will try to help make it understandable. I like to make these tools and this fun activity more accessible, and I am currently spending a lot of my free time learning and experimenting.
(I am NOT an expert, but I am learning as I go, and sharing and collaborating knowledge speeds up the learning for everyone.)
Feel Free to use and share. Just please leave a like or something, so I know that there are a few people finding it useful.
This is the included explanation of basic AI for beginners and those wanting a simple explanation.
Please Note - I realize this is an oversimplified explanation and some of it may not be perfectly accurate, but it is for those who need a little simpler understanding. It helps start to understand what nodes do in ComfyUI and how components work together, in a simplified way.
AI:
I created this workflow for people who are new, beginners who still need a little help sometimes, or anyone who just wants something simple to keep around. Feel free to use it all you want. I made it to help anyone because when I was starting, I had to use all kinds of resources to learn this stuff. There are countless libraries of things to help people, but few things for beginners, unless you want to wade through hours of YouTube.
How to understand Stable Diffusion AI in a more accessible way- This is very simplified and not perfect, but it will help anyone get a grasp of the components you need in Stable Diffusion
To help understand the components of Stable Diffusion, I like to explain it like an alien being sitting at a huge desk, somewhere in the Universe. (If you have seen the movie Independence Day, think of the big alien in the mothership that Will Smith and Jeff Goldblum go up and see)
So at the desk sits the AI Overlord. Make them look however you want in your brain. Creating AI images and videos with ComfyUI is giving your requests to this Overlord; they create it based on your specifics, and then they give it back to you. The components are easier to understand this way. The Overlord only speaks in an AI alien language, so all the tools you use here are to translate what you want for them.
We send the catalog, instructions, text details, and anything else we need to the great AI Overlord. They read the instructions, the fine print, and what we are looking for, and they take our example image or text and use it to create layers and layers of pixels. Like different layers of animated gels from old-school animation processes. Once they have enough to include all the things we want, they choose a tool from a specific tool box, reassemble them all together, fine tune them if we want, then teleport them back to us, where it gets translated back to Earth language for us to understand.
"CHECKPOINT" - The Checkpoint is the complete instruction manual of what you want them to create. Picture a huge catalog sitting in front of them on the desk. It contains information on the image stylization, the people or objects, definitions or keywords, etc. The checkpoint has been "trained" with sets of images and text, such that it contains a unique style that differs from others.
Each checkpoint is the same at a basic level as far as its purpose. Think of it like that huge catalog is called, "Creating Stuff: The Big Book of Making Sexy Vehicles In Amazing Landscape Photos". Another checkpoint will be the same basic principle, but the title may be "Creating Stuff: The Big Book of Making Naked People.
The Overlord can read this instruction info and understand the basic overview of what the image will be styled and presented like.
"VAE" - The Overlord only understands alien languages. We have to have a way to get the instruction books we want the Overlord to use all the way up to them in their Universe workshop, and we have to make sure it is translated into their language.. The VAE is the special teleporter door that we open to get it to them. I like to think about VAE ENcoder sounding like ENter and DEcoder as DEpart. So we open up the ENcode teleporter door and place our info in, along with a map to the Overlord's shop, what language it should be translated to, and it gets whisked away, into the universe, and to the Overlord. After he is finished creating what we want, he opens the DEcode teleporter door, and the creation departs back to us here on Earth, where it is translated back to our language of choice.
Some checkpoint instruction catalogs have the VAE info "baked-in," which means that it has the built in GPS option. You choose that instruction catalog, and it is the GT model - when you have everything you want to send ready to go, you just click the button, and it knows where to go, the language the Overlord wants it in, and how to get it there.
"LoRAs" - LoRAs are the supplemental fine print instructions that help the Overlord understand the specifics of our creation. Remember our catalog about making sexy vehicles? Well, the lora is like taking that catalog and making it come from a specific department or brand in the store. For example: "Creating Stuff: The Big Book of Making Sexy Vehicles In Amazing Landscape Photos - The Ferrari Collection. Now the Overlord has a very specific guideline of what sexy cars he should make. You can send them more than one department section, too. Like the Ferrari Collection and Ferraris With Cute Ladies Standing Near Them.
"CLIP TEXT PROMPTS" - This is the little description under each of the pictures in those little catalog photos. Now the Overlord has the instructions on what we want and in what styles (Photos of cars in amazing landscape locations), the specific departments from which we want him to shop (The Ferraris and Ferraris with cute landies standing there. Now we use the text prompts to tell them what we do and don't want our selections to have. "I want my Ferrari to be in front of the amazing landscape of Paris, and I want my cute lady standing next to it to be a tall brunette with curly hair. "I don't want my Ferrari to be yellow, and I don't want it to be nighttime in Paris."
The Overlord generously reads the book, the fine print from departments, and the descriptions and makes layers of pixles that create image upon image (that are in AI Overlord language), and he starts working.
"CLIP SET LAST LAYER" - As the Overlord gets started, we may use this to tell them that we want the final product to be the image they create when all the layers are put together, or maybe we want it when all the layers are put back EXCEPT the last one. As they create, the first layers are from the main catalog, then comes those from the department loras, and then the text promp descriptions. So as they get down to the end, the last layer may be trying too hard to be detailed and exactly what we ask for, so it may be an image that is actually worse. This is the case for certain things like Anime, or semi-realism, or specific Checkpoints (catalogs).
"SAMPLER" - This is the workbench. Once the Overlord has read all instructions, gathered all the layers, and gotten all of their materials neatly layed out, this is where they go to start gathering layers and putting things back together. This is where you tell them what tools to use, how you want it assembled, and how much freedom you are going to give them to create your final product.
"Seed" - The specific technique used to build the creation.
"Control After Generate" - is what happens with the seed after generation. You can have it randomly change, sequentially change, or stay the same.
"Steps" - How many layers of creations are assembled to create your masterpiece? Theoretically, it would seem that more is better, but that depends on what you want to create. Generally, the steps are between 10 and 40. If you just can't seem to get a good final image, try to lower this or raise it. Too many steps can "overcook" an image, and that many layers will make a mess. Sometimes you don't have enough, and you can't get the detail you want.
"cfg" - How strictly the Overlord will adhere to your prompt instructions. Start somewhere in the middle if you are new and want to experiment. Then go up if you want it to be closer to the prompt or down if you want to give the Overlord a little more creative freedom.
"Sampler name" - This is the "toolbox" the Overlord digs into when they start assembling your image. Each of them serves different needs. Look up each one for details, or start with Euler and play with that.
"Scheduler" - This is the actual tool that the Overlord got out of the Sampler toolbox. They vary in uses also, and you will need to look up the specifics.
"Denoise" - This tells the Overlord how close they are to what you want or how much you want to keep the creation like the example image or the last creation. The higher the number, the more like the original or last creation it will be.
"VAE DECODE "- This is the teleporter doorway that our creation comes back through. It takes the stuff sent from the AI Overlord, translates it back into our language, and presents it to us. This is a necessary component. Comfy will not finish without this because the information will not be understandable to us mere Earthlings.
"UPSCALE" and "FACE RESTORE" - These are optional and used to help increase the images size or resolution and help fine tune the reassembly of faces. Sometimes faces are less than perfect since the AI Overlord is not human and can't make perfect human faces.
"Save Image" or "Preview Image" - At least one of these is required for your ComfyUI workflow to work without error. They both have the same inputs and you can use one or both. The Save Image node will show you the final result and also save it within your comfyui/output folder. If you want to just see the image and only save them manually when you get one you want, you can use the preview image and then save your image from the workflow if you like it. This is personal preference for you decide how you want to handle the final portion of the workflow. I personally just use the save node. It is faster for me to go through the output images folder and mass delete everything I dont want - but I have plenty of space for that.
Description
No changes expected.