
Photomatix v3 (added for LoRA tests)
standard SD 1.5 usage
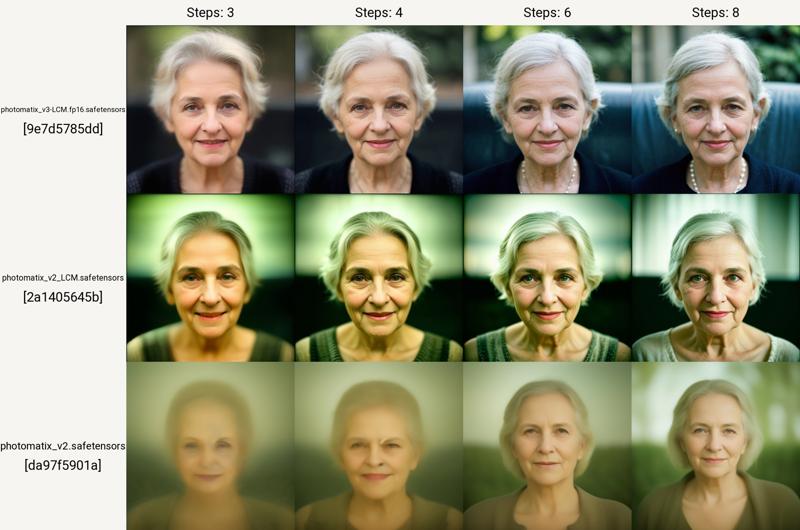
Photomatix v3 LCM
CFG scale 1.5-3.5
Use LCM sampler (or a combination), see gallery
3-8 steps, for tools like ControlNet IP Adapter use 20+steps
standard SD15 resolutions or 1024x768+
upscale with LCM sampler
Photomatix v2 LCM
How to use the experimental Latent Consistency Model>
CFG scale 1-1.5
Use recommended samplers (read more in this article link)
use 4, 8 steps (check the gallery)
Photomatix v2 Changes
experimental model merge aimed at cinematic outputs
tuned to work with Photomatix and SDXL styles: Download the full collection of styles from Github: PX-Styles.
standard resolutions (512x512, 512x768, 768x768, 960x640, 1024x768, 768x896, 1024x1200)
experimental px-realistika model to refine the v2 model (use in the Refiner model with switch 0.3-0.6)
Check the gallery for examples. Read more about the v2 and refiner models (link to the article)
Photomatix v1
RT (Experimental) Version: Tested on A4000 (NOT tested on other RTX Ampere cards, such as RTX 3090 and RTX A6000). This version is for advanced users and needs TensorRT extension and NVIDIA TensorRT.
Read about the installation carefully in this article. This version doubles the render speed with a maximum working size of 832x832. After the installations, download the .trt file (hosted on Hugginface) into the stable-diffusion-webui\models\Unet-trt. Then you can choose it in the GUI list as in the tutorial. I recommend creating another installation of A1111 for these experiments, as described in the article.
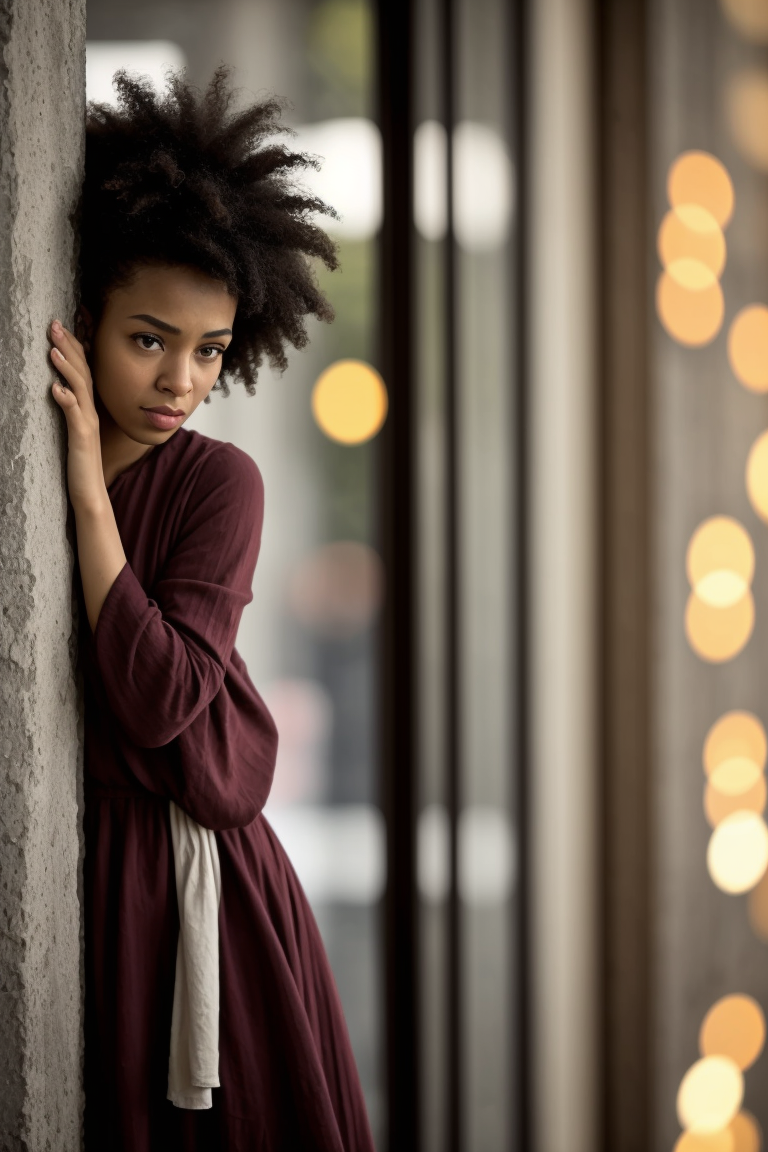
Photomatix is the merge I use for my experiments. I am uploading it for consistency with my other models. It performs surprisingly well in many resolutions and setups and the results are comparable to the best merged and trained base models. It can create a photorealistic output but also various creative styles for concept design. Read more about the model and its use here.
Strong points: Consistent, universal, realistic, balanced, and flexible. Works well with extensions. Works great with LoRAs and styles. Simple negative prompt.
Weak points: Hands and feet (sometimes), Characters handling objects
Extensions to use: ControlNet, ADetailer, Regional Prompter, Latent Couple, Roop, Dynamic Thresholding, Latent Mirroring, Hires fix. (in txt2img)
Resolutions for portraits: can create quite consistent outputs f.i. for 768x512, 640x832, 768x896, 1024x768, 1112x768
Recommended CLIP SKIP: 1-2
There is the inpainting version available in the menu at the top of the page. Although you can inpaint with the normal version too (and sometimes the result is quite good), you may see the differences in the gallery. The inpaint version is just better for big changes.
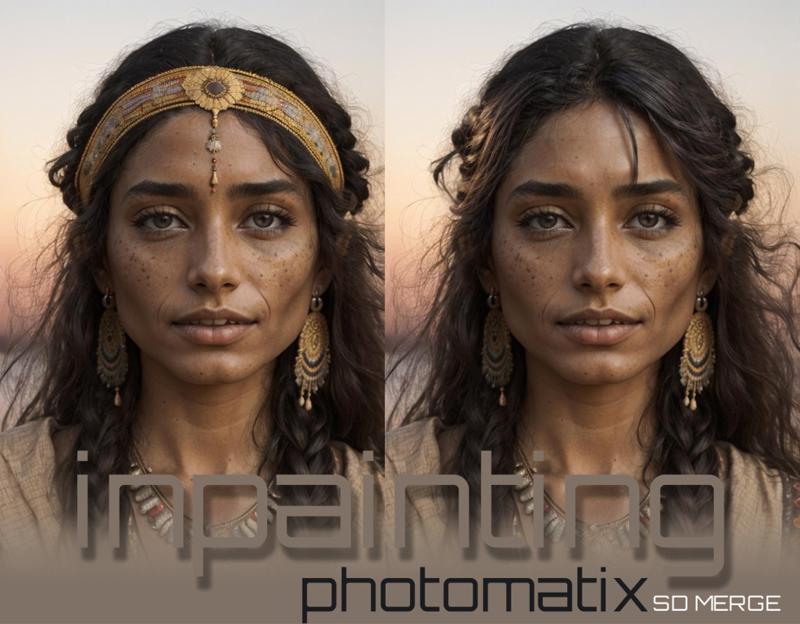
Quick Tutorial on Inpainting Details in A1111:
Load your image (PNG Info tab in A1111) and Send to inpaint, or drag and drop it directly in img2img/Inpaint
create or modify the prompt as needed (if you have imported an image with generation data, do not forget to uncheck the former base model, if it is connected!)
Load the inpainting version of Photomatix model
Mask the area you want to change and Generate
If you want to learn more about AI-augmented design and algorithmic art, check my web pages.

For my notes on training, research, and use of stable diffusion models, check https://sandner.art/articles/ai/
If you can afford it, support my work by buying me a coffee to keep those costly render cores going and to keep the creative flow: https://ko-fi.com/airesearch
If you can not, review and rate the model to help others to find it.
Have fun rendering!
Checkpoints used for v1 merge:
Checkpoints used for v2 merge:
Photomatix v1
epiCRealism (Civitai link) was also used to balance the refiner versions
Checkpoints used for v3 merge and finetuning:
Photomatix v2+SD15 base model
Nextphoto v1.0 +v3.0 for adjustments
Thanks to the community and contributors for their hard work, without the collective effort and resources such projects would not be possible.
Description
v3 LCM test, use CFG 1.5-3.5, steps 3-30, optimal 1.5/5
Clip skip 1-2
FAQ
Comments (4)
your model v3 lcm , there's no additional workflow ? it's normal to just load the model with recommended setting to benefit lcm advantage ?
Yes. Just load the model and adjust the CFG and steps. Moreover, you may use standard workflow in v3, some extensions may need more steps for better results (IP adapter in CN). In most cases you will get nice pictures with CFG 1.5 in 4+ steps. I am writing an article for v3, meanwhile, you may read about the tricks in my article on LCM with v2 examples (link in the model description). BTW you can use v2 and v3 LCM side by side and/or refine the results (via refiner or hires fix) with these Photomatix versions taking full advantage of LCM and model diversity. I also suggest to take a look at my styles collection, which is under development and works great with v1, v2, and v3.
@airesearch Hello, thx for this checkpoint, can you change the Base Model SD 1.5 to Base Model SD 1.5 LCM. Please, this is to find you more easily. ^.^)v
@zopiak It is now. Technically the base model is SD1.5, but I have changed that to LCM to avoid confusion.