

(I added all images from this post to .zip archive. Click download to see them in full resolution)
Everything I write here is about txt2img without img2img, hires.fix, inpaint and extensions like controlnet. I’m gonna focus on creating prompt, not how to make more detailed, upscaled or edited image. Everything was tested mostly on anime models so it may not work with realistic models.
Before we start I’d like to keep your attention to set up a few things if you haven’t done it yet. This will help you get good images.
First of all you should set up VAE you will be using with your model. (If model has baked VAE you don’t need to do anything). To do so download VAE file (if you haven’t) and put it into “stable-diffusion-webui\models\VAE” folder. Go to settings->Stable Diffusion, in SD VAE click blue arrows and select your VAE. Click apply settings.
You can also go to Settings -> User Interface -> Quick settings List and add there sd_vae if you want to have this setting in your txt2img tab.
For all examples I was using this VAE: https://civarchive.com/models/23906/kl-f8-anime2-vae
I highly recommend you using Negative embeddings. All examples in this post were made with EasyNegative embedding. No additional negative tags.
To use it, download and put it into “stable-diffusion-webui\embeddings” folder. Then add its file name to negative prompt. (I suggest you use EasyNegative which you can download from here: https://civarchive.com/models/7808/easynegative, but you can use other embeddings)
I suggest you try Clip skip: 2. It should work better with anime models. Try both - 1 or 2, to find what you like more.
To add Clip skip add CLIP_stop_at_last_layers in Settings -> User Interface -> Quick settings List, click apply settings and you should have this option in txt2img tab.
____
You can find many prompts on the Internet or this site but I think you should not just copy them, at least not at the beginning. Better way is to look at them and try every tag separately.
It’s important to know how a specific tag works because you will be creating compositions with it and adding random words to get result you want may be really frustrating. Sometimes tag is different from a normal word, so you can spend a lot of time trying to get it on your image which you could do with a simple tag.
Weights in your tags.
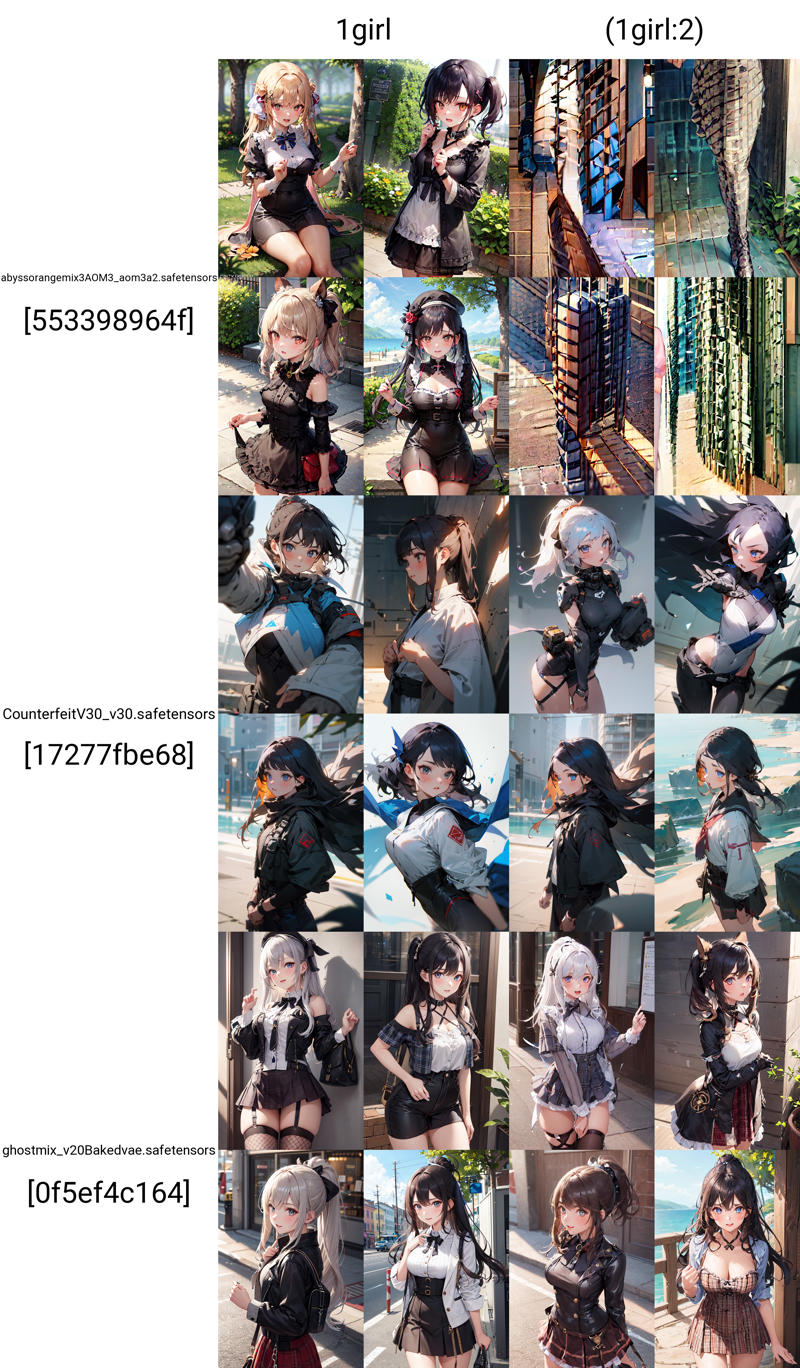
By adding more weight to your tag (tag:1.x/1.1/1.5 etc.) you can force AI to add something to your image, but I highly recommend you start every new prompt without weights, because changing it will change your image. If you use many different weights in many tags, it may change your image into a complete mess which we don’t want to. Sure, you can use it if AI is not giving you results you like but first see how image looks like on :1.0 and change this value only if you really have to. Be careful with this, set this value as low as possible (like (tag:1.1/ 1.2) not (tag:1.6/2), it concerns negative and positive prompt).
Personally, in many cases I’m actually decreasing weights rather than increasing them.
Example (prompt: 1girl in positive and EasyNegative in negative prompt):
How to write prompt?
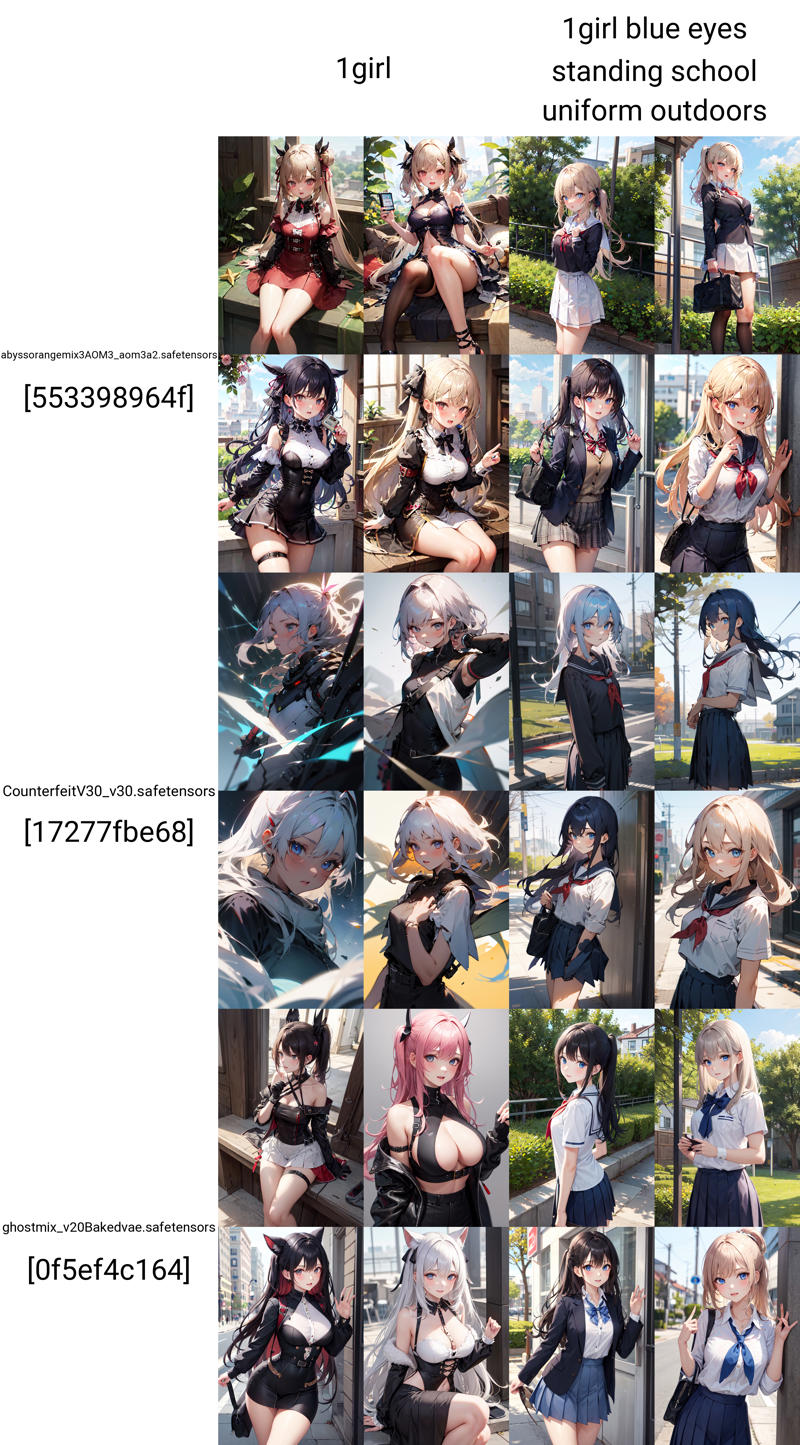
In my opinion best way to start is using very simple prompt. Like:
P: 1girl
N: EasyNegative (this is negative embedding, if you are using other use their file name)
Then you can add tags to see how it will change your image.
Most anime models use Danbooru tags, so you can go to Danbooru site and search for tags you can use in your image. If you click “?” in tag you want, you can read a short explanation of what it is and see in which situations it’s used. If tag has _ in it use space instead, it should work better.
Basically, you need to be precise what you want in your image. If you want something that is too general AI may not be able to generate it. Depending on model you're using, you may get decent results but on some models you may end up with weird objects or deformed image. To prevent this you should add at least few informations about what is going on and what the characters (if you want to have them in your image) look like. Try to think what elements your image needs. If for example you want to have person outdoors you can add details like grass, leaves, trees, but also blue sky, flying butterflies to get more natural look.
Don’t add too many tags, if you do it may be harder to get result you want.
I would think about creating prompt in this way:
[character description] + [actions the character performs] + [background] + [rest of your prompt]
Example:
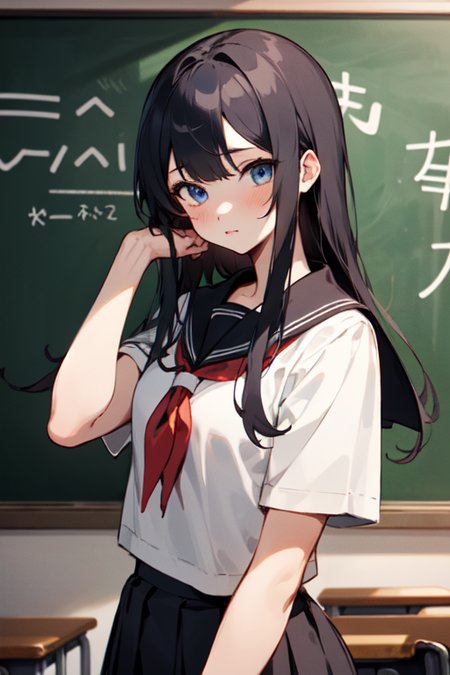
1girl, blue eyes, black hair, long hair, upper body, school uniform, standing, hand up, facing viewer, classroom, chalkboard, kanji
or
1girl, white shirt, long sleeves, black jeans, backpack, full body, walking, landscape, mountain, night, from behind, snow
You may need tags for viewing angles and body position/movement to have more control of what is going on in your image. Of course clothes and background are important too but many models will add decent looking clothes even if you don’t add them to your prompt. With background you can specify elements you want to have in your image, you don’t need to write “trees in the background…”, adding outdoors, trees, autumn will work instead. Be sure to specify background or it may give you weird results. If you don’t have an idea for that you can add white background or indoors/outdoors.
Here is a list of tags that may help you:
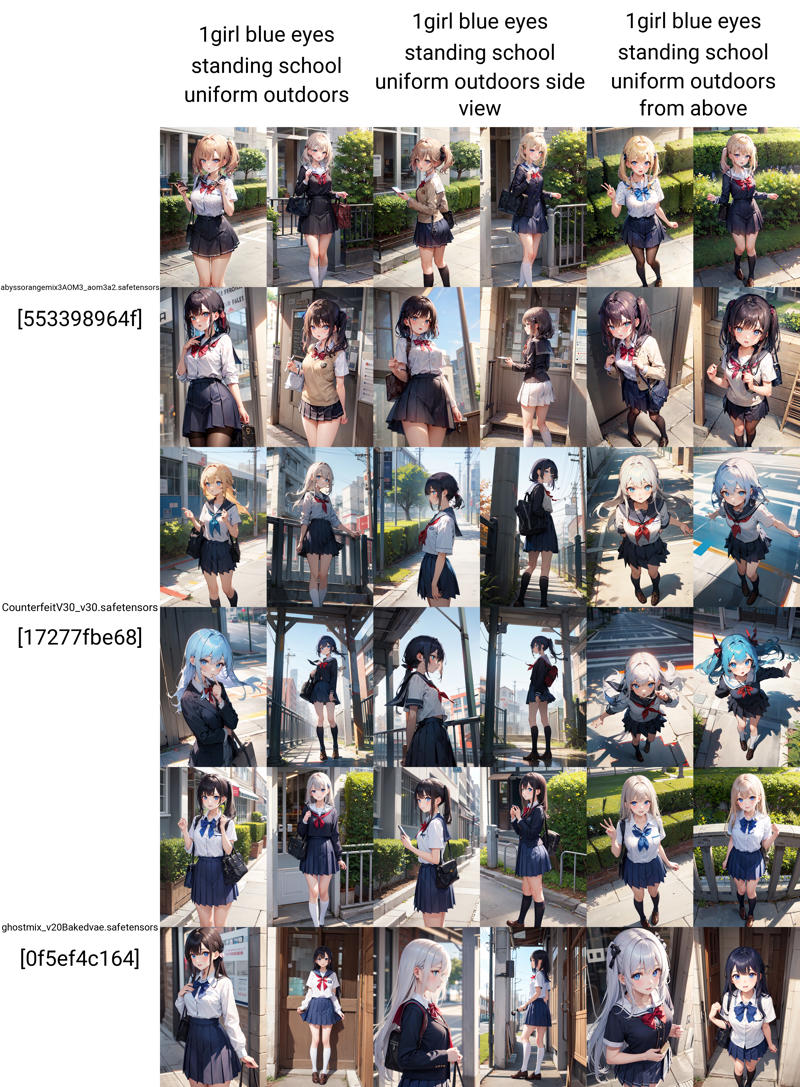
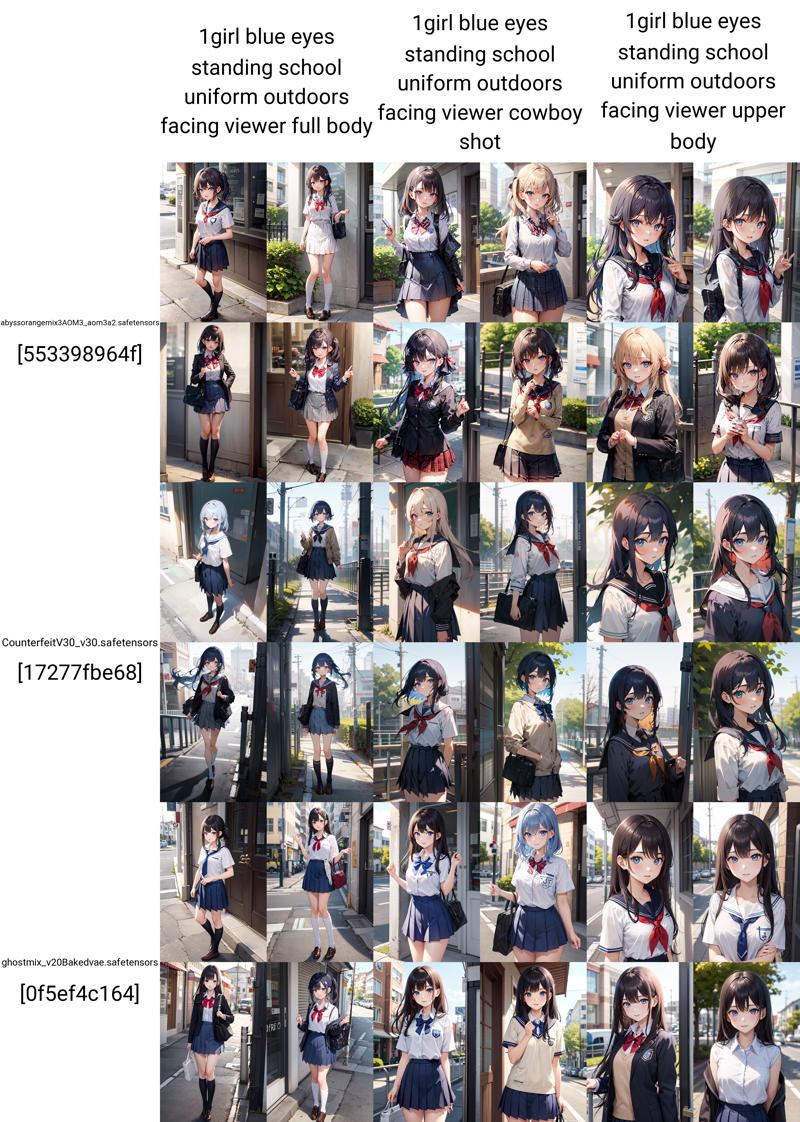
dutch angle, from above, from below, from behind, from side, straight-on or facing viewer.
full body, cowboy shot, upper body, close-up.
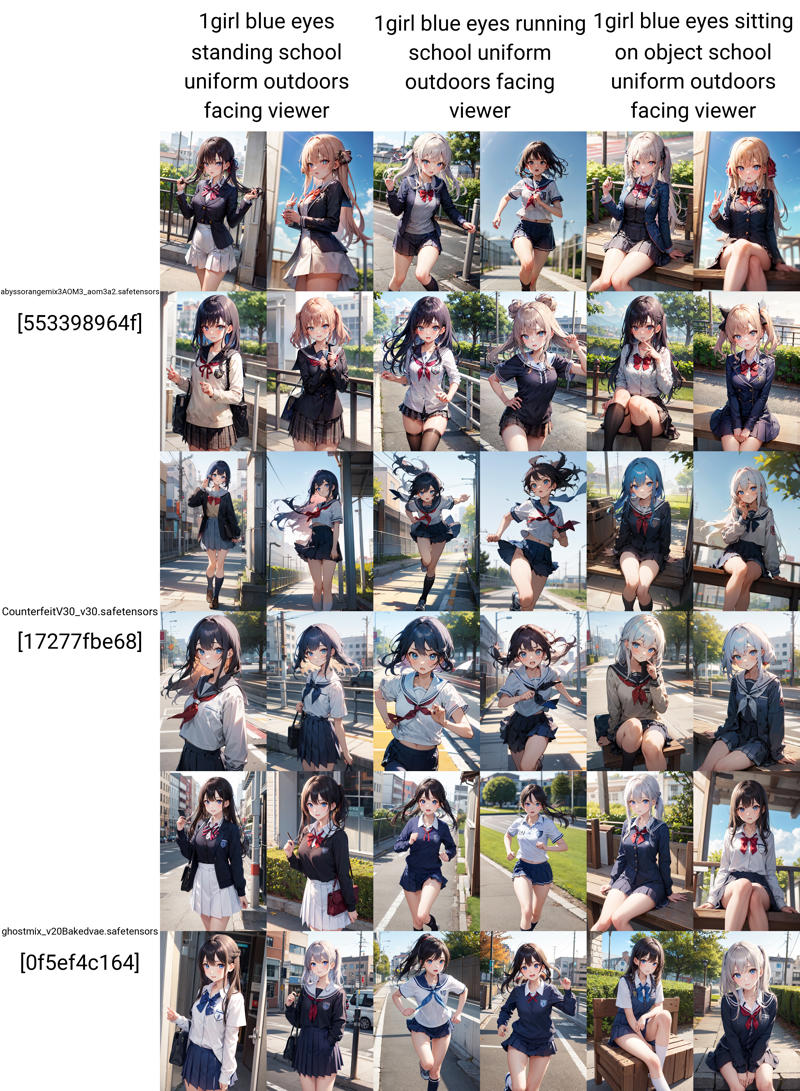
standing, sitting (this one has many versions like wariza, crossed legs, sitting on object, etc. you can find them on danbooru), lying, jumping, running, walking, arched back, leaning forward, and so on.
If AI is giving you something you don’t want on your image add it to negative prompt. Some things are obvious like: you are getting cat on your image so you can add cat to negative prompt to (hopefully) remove it. Other things may not be so obvious. For example: you want your character to be wearing a skirt and shirt but AI gives you some odd clothes. It may be a good idea to add dress to negative prompt. AI may be confused and merge shirt and skirt together.
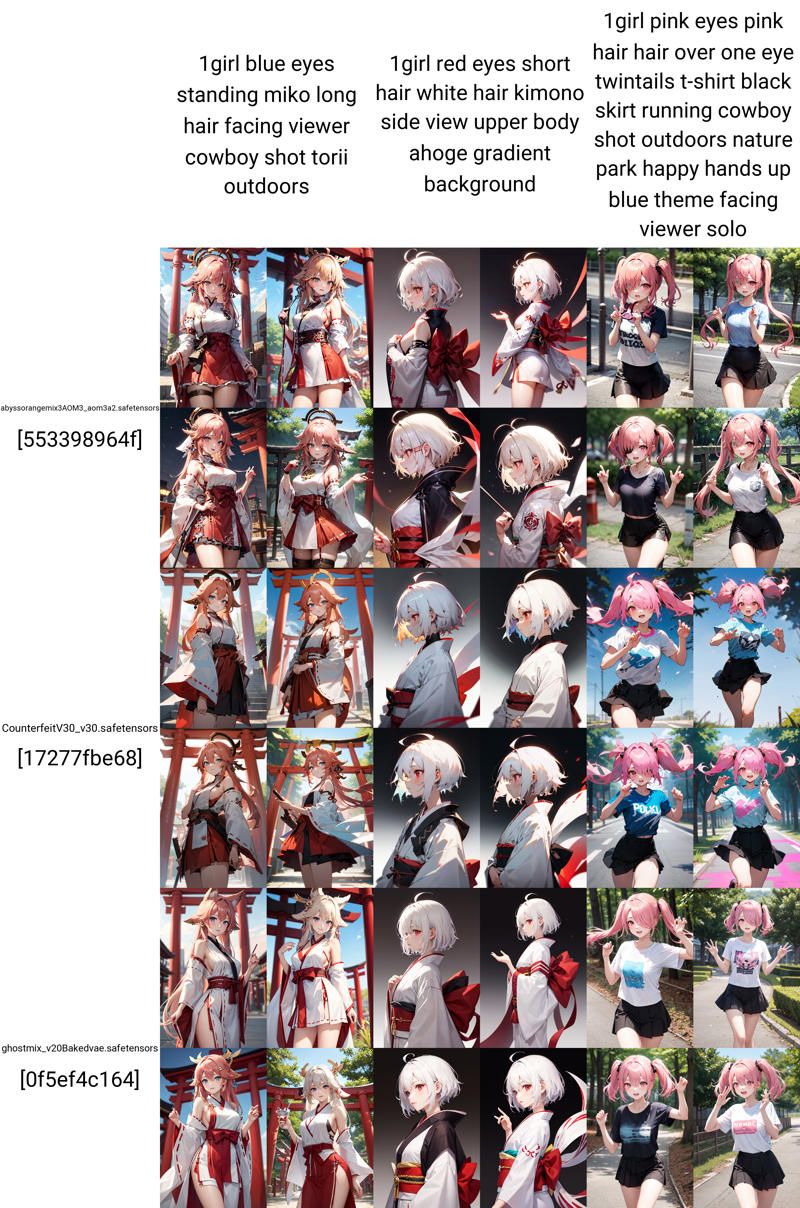
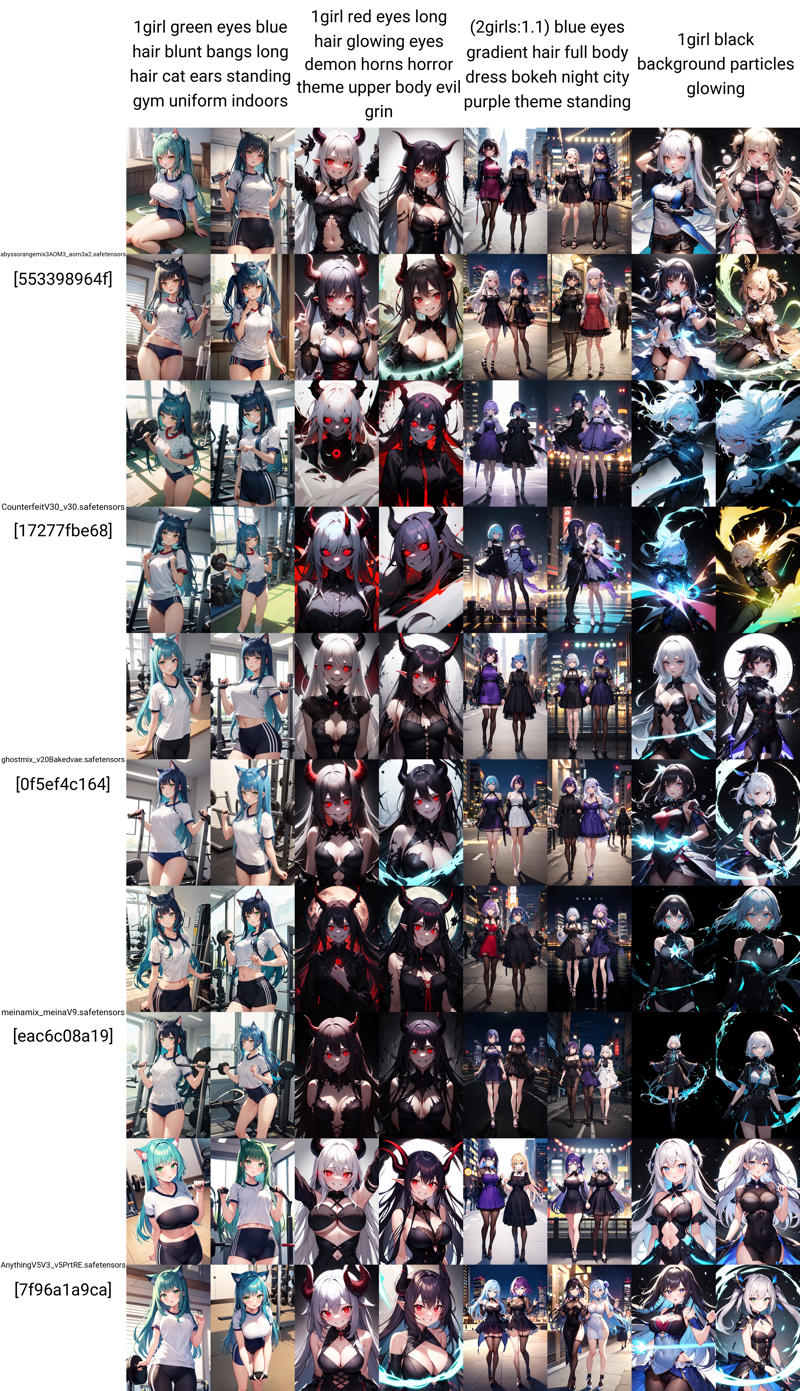
Some prompt examples: