ACTUAL VERSION 0.43 from 260223
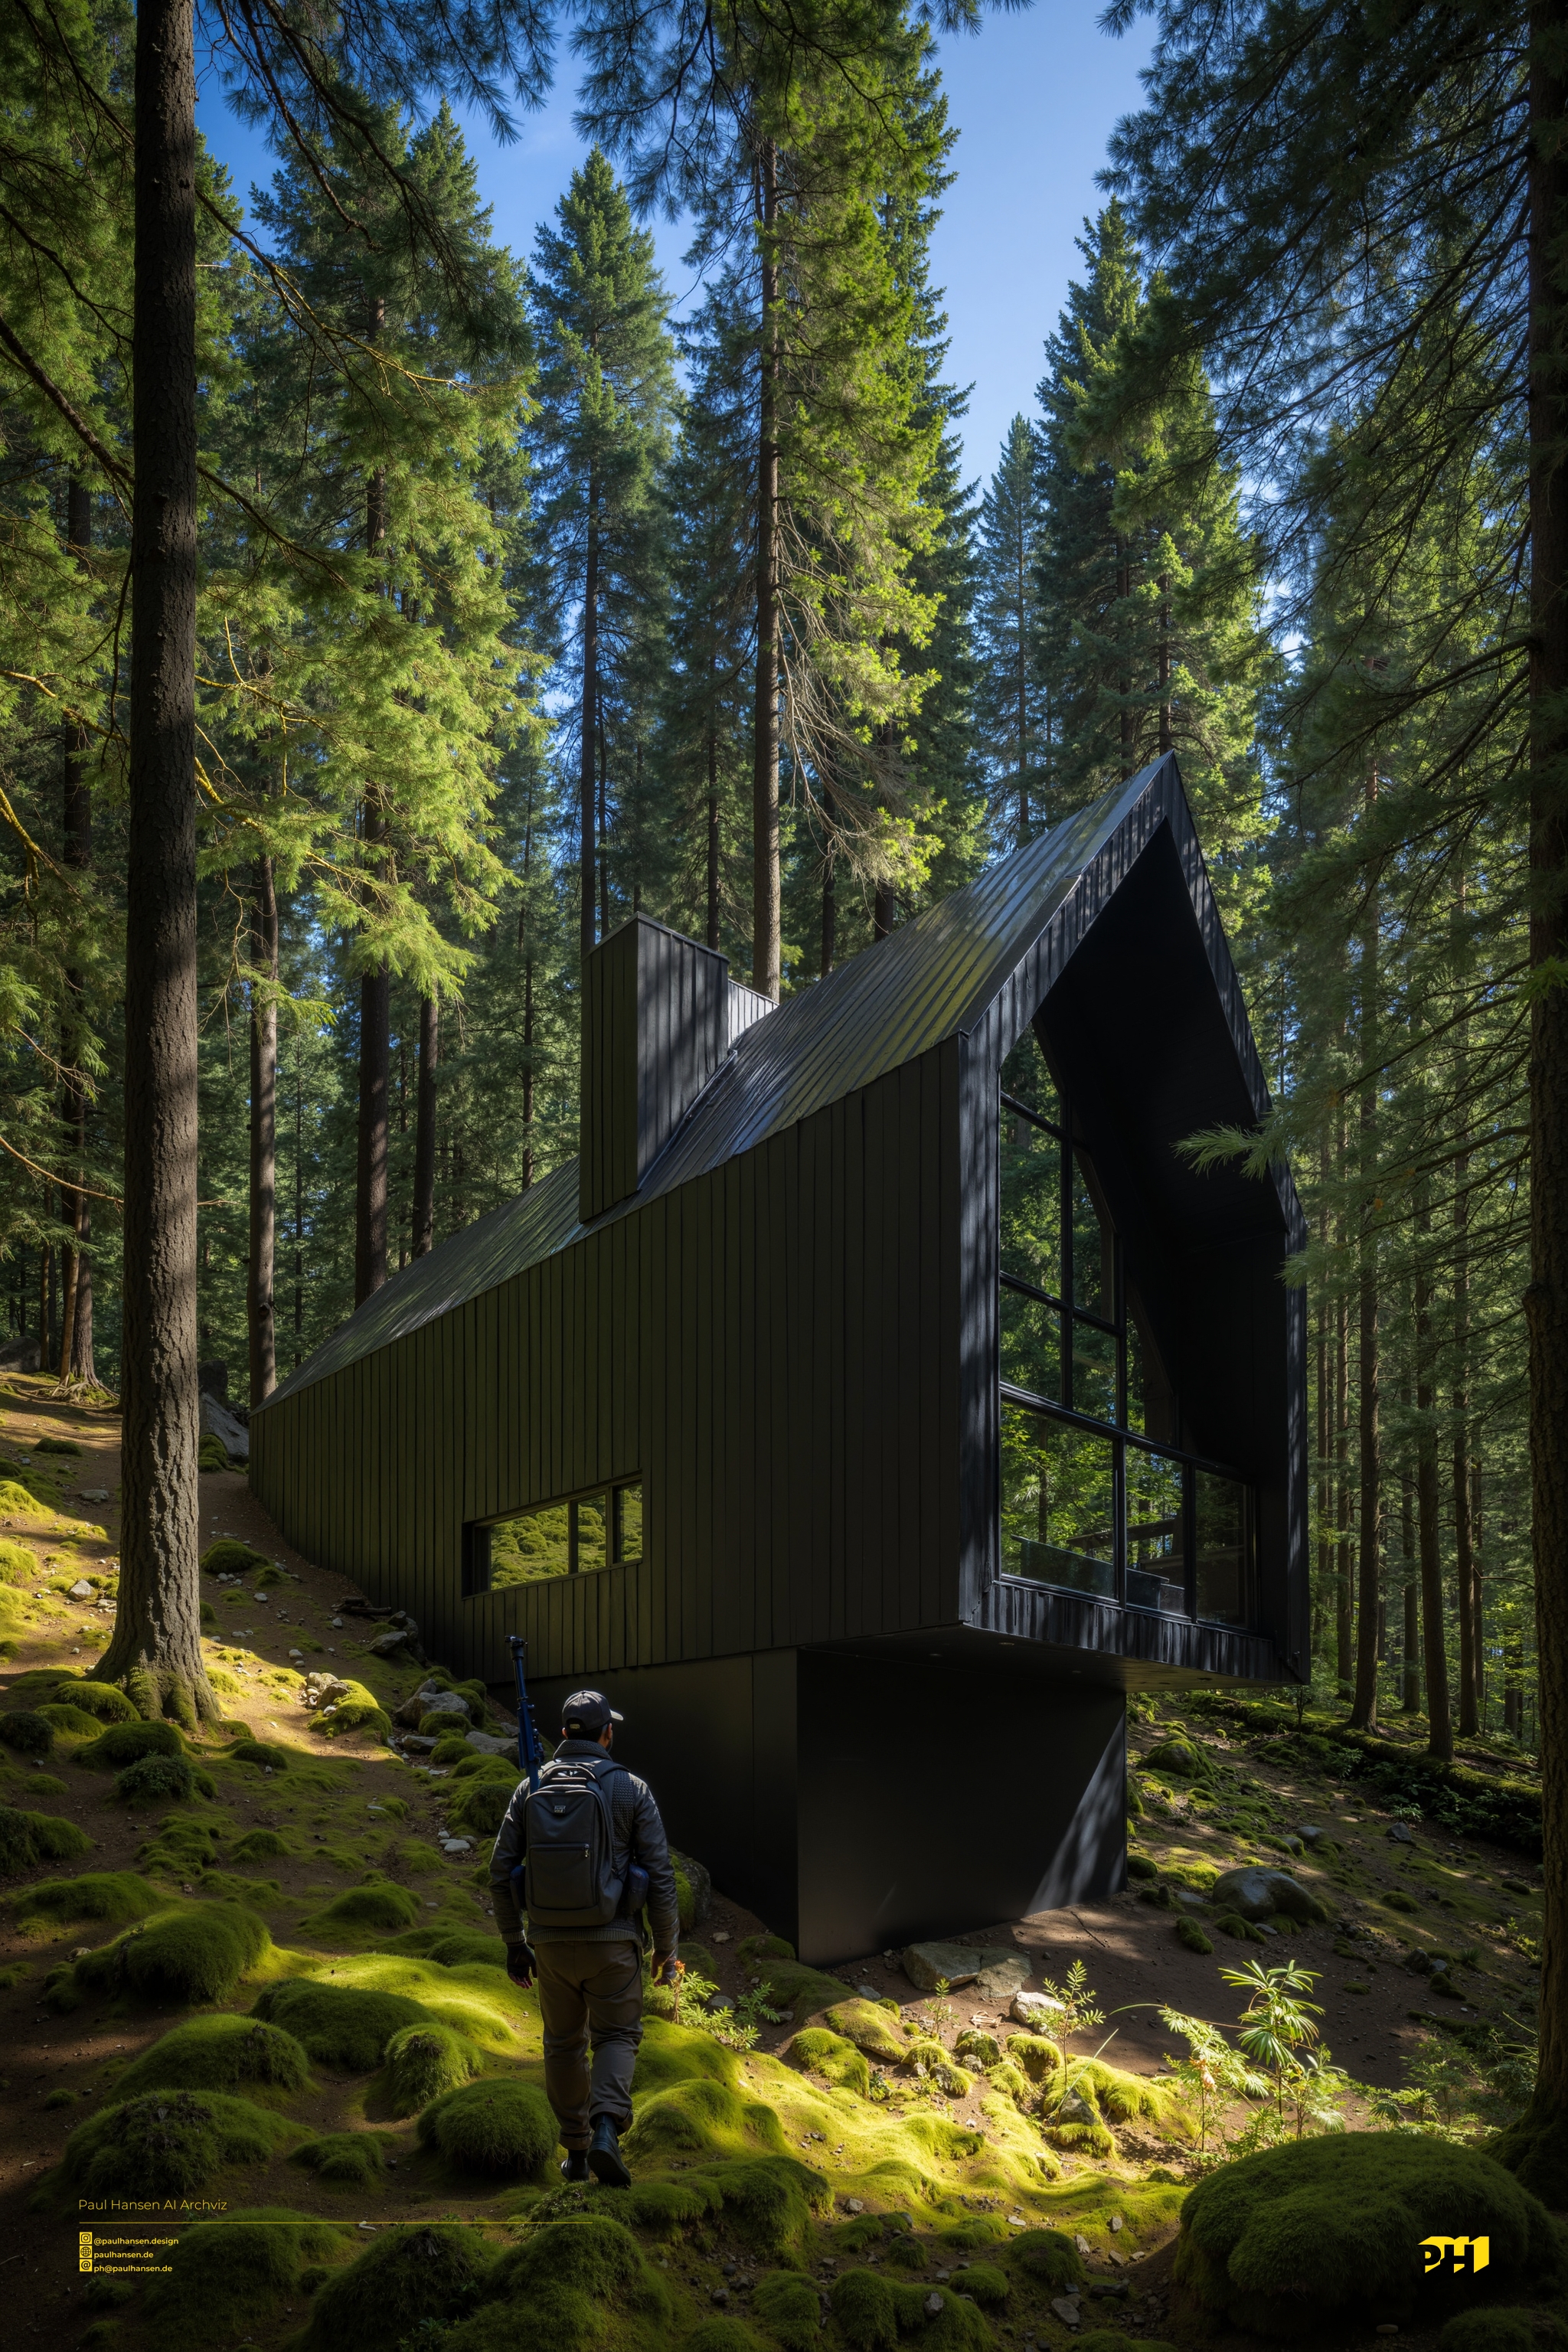
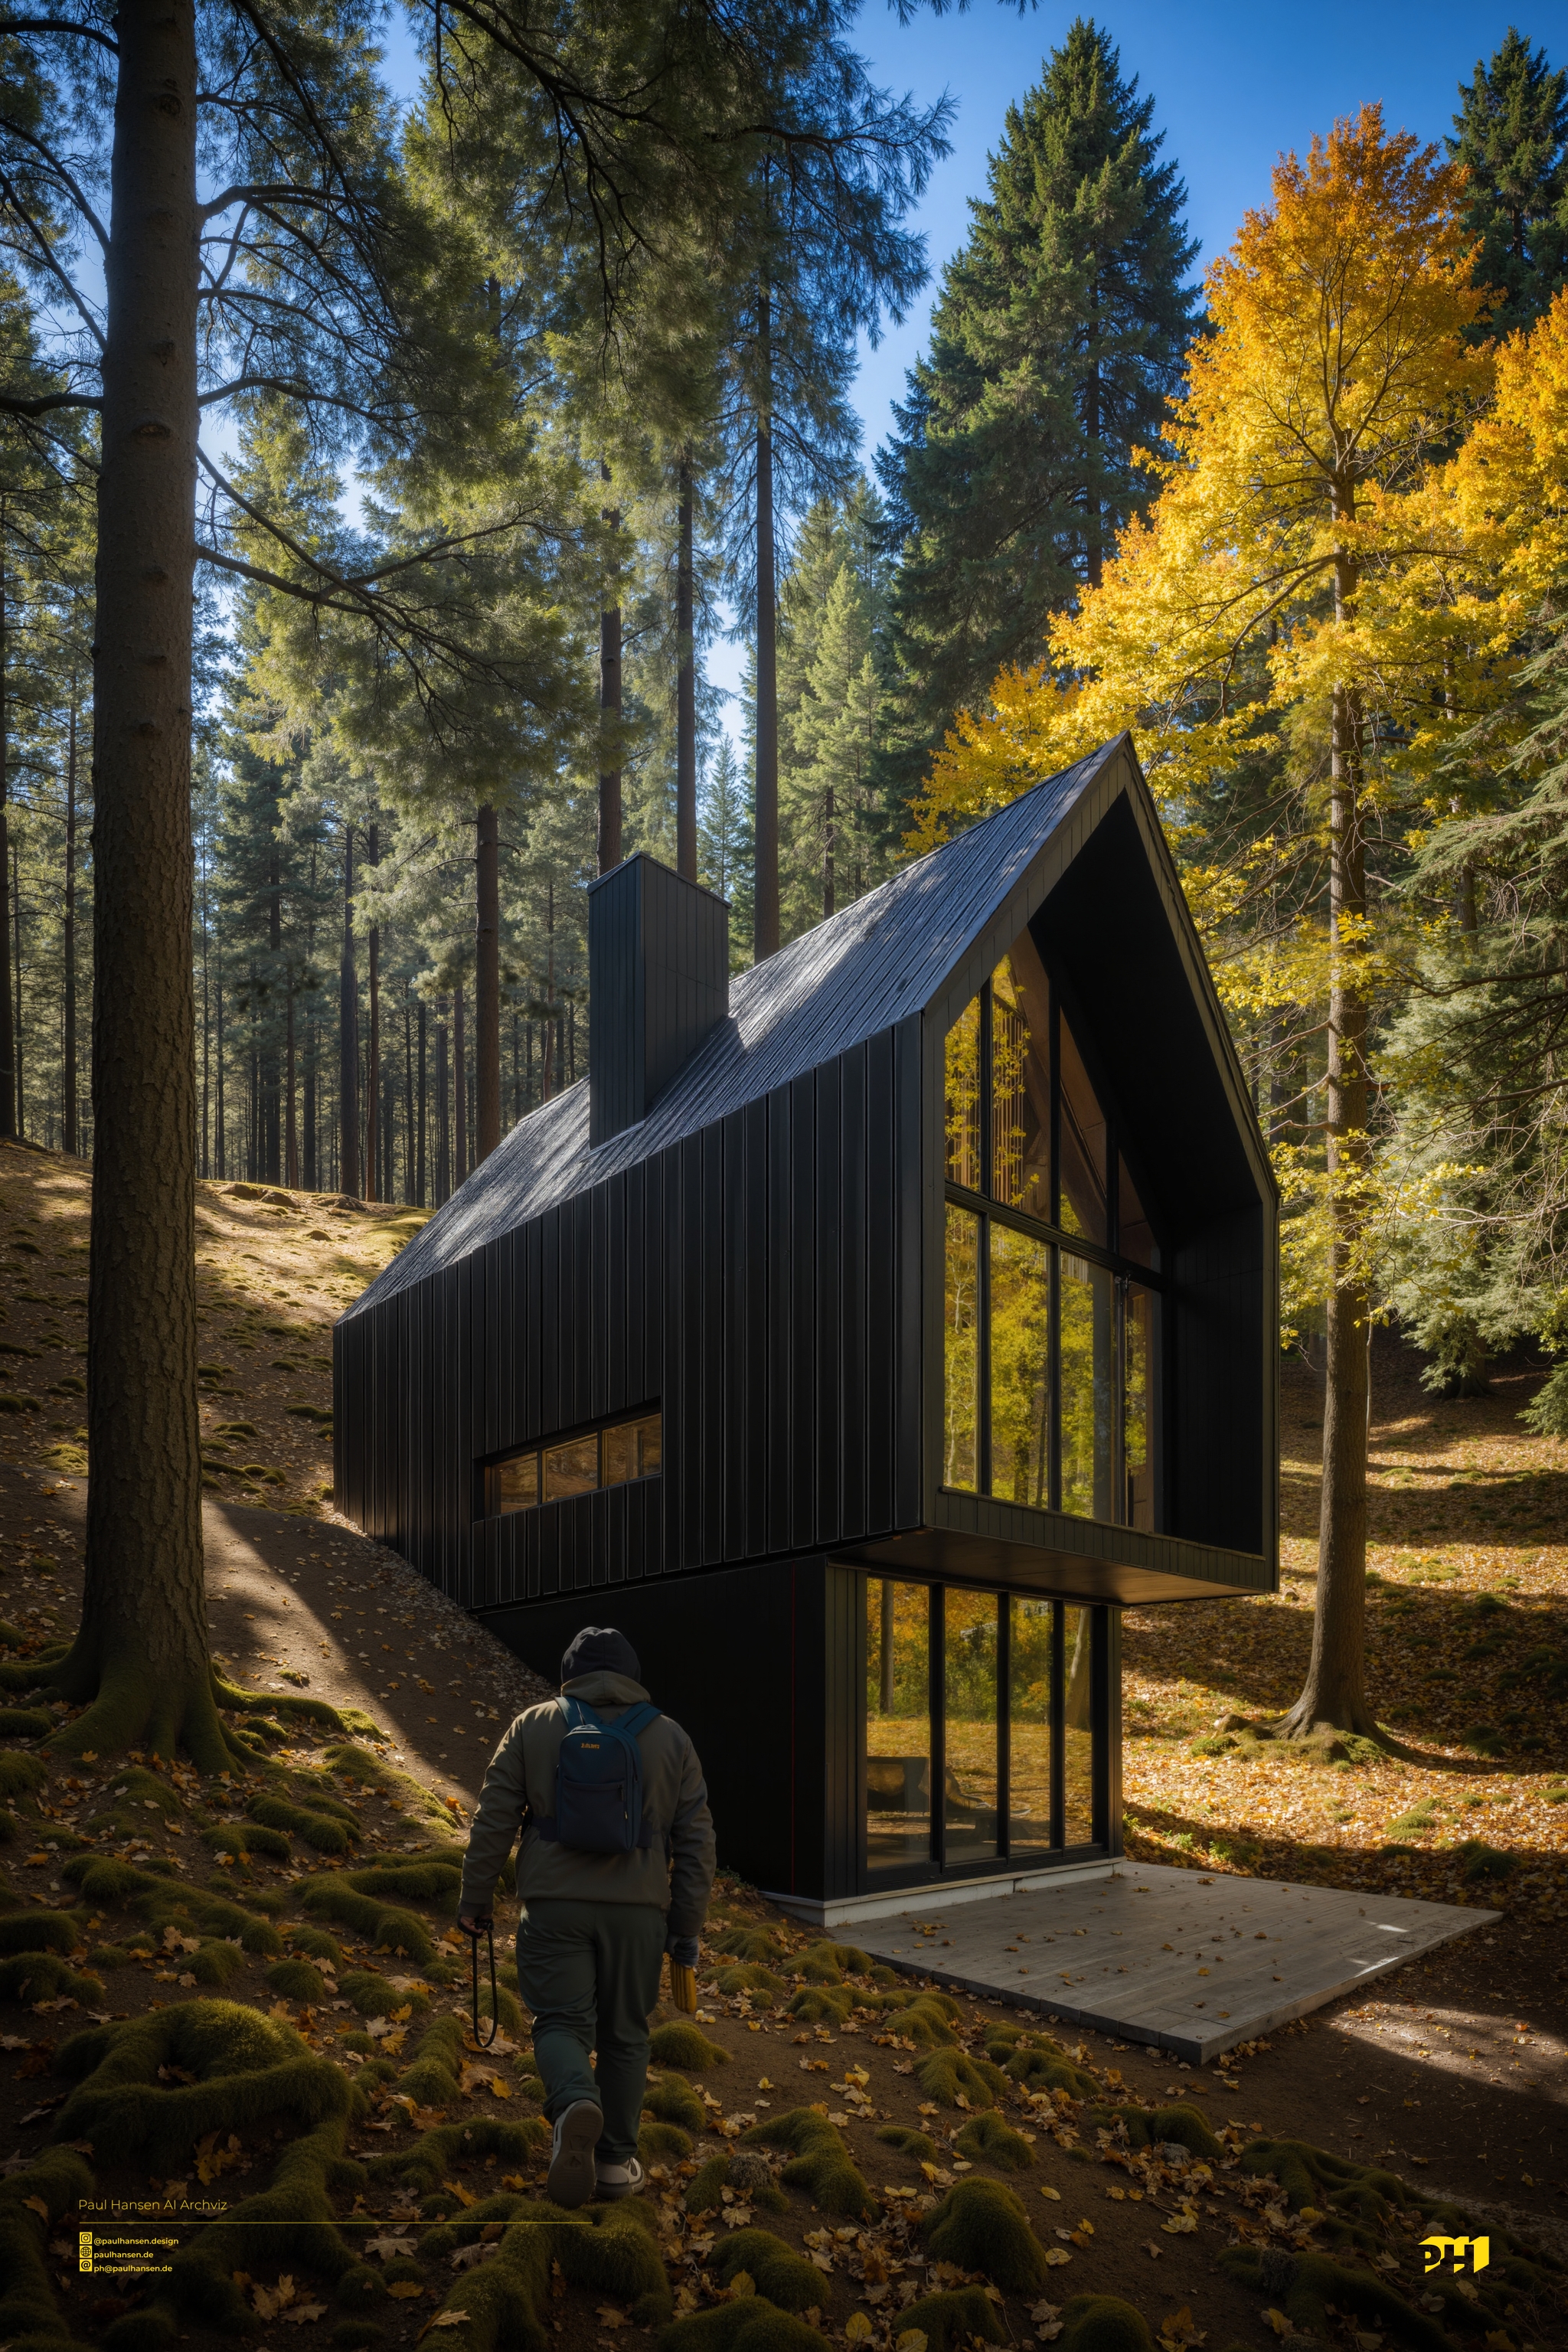
The workflow has 2 main functions, it is designed to 1) enhance renderings and 2) creates highres architectural images (tested 12288x8192) from lowres outputs of any kind of rendering software (tested 1536x1024) and tries to keep details throughout its process of "staged generation": a first stage with sdxl, a second stage for detailing first stages output with flux, a third stage upscaling the seconds stages output with flux again. If you have 3d people in your image, it will autodetect them and enhance them too. You can generate additional people with flux to your image by painting a mask.
More infos here:
and here:
History:
v0.43_260223
- In case you get "Missing Nodes" messages with "If ANY retrn A else B [Microscope Icon]", "Float [Microscope Icon]", "Compare [Microscope Icon]", "Int [Microscope Icon]" -> On ComfyUI_windows_portable (recommended) install/update ComfyUI-Logic nodes (https://github.com/theUpsider/ComfyUI-Logic) through the Manager. Please be aware that these nodes have been ARCHIVED by the author.
- due to comfyui's node 2.0 implementation and incompatibility with rgthree FAST GROUP BYPASSER, this workflow works best with classic node (settings -> comfy -> Nodes 2.0 -> Modern Node Design (Nodes 2.0) -> "off"), otherwise groups have to be bypassed manually
- quality of life updates ensuring compatibility with latest ComfyUI (0.4.12)
- replaced with core nodes to reduce external dependencies
- sipherxyz/comfyui-art-venture
- melMass/comfy_mtb
- jamesWalker55/comfyui-various
- removed
- experimental section including automated inpainting, realtime sdxl previz stage and posed character control
- optional preprocessors for depth, canny and pose alternatives
/edited 260223
v0.37 actual, tested on Comfyui 0.3.68 and frontend v1.28.8 - removed deprecated nodes, quality of live updates
/edited 251105
v0.30 - last versions broke due recent ComfyUI update and issues with mtb-nodes (node+)
/edited 250326
v0.27 recommended - v0.23 of this Model unfortunately stopped working as soon as Mixlabs Nodes are installed or have been installed before (SDXLAspectRatioSelector/art-venture and some preprocessors stop working)
/edited 241102
I assumed, people who are interested in this whole project, will a) find a quick way or already know how to use a 3d environment like e.g. 3dsmax, blender, sketchup, etc. to create the outputs needed, b) adopt some of the things they see here into their own workflows and/or modify everything to their needs, if they want to use this kind of stuff the way I do.
Control over the desired outcome is mainly gained through controlnets in first stage and the help of a masked detail transfer for your base image, where you define the mask by a prompt (e.g. “house, facade, etc. - wherever your details are that you want to transfer/keep throughout the stages you activated). And if you for example have an area where you placed a person with the MaskEditor, the mask gets edited within the process to prevent detail being blended onto that person from your mask. Basically, I’m using various models in a row to add detail in each step or bypass stages that I don’t want while using the workflow, it is only in some cases a straightforward process, still for example I am cherrypicking first stages outputs with a preview chooser before passing it to the next stage.
Depending on the models you use, it imagines photorealistic images from renderings like a "per-polygon-unique-colored-mesh" or some kind of outlines/wireframe-meshes/etc. through one or two (or how many you would add) controlnets. Anything that a sdxl controlnet-preprocessor or your controlnet directly will understand, can be used. In advance you can control the amount of the detail transfer and most of the basic functions with sliders and switches (no, I am not a UI or UX designer). Your Prompt then defines the general output, I like to keep it separated to quickly adjust things in the generation, but it just gets concatenated at the end. You may have to edit your 3d output/base image before generation, for example I painted some vertical tiling lines for my facade directly onto the normalpass renderelement in photoshop.
In addition, you can change the base settings to have an img2img workflow with one button, keeping its functionality if you already have some kind of more or less photorelistic rendering in the base image input. You may want to denoise that at lower values in first stage, then let flux add details in stage 2 & 3. Most of its additional features, e.g. activating “people generation” and using a MaskEditor paintbrush for placing a flux generated person onto your scene, are considered to be a proof of concept as you can see from the examples.
This workflow is:
A potential replacement to many paid services like image enhancement and upscaling
A “tool” developed for myself to assist my daily doings as a technical artist according to my needs from previsualisation to a final image, in general is based on my best intention, latest findings and limited knowledge of AI itself. I still use my 3d environment and additional rendering software and for example still often postprocess my images manually :)
Therefore, this workflow unfortunately is NOT:
a masterpiece comfyUI workflow never seen by mankind before - some might have guessed that
ultimate magic technology that every time you start generation with, makes you receive an award winning image - not yet, but I promise I’ll let you know asap when I have it. I may not will give it away for free then
This workflows output in any case will depend on:
Your base image input, precisely in context to the purpose of this workflow: your skills in your favourite 3d environment for base image creation. I have not tested this thing with any other stuff besides architecture related imagery
Your ability to describe what you want as a prompt/prompting in general
Your Hardware (basically if you can run flux.dev, you can run this, optimization may follow, tested on gf rtx 4090, use more performant models and reduce resolution to make this work on lower hardware)
Your creativity to use/edit/adopt something like this, in a way that fit your needs
Your understanding of how comfyui and controlnets work and knowledge of which exact settings may work for your scenario
Bonuscontent:
Because at the moment i cant use "mixlabs screen share" due some display bugs, this workflow is part of the release too, you find it on the right under "Experimental" (may have to pan a little to see it). Replace the Load image node with mixlabs screen share and turn on autoqueue in comfyui to use it as shown in the video. You may want to bypass everything else then.
To use the experimental "Flux inpaint by Mask" feature, connect a mask to the respective node in the "mask area" (yellow typo), enable this process on the base cfg and use a prompt for what you want to see - this feature is real experiment and does not give always the desired results.
Models used:
flux.dev gguf Q8_0.gguf
realVisXL_4.0.safetensors
realVisXL40_Turbo.safetensors
clip
t5-v1_1-xxl-encoder-Q8_0.gguf
clip_l.safetensors
ip-adapter
CLIP.ViT-H-14-laion2B-s32B-b79K.safetensors
ip-adapter-plus_sdxl_vit-h.safetensors
controlnet
diffusers_xl_depth_full.safetensors
diffusers_xl_canny_full.safetensors
thibaud_xl_openpose.safetensors (optional, to be re-implemented with openpose-editor for posed people in future release)
sam2/florence2
sam2_hiera_base_plus.safetensors
Florence2-base
upscale
4x-UltraSharp.pth
Recommended models to try: CrystalClearXL, RealVisXL, ProtoVision XL,
Customnodes used (yes, ressource heavy, even may be edited/added in future, recommended to install ONE-BY-ONE and restart comyui in between to prevent errors):
GitHub - ltdrdata/ComfyUI-Manager
GitHub - ltdrdata/ComfyUI-Impact-Pack
GitHub - Fannovel16/comfyui_controlnet_aux
GitHub - jags111/efficiency-nodes-comfyui
GitHub - WASasquatch/was-node-suite-comfyui
GitHub - EllangoK/ComfyUI-post-processing-nodes
GitHub - BadCafeCode/masquerade-nodes-comfyui
GitHub - city96/ComfyUI-GGUF
GitHub - pythongosssss/ComfyUI-Custom-Scripts
GitHub - ssitu/ComfyUI_UltimateSDUpscale
GitHub - Suzie1/ComfyUI_Comfyroll_CustomNodes
GitHub - cubiq/ComfyUI_IPAdapter_plus
GitHub - sipherxyz/comfyui-art-venture
GitHub - evanspearman/ComfyMath: Math nodes for ComfyUI
GitHub - jamesWalker55/comfyui-various
GitHub - Kosinkadink/ComfyUI-Advanced-ControlNet
GitHub - theUpsider/ComfyUI-Logic
GitHub - rgthree/rgthree-comfy
GitHub - cubiq/ComfyUI_essentials
GitHub - chrisgoringe/cg-image-filter
GitHub - kijai/ComfyUI-KJNodes
GitHub - kijai/ComfyUI-DepthAnythingV2
GitHub - kijai/ComfyUI-Florence2
GitHub - kijai/ComfyUI-segment-anything-2
GitHub - shadowcz007/comfyui-mixlab-nodes
GitHub - palant/image-resize-comfyui
GitHub - yolain/ComfyUI-Easy-Use
All of the above nodes are outstanding work and highly recommended. IF YOU WANT TO SUPPORT MY WORK DIRECTLY you can donate at https://ko-fi.com/paulhansen
Description
v0.23 first public release
FAQ
Comments (13)
I look forward to more of your posts!!! Keep up the good work!
thank you! looking forward to release more like this :)
How much vram needed? for the entire workflow
hey, according to a user on youtube https://youtu.be/6aXJqRhjXo0?feature=shared, it runs on:
"I was able to run almost the all workflow just on my laptop with 16gb RAM, gpu geforce rtx 3070 (8gb) and cpu AMD Ryzen 5800H"
Thank you for the updated version! Unfortunately I am still having problems realted to sdxlaspectratio, the workflow just won't start and says node 151 is missing class_type property...
Have you installed mixlabs custom nodes? If so, reinstall without.. as soon as i installed them the last time i tried, the art-venture pack broke and then sdxlaspectratio did not load correct
@ph01 hi and thank you so much for the quick answer! I do not have mixlabs custom nodes installed, yet the workflow is still having issues with sdxlaspectratio
@biancaurq im sorry to hear that, i tested everything on a fresh installed comfyui (windows_portable) and there it worked. Do you have any error logs that yxou can have a look after? I dont have another solution to this atm but to completely reinstall comfy and start from scratch (with backuped model and maybe output/workflows folder, evaulate the effort before doing this for this workflow only).
same here, i got same warning
@MihawkJr thanks for letting me know and im sorry to hear that it's not working for you. I will have a further look into it and will update the workflow as soon as i find a solution. Can you tell me which version of comfyUI you are using? As i said, everything tested before releasing on a fresh install, having comfyUi updated several times and working right now with it, no errors for me.
@MihawkJr to investigate the issue, it would be great if you could let me know the customnodes that you have installed and to see the error logs from comfyUI. Maybe you can pm it to m or join the discord (link in profile).
Is there any simpler version of this? Just to use in Archviz with AI Enhance and generate 3d people?
Your work is awesome, but for a beginner like me its difficult to understand.
I cant even download a model from Hugging Face :(
Now I guess, I have but trying to learn and use the AI in current workflow but I guess it will take me some time.
Hey, if you just started with comfyui, i highly recommend to practice with some basic workflows (e.g. comfy.org examples) and return to my workflows later. To have the maximum of control, its crucial to know what the settings do and where you adjust them to achieve what you want the AI to create. Controlling it is a real complex thing and reducing complexity to its settings will reduce the ability in general. But i really value and appreciate your feedback, im already thinking of increase at least the ease-of-use, making it more beginner friendly for the next releases.