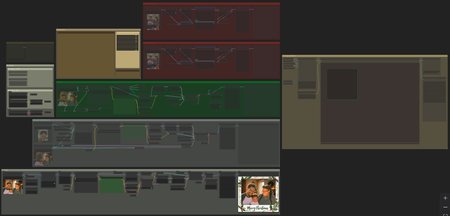
This workflow may help semi-automate making a Christmas card cover using your personal photo(s), but the idea was probably better than the execution. I spent a lot of time trying to get everything to work, but ComfyUI and several custom nodes have not been kind...including code bugs/updates that broke PuLID right in the middle of trying to implement it (and teach myself ComfyUI). If someone else wants to pick up with this and make it better, PLEASE DO!...just add me as a collaborator. If you run into error codes or installation issues, post a comment and I'll try to share any solutions I know.
Suggested Workflow
PREPARATION
Install missing nodes.
Install and select all necessary models in the 02 Loaders group; and as needed in the other groups.
Download appropriately themed LoRAs.
Gather family photo(s).
STEP 1 >> Prep Prompt
Toggle 00 Start Here and 01 Enhanced Prompt Generator group to "yes"; all others to "no".
Queue until an acceptable prompt is produced.
Copy-and-paste into positive prompt [CLIP Text Encode].
Alternatively (as a better choice), use an online prompt generator.
STEP 2 >> Generate Backdrop
Toggle 00 Start Here, 02 Loaders (GGUF or Reg.), and 03 Base groups to "yes"; all others to "no".
Set the Latent Switch in the 03 Base group to "1".
Adjust settings:
Steps = 20–30, or 8–14 w/ turbo lora
Denoise = 1.00
Flux guidance = 2–4
Queue until an acceptable backdrop image is produced.
Copy-and-paste (Clipspace) the backdrop image as the Load Image in the 03 Base group.
STEP 3 >> Generate Composite
Toggle 00 Start Here, 02 Loaders (GGUF or Reg.), 03 Base, 04a/b Family Images, and 05 Composite Editor groups to "yes"; all others to "no".
Set the Latent Switch in the 03 Base group to "2".
Adjust settings:
Denoise = 0.00
Connect/disconnect Image blur and color correction nodes, as needed.
Queue until an acceptable composite image is produced.
Click "continue" at the bottom of the Compositor in the 05 Composite Editor group.
Copy-and-paste (Clipspace) the composite image as the Load Image in the 03 Base group.
STEP 4 >> Blend & Stylize
Toggle 00 Start Here, 02 Loaders (GGUF or Reg.), and 03 Base groups to "yes"; all others to "no".
Mask any areas you want to preserve from too much change, such as faces.
Adjust settings:
Denoise = 0.20–0.40
Connect/disconnect Image blur and color correction nodes, as needed.
Queue until an acceptable composite image is produced.
Copy-and-paste (Clipspace) the composite image as the Load Image [bottom] in the 06 Face Fix group.
STEP 5 >> Face Fix [BROKEN???]
Toggle 00 Start Here, 02 Loaders (GGUF or Reg.), and 06 Face Fix groups to "yes"; all others to "no".
Load face reference image [top] and composite image [bottom].
Manually mask the face in the composite image to replace/repair.
Adjust settings:
Denoise = 0.50–0.80
Queue until an acceptable result is produced.
Repeat for additional faces, as needed.
Copy-and-paste (Clipspace) the composite image as the Load Image in the 07 Border group.
STEP 6 >> Border
Toggle 00 Start Here, 02 Loaders (Reg.), and 07 Border groups to "yes"; all others to "no".
Change diffusion model in 02 Loaders to Flux FILL.
Queue until an acceptable final image is produced!
Description
Beta version.

