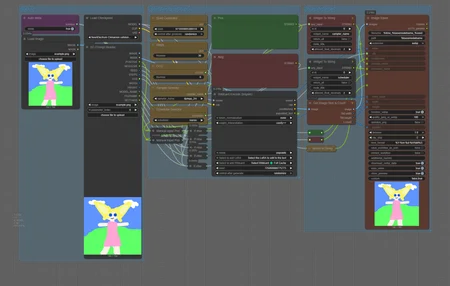
Workflow is designed to allow you to create a image that will automatically populate settings, resources used, and prompts when posting to Civitai. This workflow allows you to load an image with metadate and transfer it to another image. You can also manually input settings.
This is a small enough workflow that can be added to any setup if you need automated solution for posting to Civitai.

Civitai sometimes has trouble automatically reading the metadata from a generation, which means you end up having to enter the missing info yourself. This workflow automates that process so everything transfers over properly.
Step 1: Load images, Checkpoint and input settings

You need to pick with model and images you're going to use. The SD Prompt Reader node will transfer an image's metadata over automatically if you have the
Auto Metanode toggled totrueIf set to
falseyou will need to enter the prompt and ksmapler settings manually.
Step 2: Manual Inputs

Even when Auto Meta toggle is active you still need to pick which sampler and scheduler you want. If you turn off the Auto Meta toggle then you will need to manually set everything in this group which includes the positive and negative prompt.
Step 3: Selecting LoRA data

You can load LoRA data similar to how it's done in WebUI interfaces, and will allow Civitai to read the resources used automatically.
To select the lora you click on the titled "select to add LoRa" and picked the one from the list

When selected it will auto-populate the lora into the prompt

Example:
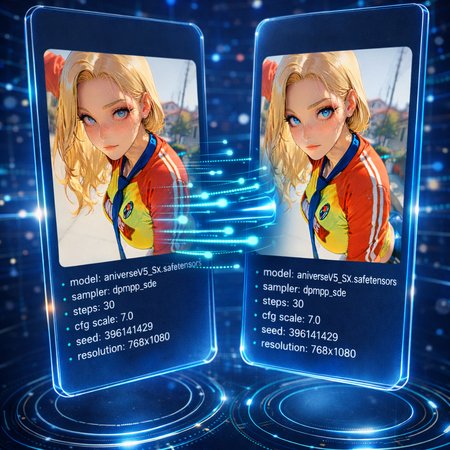
In this example, a standard PNG image made in ComfyUI isn’t being detected by Civitai’s system.

The image is run through the workflow

Now all of the settings, resources, and prompts are displaying.

Description
Comments (5)
Yo, I needed this. Always had to add models manually since I transferred to comfy.
lol I can't believe this, I just finished making the same thing today xDDD
Mine is all with 1 or 2 nodes, it includes metadata injection, editing and filename editing all at once. I spent 2-3 days on it so I'm almost sad it's done now xD
Check it out here : https://github.com/tetsuoo-online/Comfyui-TOO-Pack?tab=readme-ov-file#smart-image-saver-advanced-
Awsome! Always happy to have a easier way to do this. It's a bitch to connect up when I make a new workflow. I'm not going to say no to free stuff haha. I'll try it out
@Sexiam Don't forget to hit the Node Info button, believe it or not but there is a documentation !!! Yes, it's crazy I know lol
@Sexiam hey I just update again, now you don't even have to type in the data fields anymore, you can pick up the node values directly by clicking with the mouse :)
Looks like we don't have an active mirror for this file right now.
CivArchive is a community-maintained index — we catalog mirrors that volunteers upload to HuggingFace, torrents, and other public hosts. Looks like no one has uploaded a copy of this file yet.
Some files do get recovered over time through contributions. If you're looking for this one, feel free to ask in Discord, or help preserve it if you have a copy.