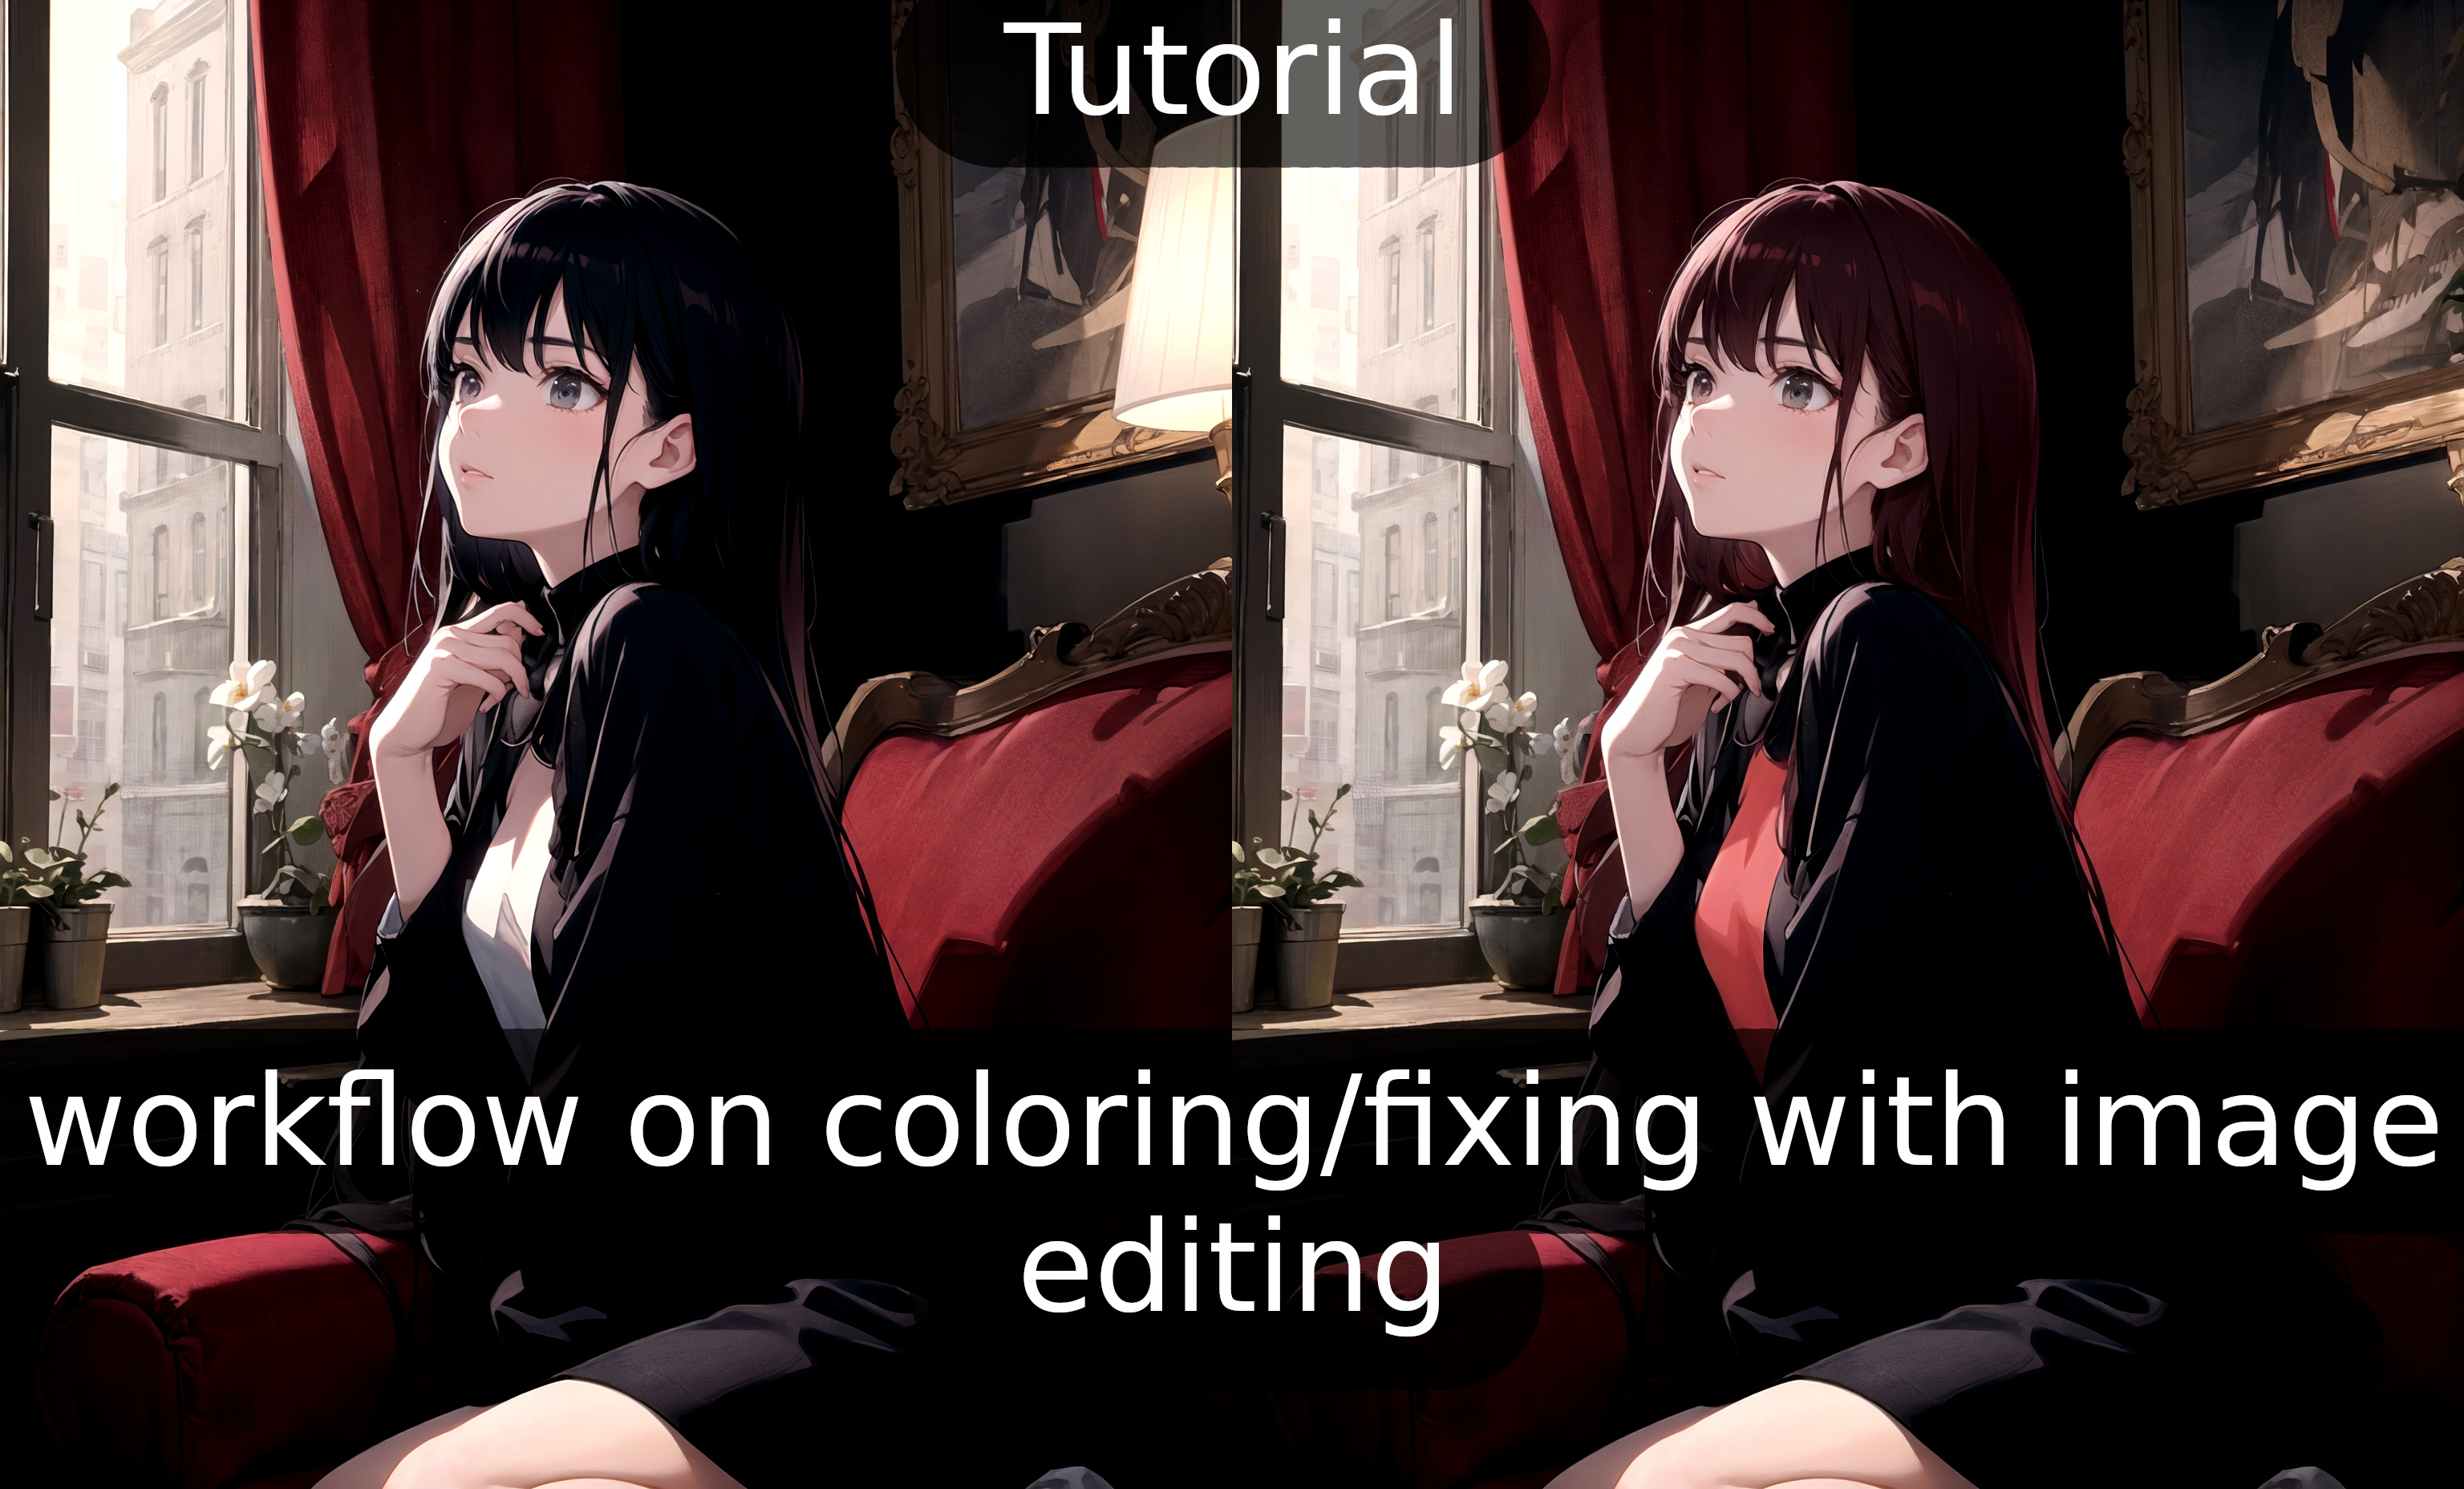
You can read from below or download the shitty scrapped PDF from this post. Cannot publish without having file.
Fixing image with photo editing:
This workflow consist of 3 things:
Creating image with txt2img.
Fast fixing what we want to fix in image editing software.
Color of clothes/hair
Messy hands, clothes,
removing unwanted stuff in the image
img2img enhance with method you prefer.
Here are few tutorials which may help on your img2img journey and overall image quality enhance:
Multidiffusion upscaling: https://civarchive.com/models/34726/tutorial-for-multidiffusion-upscaler-for-automatic1111-detail-to-the-max
Ultimate SD Upscale: https://civarchive.com/models/59811/4k-resolution-upscale-8x-controlnet-tile-resample-in-depth-with-resources
img2img enhance: https://civarchive.com/models/34192/ultra-sharp-high-contrast-tutorial-vaeandupscaler
1. (~ ̄▽ ̄)~
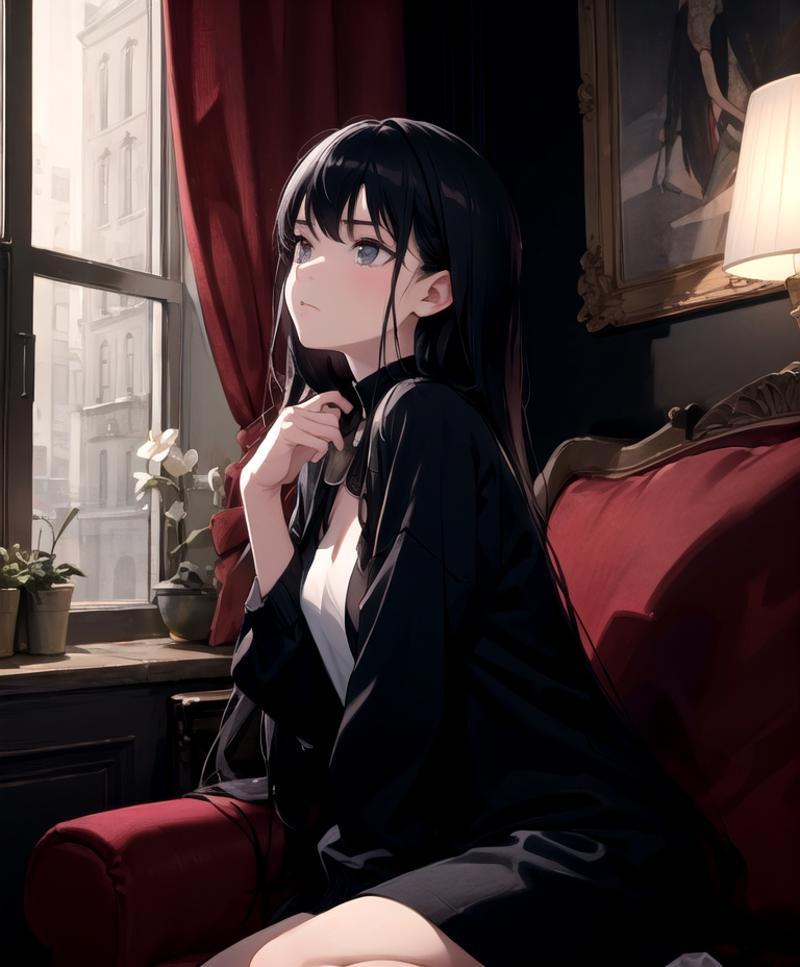
First i will be generating shitty image for the purpose of showing this workflow. (It feels like it has become hard to create shitty images on purpose, had to take of my negative embeddings (~ ̄▽ ̄)~ )
1.1 Prompt + settings:
Keeping the prompt simple:
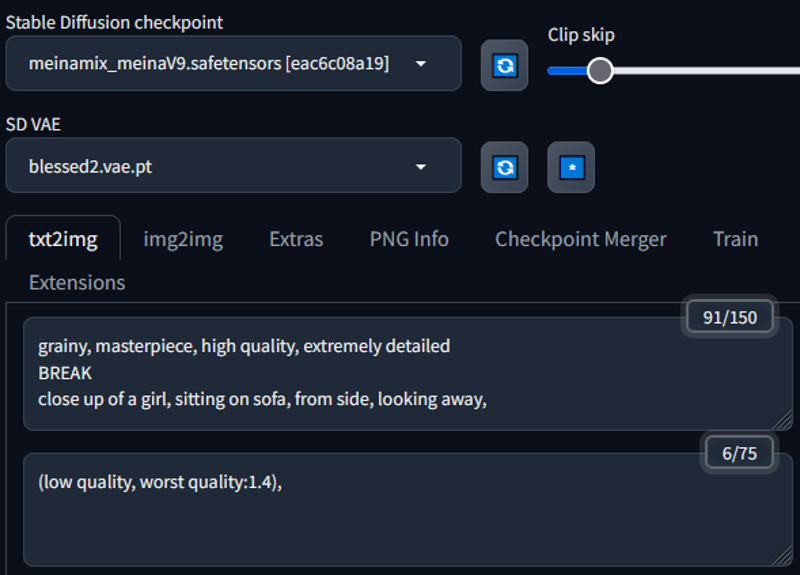
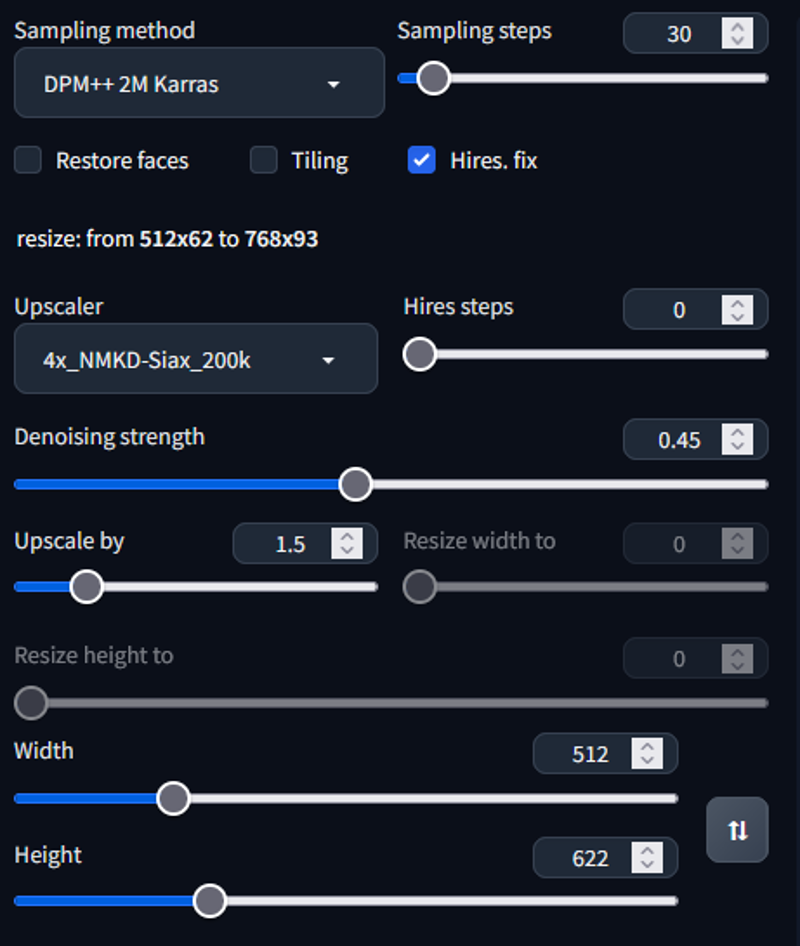
The settings simple: (Used random resolution to get more bad stuff to the image for the tutorial purpose)
The image i got with this:
1.2 The editing
The editing can be done with any image editing software. The methods might change a bit depending on the software, but generally the idea is the same. (For the sake of the tutorial i use simple methods and things that are available in simple image editing tools, there are better ways to do these things for example in photoshop. But that is not available for everyone)
Few free softwares you can use:
Photopea (I will be using this in the tutorial, it is free and works on your browser. Mimics photoshop)
This is how photopea looks:
(have to keep it smaller to fit into civitai formatting)

Few shortcuts for photopea in windows:
Pressing alt + scroll wheel you can zoom in and out
pressing control + scroll wheel you can move left and right on the image
With scroll wheel you can move up and down
right clicking on image it will give you settings of the tool you are using
First thing i will be going to this image is fix the hand. It will be messy if we leave it like that. I will be using simple tools for the sake of the tutorial. If you are capable and know how to use image editing software, using more advanced tools can give better results. (You can use layers and blending modes, object selections etc....)
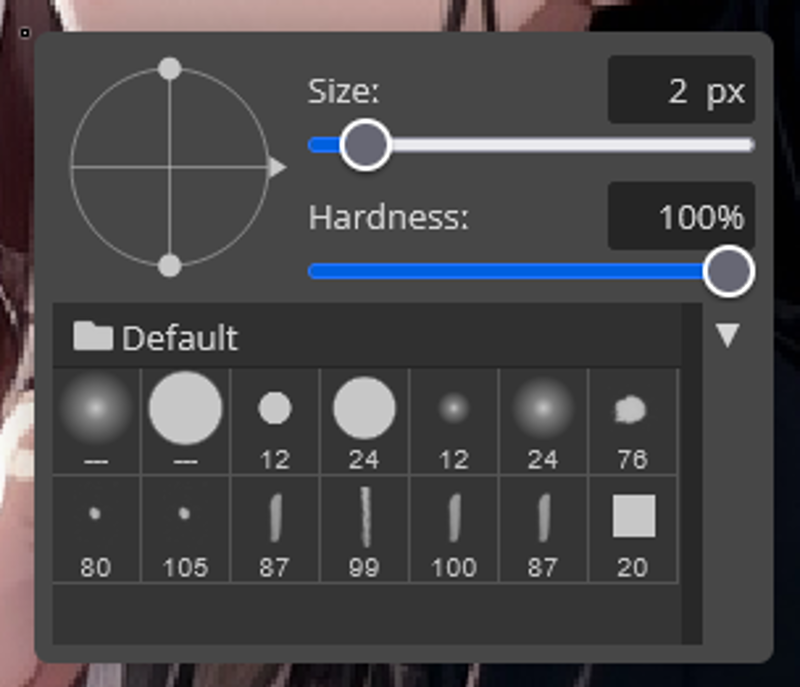
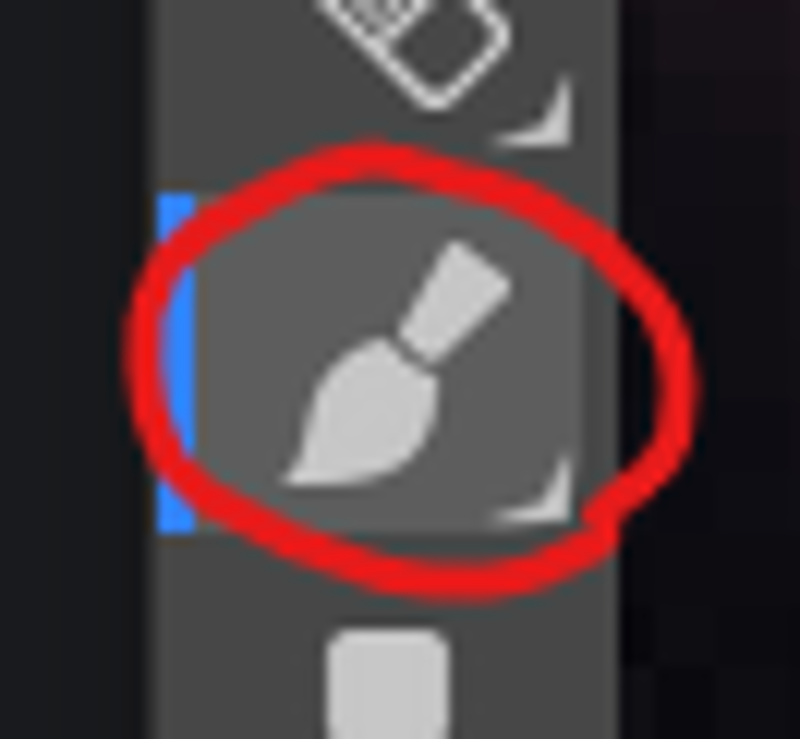
For the hand i will be using brush tool to fix the fingers.
Few tips with the brush tool:
With alt + left click you can select the color from the image where the cursor is
You can change opacity settings from the top of the screen when you have brush tool selected.
Before and after image:
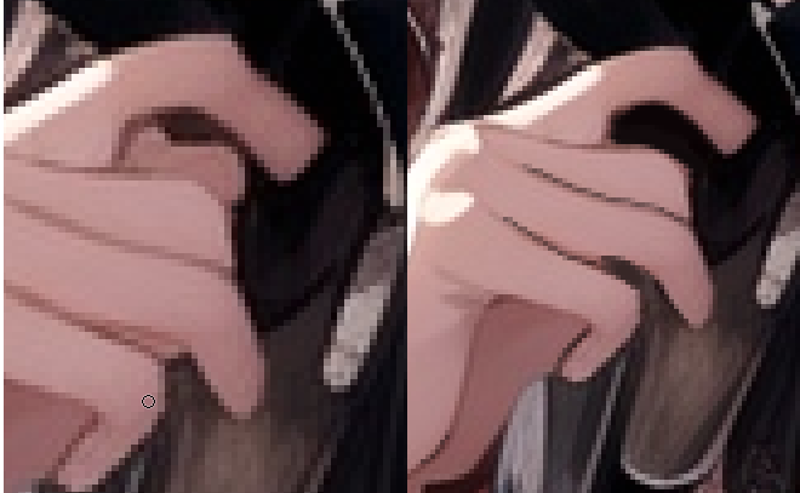
I removed parts that might confuse the ai into making monster of an hand. Then i strengthened the lines to make the ai understand the hand better.
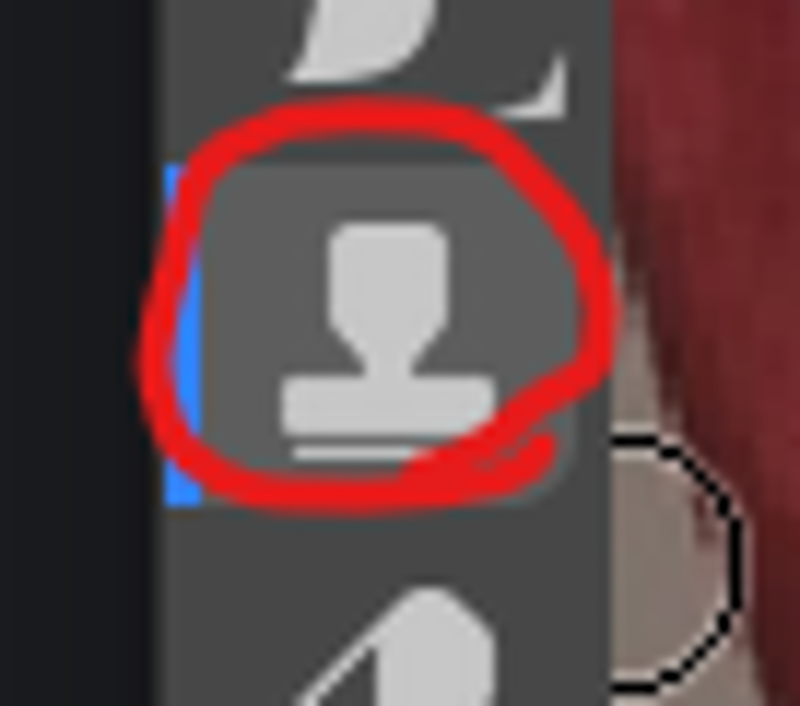
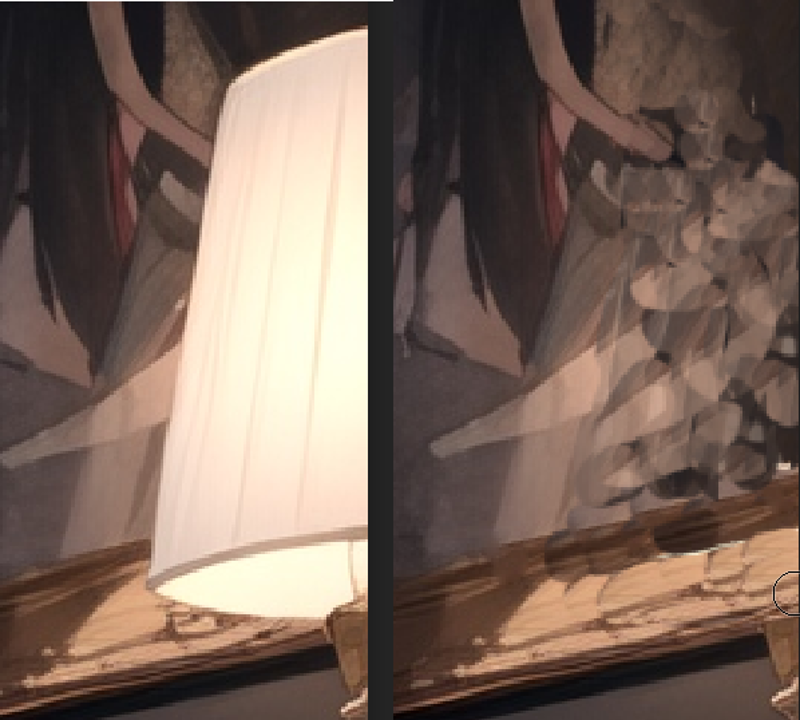
Next i am removing the lamp and only have the painting in the right side of the image
For this i used stamp tool (There are many different ways to do this, best would be with photoshop content aware fill, but for the sake of the tutorial i use simple methods and things that are available in simple image editing tools)
Tips for the stamp tool:
With alt + left click you select source from where you want to stamp from, and after that painting with the left click will stamp on your current location from the source.
The opacity can be changed from the top
This does not need to be perfect, AI will handle our shitty painting.
Before and after editing: I did this really fast and AI hopefully will fix my shitty painting
༼ つ ◕_◕ ༽つ
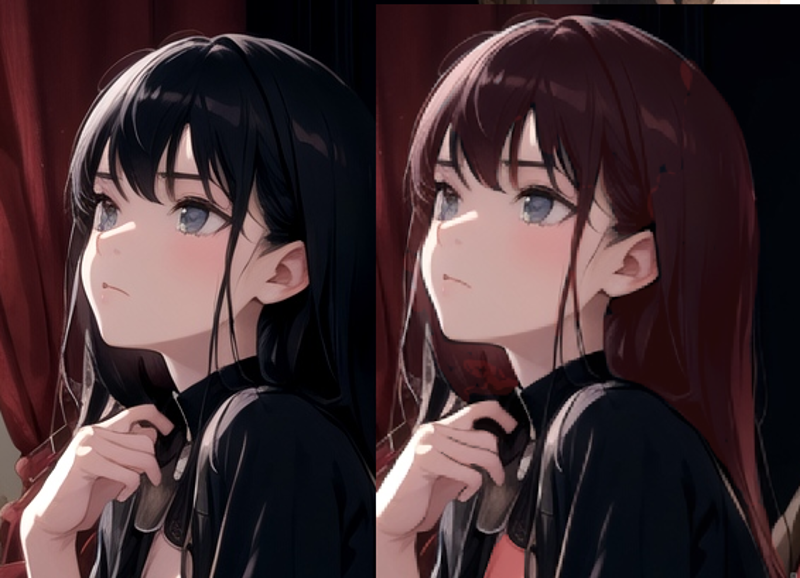
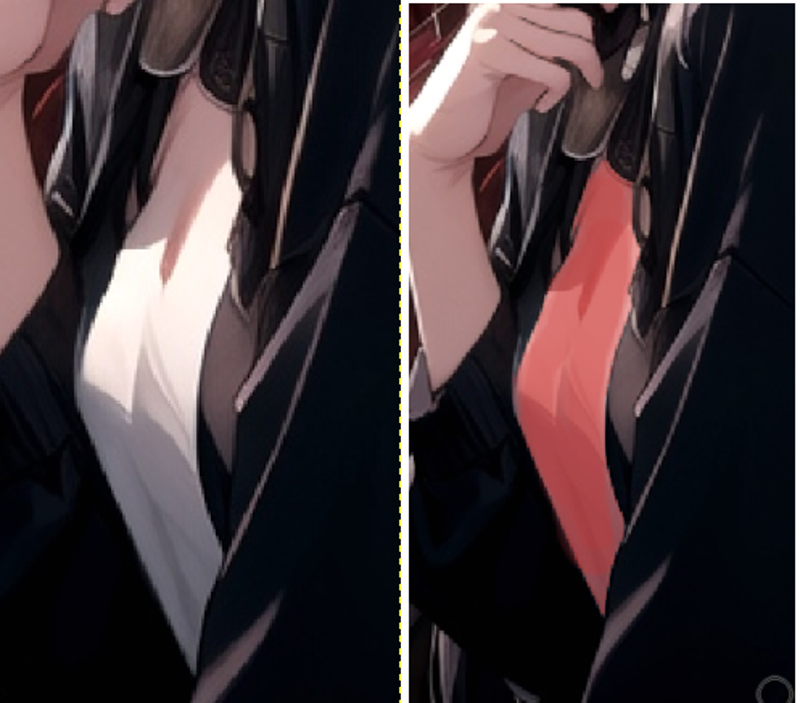
Next i will be changing color of the hair and shirt:
Tips:
This can be done better with selection + using layer and color blend for example.
I used brush to roughly paint over them with lower opacity.
Use low opacity to retain the detail of the original cloth/hair etc...
Before after editing hair:
Before after editing shirt:
1.3 IMG2IMG
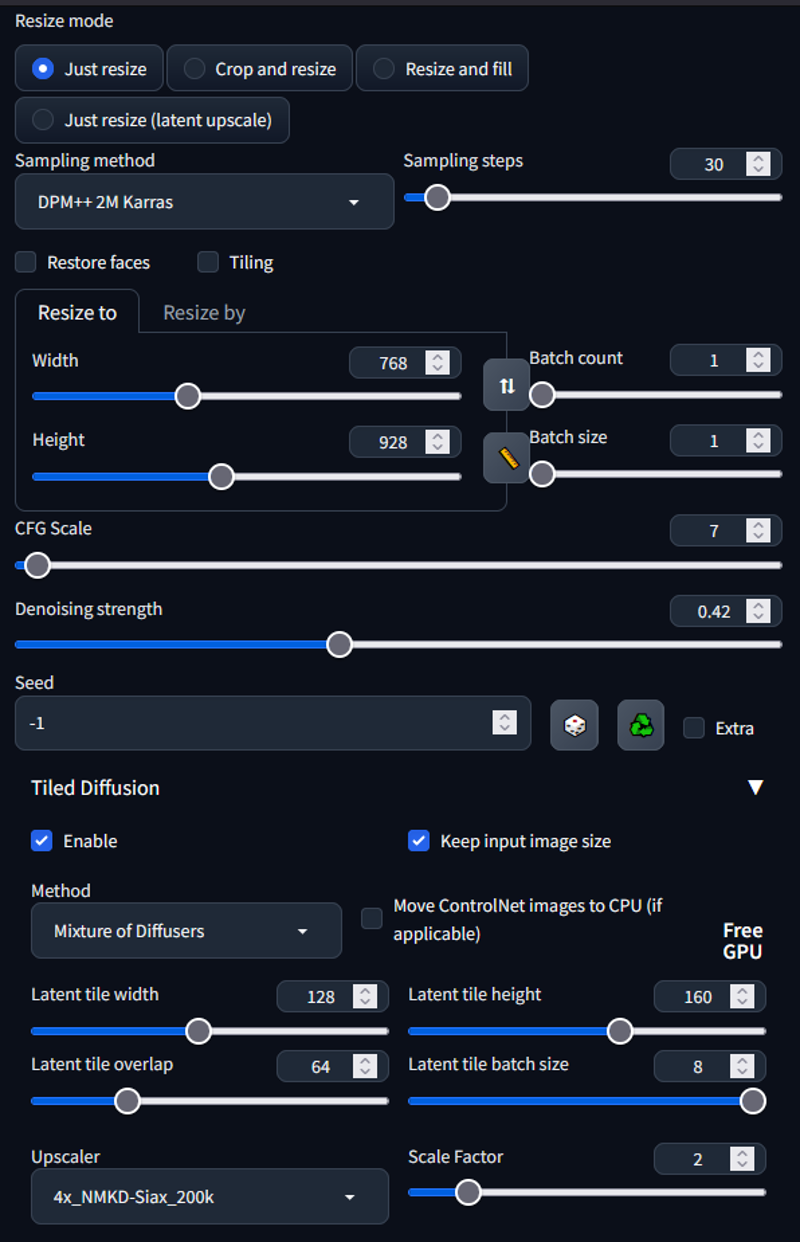
At the start i gave several different methods for refining image in IMG2IMG. There is no correct way of doing this, just different ways. I will be using multidiffusion upscaler to upscale the image 2x
Settings:
REMEMBER TO SEND THE IMAGE FROM TXT2IMG to get right proportions etc...
Save the image. In photopea -> file -> export as ->PNG
Drop the edited image to IMG2IMG
fix settings
Generate
These are settings i used for multidiffusion:
The result:
The image is not perfect, the idea was to show way to alter your image without going into inpaint and pray ༼ つ ◕_◕ ༽つ
Results are better, more time you spend editing the image. Total time i would have spent on editing this image would around to around 1 minute. Could take 10 minutes in inpaint to fix bad hand.

The end
Than you for getting this far, if you liked please leave review. Discussion is open for any feedback for the workflow.
Thank you (~ ̄▽ ̄)~
Description
FAQ
Comments (19)
Can't agree more, it's a very nice things to know how to do it. Just doing that makes the picture 90% better than most people.
I do a Lot of Edit in all my works, but it's actually take time ahah. (Semi-AI) atm.
Yeah editing can be very time consuming. I usually do minor edits between txt2img and img2img. Thanks for comment :)
Very useful and informative. 👍 I see you're also a fan of the Siax upscaler. A lot of people use Remacri, but I haven't found anything better than Siax—except SwinIR, which takes a prohibitively long time on my system.
I have a question for you, if you know. Many times when I do an img2img, the result gains a lot of contrast, and if I do img2img in a loopback, the contrast becomes so "punchy" that it looks horrible. Do you have any ideas what may be causing that, or how to avoid it? Of course, I can try to fix it with Gimp or Krita or something, but of course you can't really add contrast that isn't there in the original just by adjusting the curves.
Thanks for your help!
Hey,
I personally think Siax is one of the best. Feels like the sharpest of them. Another one that felt a bit sharper on some tests was 4x_NMKD-Superscale-Artisoftject_210000_G.
i have noticed using same seed causes contrast sometimes, feels like it is better to use random seed on multiple img2img loops. Do you use any extensions in img2img that affects the image?
Thanks for the comment (~ ̄▽ ̄)~
@Potatovision Thanks for the help. I haven't used that upscaler, but I'll try it. And yes, definitely sharper than most. In my A-B comparisons, it's not just sharper, but also offers more detail especially in textures.
Yes, I did notice that about same seed, and so I stopped doing that. It's a pain to have to remember to always change the seed after sending from txt2img to img2img, but oh well. For a while I was using the Conditioning Highres extension when inpainting, which does seem to increase the contrast, but once I discovered that, I stopped using it most of the time. Otherwise, no, no extensions. I've also tried switching to a different sampler, and that didn't do much one way or the other. A lot of times I generate candidates with DDIM and then use SDE Karas in img2img.
It felt like things were better after I stopped using Cond Hires, but then when I did an i2i two days ago, it had quite a bit higher contrast again. It's possible I just forgot to change the seed or something, or maybe it was a coincidence. I'll have to try it again.
Thanks again.
@dita Now you reminded me, it could be issue with sampler too. I read somewhere about some samplers bringing more contrast. Could also be sampling steps.
If you want more quality to your images check out https://civitai.com/models/34726/tutorial-for-multidiffusion-upscaler-for-automatic1111-detail-to-the-max and combining that with controlnet tile sampling it really does wonders :)
@Potatovision I've been wanting to check out Multi and Tiled both, but just haven't gotten to it yet. Soon, maybe?
I'm doing some i2i right now, and out of the first two, one has a bit more contrast than the source, and the other actually has less. They were generated in the same t2i batch, and I'm using the same i2i settings, including denoise strength. Only difference is seed, so I don't know what it could be if not that.
Do you happen to remember which samplers have stronger contrast?
Thanks for the help once again.
@dita I think it was something about ancestral samplers giving more contrast/color and karras samplers giving less. I am not 100% certain and don't remember where i read this. Try testing between karras and ancestral and see if one of them give more/less contrast.
Don't worry, i like to help most of the time, just drop questions if you have them and i answer best of my knowledge ;)
Ps. Check the multidiffusion it is gamechanger (~ ̄▽ ̄)~
@Potatovision Awesome, thanks. I'll see what I can rustle up about that to confirm.
It looks like the Torch issue that was keeping me from moving to a new install (my current working one has not been updated for 2 months now, including extensions) has been fixed, so I can work on moving back to the new install again. I actually already have Multi installed on it, just a matter of trying it.
@dita I am running personally 1.1.1, not the newest one that came few days ago. Seems like solid. Had to delete VENV folder when i moved to this, torch was not updating to 2.0. Personally i like to stick to something solid and working for longer than updating every day (~ ̄▽ ̄)~
@Potatovision Yup, a lot of us got hosed a couple months ago when we blindly did a git pull without reviewing the changes in the recent commits... especially those who had a git pull as part of their startup script, which thankfully I didn't. But I still had to roll back to the March 25th version, and I've been there since. But a lot of my extensions are not working since they were updated for 1.1.1, but then some of the extensions haven't been so they may not work on 1.1.1. Kind of a mess.
I've confirmed that the Torch 2.0 issue has been solved with Torch 2.0.1, so I can work on getting completely moved over to the new install now and try out some of these other things like Multidiff and Tiled and so on.
@dita What is the torch 2.0 issue?
@Potatovision Only applies to Intel Macs, but it keeps failing with out of memory messages, even when trying to make very small images and there's plenty of free memory. But it's been fixed now, thankfully. I was about to make a 768x1024 native-size image a bit ago without issue. Plus, it seems like my system is running much cooler now too. Running under Torch 1.x, it had to do a far bit of stuff on CPU, and it got pretty hot and the fans were always kicking up. But now the fans barely even increase at all—and it runs faster since it's all GPU. Overall, I'm pleased with the new version. 😄
@dita Ah, sounds annoying.
@Potatovision Very.. Only it turns out, it doesn't look like it was fixed after all. But I think I might have a workaround, as soon as I test it again. I hope.
1 minute to redraw a hand, clone stamp the lamp and change the hair color? I feel slow 😹
🤣
Kinda late to the party, but I just want to say thank you for sharing this knowledge!
This is one of the guide that really carry me from SD1.5 day until this day. A way to make small adjustment rough "redrawing" and "cleaned" it by img2img with low denoise, this saves me time and effort if there's generations I like but there's small problem. Previously I don't have any choice except to just generate something else (I'm not too good fixing with inpaint)
(~ ̄▽ ̄)~it is pretty old guide. Glad it is still useful. I really recommend learning inpainting, the same idea can be used more efficiently with inpainting compared to img2img