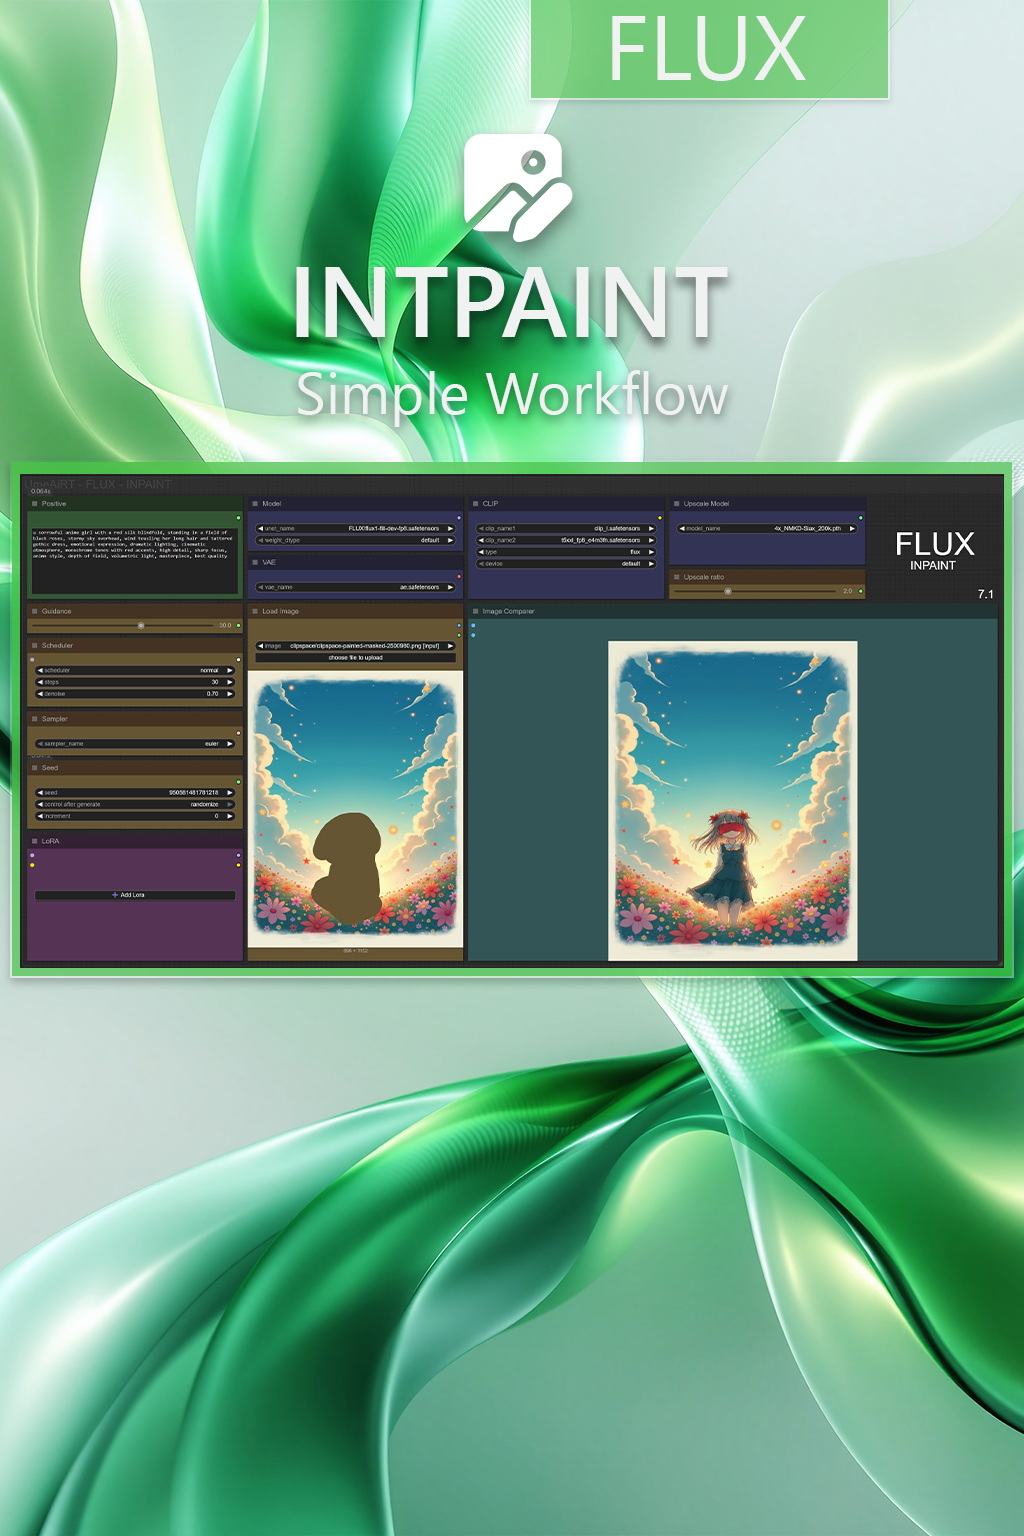
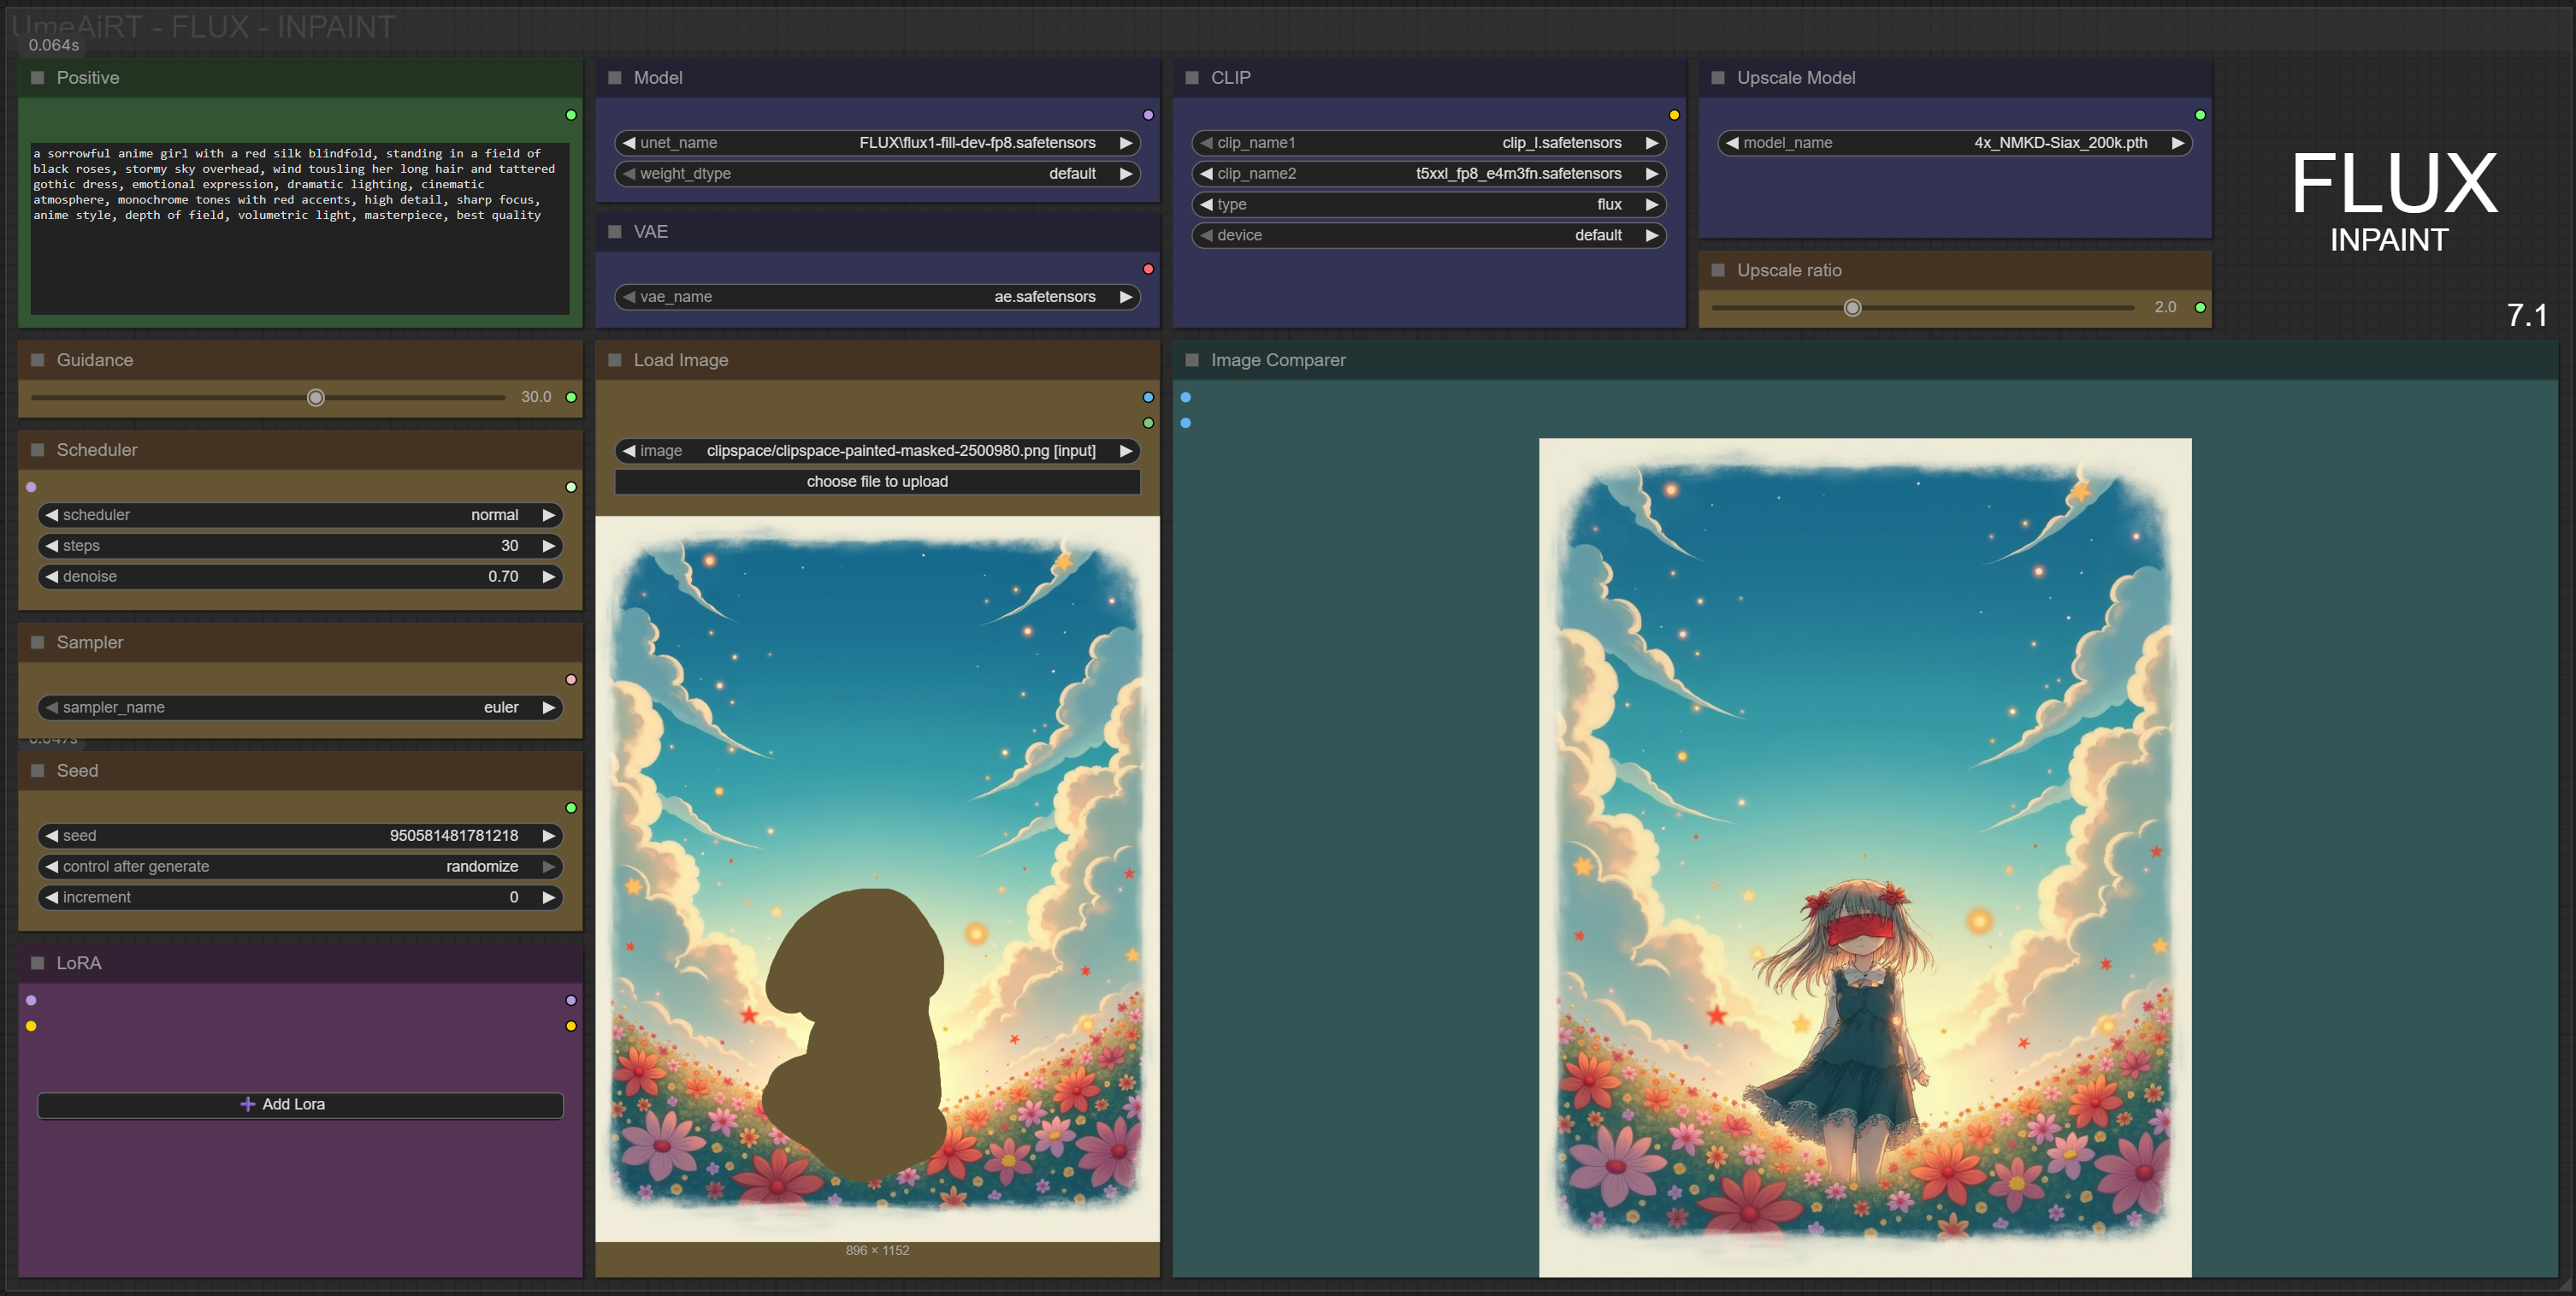
✨ FLUX — Inpaint — Simple Workflow
A clean, all-in-one FLUX Inpaint workflow built entirely with the UmeAiRT Toolkit for ComfyUI.
Only 8 nodes. No spaghetti wires. Just load your model, write your prompt, and hit generate.
⚠️ IMPORTANT — Nodes 2.0 Required
This workflow is built for the Nodes 2.0 (Vue) interface of ComfyUI. If you don't enable it, the workflow may have display problems.
How to activate Nodes 2.0:
Open ComfyUI
Go to Settings (⚙️ icon, bottom-left)
Find "Use Nodes V2 (Vue)" and toggle it ON
Refresh the page
Load the workflow
If you prefer the classic interface, check out my Legacy version of this workflow instead (link).
🎯 Features
Text-to-Image generation
Automatic download of models in auto version
Built-in SeedVR2 upscaler — high-quality tiled upscaling (toggleable on/off) Slower than a classic upscaler, but significantly better quality
Full metadata embedding — your images are saved with all generation parameters, ready for online publishing and remixing
3 LoRA slots — with individual on/off toggles and strength control and you can connect as many other lora modules to each other for as many LoRA as you want.
📦 Custom Node Required
Only one custom node to install:
Install via ComfyUI Manager (search "UmeAiRT") or use the UmeAiRT Auto-Installer.
The Toolkit packages everything internally — upscaler, face detailer, metadata saver. No other custom nodes needed.
📂 Files you need (in manual version)
for "base" version :
Model : flux1-fill-dev-fp8.safetensors or flux1-fill-dev-fp16.safetensors
in ComfyUI\models\diffusion_models
CLIP : clip_l.safetensors
in ComfyUI\models\clip
for GGUF version :
Model : Q8, Q6, Q5, Q4, Q3
in ComfyUI\models\unet
CLIP : Q8, Q6, Q5, Q4, Q3
in ComfyUI\models\clip
Common Files :
Text encoder : t5xxl_fp8_e4m3fn.safetensors or ViT-L-14-TEXT-detail-improved-hiT-GmP-TE-only-HF.safetensors
VAE : ae.safetensors
in ComfyUI\models\vae
Description
Tested on ComfyUI v0.3.62.
A few modifications to standardize my workflows.
Add a nunchaku version
FAQ
Comments (3)
Thanks so much for your effort in creating and sharing these workflows. They really are simple! I believe you have the GGUF node in the 7.1 base version rather than a checkpoint node?
edit: However, the workflow works with the q6_k gguf, clip l, t5xxl. Also would like to know how to use guidance? I read that a higher one can do things more strictly, but i've seen amazing results with things like 2-5.. interesting
Also my image compare node isnt working, very strange.
Thank you for pointing this out, I must have made a mistake when copying the files, but it's fixed now.
Regarding guidance, I've simplified things because it's not easy to explain in a few lines how it influences generation. Much more complete explanations can be found in other articles or on Reddit.
Hello I'm pretty new to this and so I need some help in prompting the inpaint. For example, I have an image where i want my character's shoulders and upper arm to be covered with the clothing she's wearing (the original image gave me an off-the-shoulder top so i kinda wanna try "extending" it). How would i go about getting this, because so far in my few attempts it still gives me an exposed shoulder...