How to Generate Multiple Different Characters, Mix Characters, and/or Minimize Color Contamination | Regional Prompt, Adetailer, and Inpaint | My Workflow
Edit: 27.01.25
Hey, it's been a while—more than six months, to be exact. The AI/SD space changes so quickly that it’s hard to keep up with all the possible errors. Everyone uses different WebUIs and versions, so some might work while others don’t.
Sections 1 and 3 of this tutorial focus on the Regional Prompt Extension, which no longer works with the new Forge (i.e., since the import of Flux). Old Forge and Reforge might still support it. If you’re using the new Forge, you may want to install Forge Couple instead.
I’ve now added a fourth section covering SD Forge Couple. Most of the basic concepts are already explained in Sections 1 and 3, so this new section will focus on the usage of Forge Couple. The underlying logic is similar to the Regional Prompt Extension, but there are some differences.
(All images shown in Section 4 were generated on IllustriousXL/PaSanctuary.)
Edit: 30.06.24
I added a brief installation guide on how to install this extension. I will continue this tutorial section (Part 4) shortly after my exams. Things have been pretty busy lately, so I apologize for the inconvenience.
0. Intro
Hello everyone,
here is a little guide that will be updated from time to time. I will add different versions on top of the model page to show you some different images with their metadata, so you can copy and paste into auto1111/forge. I post this in a model page instead of article, because I can showcase images better this way, while also having a better view of comments I get. No need to download the file I attached here.
In this guide, I will go over Regional Prompt, Adetailer, and inpainting. This is also different on XL and 1.5, so the settings are not the same on both versions, but similar.
What do we need?
SD Forge Couple (Section 4)
Checkpoints and LoRA's
Any Character LoRA's, but works with baked-in characters as well.
Models, where I used/needed Regional Prompt:
Here is a small list of models that I published, where you might need or want a regional prompt for optimal results:
For Pony:
For 1.5:
For Illustrious:
Note for 1.5: 1.5 LoRAs require Latent Mode, which is currently not usable in Forge. This tutorial doesn't cover that for now but will do so later. It's a bit more complicated.
0.5 INSTALLATION:
First, we start our WebUI (in this case, Auto1111 or Forge). It's best to use the latest version of either one. After opening the WebUI, go to the Extensions Tab -> Install from URL. Paste the following link under URL for extension's git repository: https://github.com/hako-mikan/sd-webui-regional-prompter. Then, press Install.
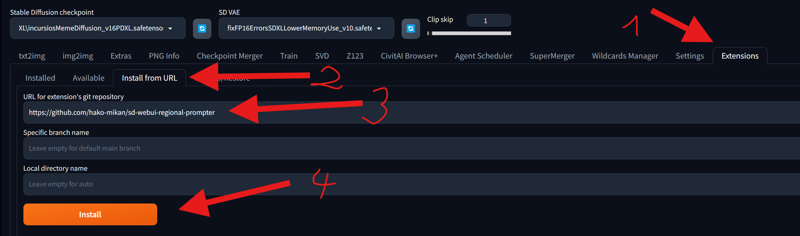 After doing that, restart your WebUI. I recommend closing the WebUI terminal and rerunning it.
Note: If you are using Colab or sharing your WebUI with the command-line argument --listen, you might need to add an additional command-line argument: --enable-insecure-extension-access. WARNING: Only use this command if you are the only one using your WebUI. If other people use your WebUI, you need to trust them, or you could lose your data or get hacked.
The file with the command-line arguments can be found in your WebUI folder. It's called webui-user.bat. Right-click and open it with a text editor or Notepad to edit it.
 You don't need to do this step if you don't share your WebUI. It's only necessary when you use
 --listen or when using Google Colab or something similar.
1. REGIONAL PROMPT Basic (Matrix) (Pony XL):
Overall Settings:
After installing all necesarry Extensions, you will see in your txt2img and img2img the tab "Regional Prompt".
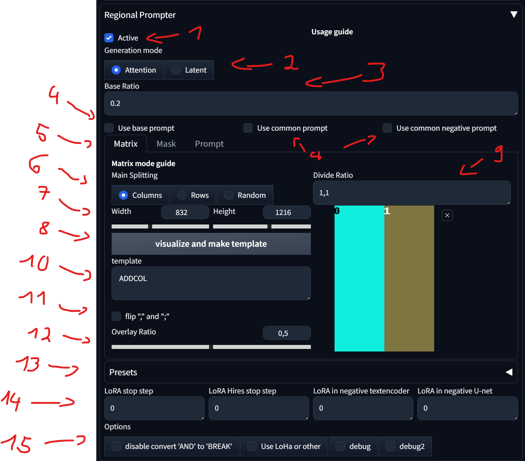
Activate/disable
There are two generation modes. For XL, only the 'Attention' mode is important, with or without LoRAs. The 'Latent' mode doesn't work properly IN FORGE, due to the XL encoder. A separate Tutorial section will be done for 'Latent' mode.
With the base ratio, we can change how strong the base prompt is. If the base value is 0.2, then the weight of the base prompt in the generation is 0.2, and the divided areas are 0.8.
Base, Common, and Negative Prompt:
'Use base prompt' affects the entire image, mostly used for backgrounds and/or characters, impacting all divided areas. I personally don't use it much.
'Use common prompt' copies and pastes all prompts in that section to all regions.
'Use common negative prompt' does the same for the negatives. This is only useful if you want to have a specific negative in a specific divided area. Otherwise, leave it unchecked, as the negatives will affect the entire image anyway.
Section for Matrix, Mask, and Prompt: We will see the differences between them later. For now, we will focus on Matrix.
Main Splitting: This allows you to change how you divide the template. Changing this and pressing 'visualize and make template' will update it to the template.
Changing Width and Height does not affect the image; it's there only for visualizing the template. You can leave it at its default setting.
Pressing 'visualize and make template' will update the template on the right side.
Dividing Ratio:
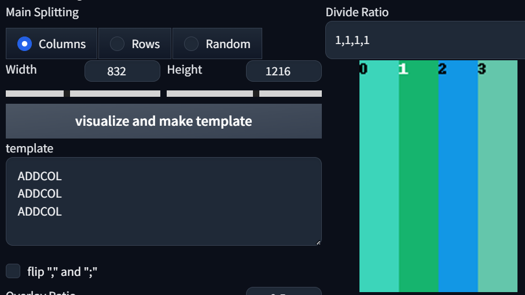
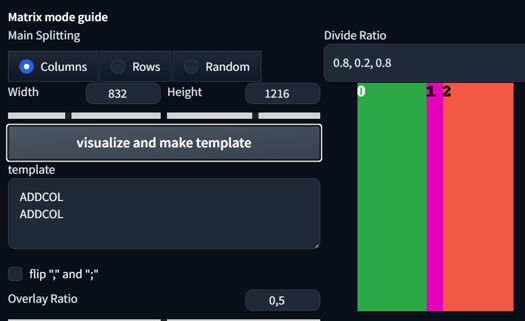
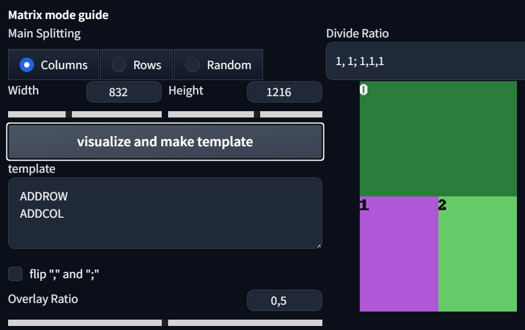
This divides your image into regions. Setting it to 1,1 will give you 2 regions. Setting it to 1,1,1 will give you 3 regions. You can even set different sizes for regions. Here are some examples:
1,1 Columns

1,1,1,1
0.8, 0.2, 0.8
1, 1; 1,1,1
1,1; 2, 3, 3

1, 1, 1; 1, 1, 1
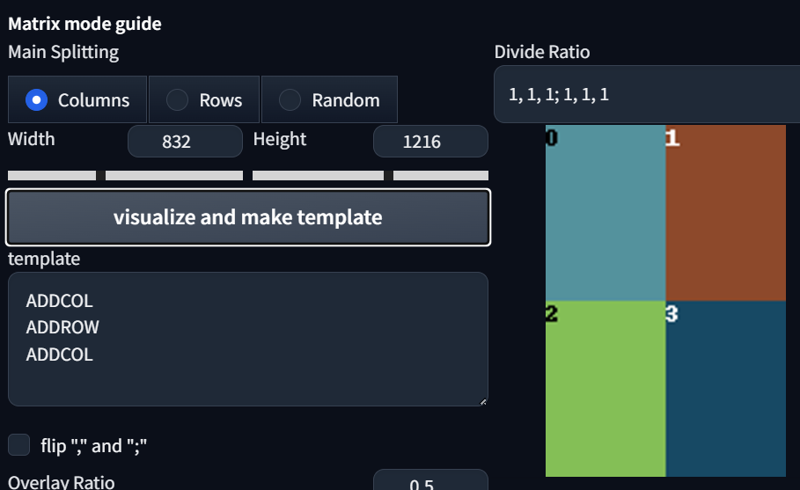
Shows the current template format and the order of regions.
Flips ',' and ';'. Fairly useless.
The overlay ratio might be an important factor in determining how much impact one region with its prompt and overlay has on other regions. If you require precise prompting and don't want much interaction between the regions, lower the ratio. If not, keep it at 0.5.
Your presets
Options for Latent, fairly useless for us in XL.
Options for other things that might be needed for debugging.
Prompting Multiple Characters:
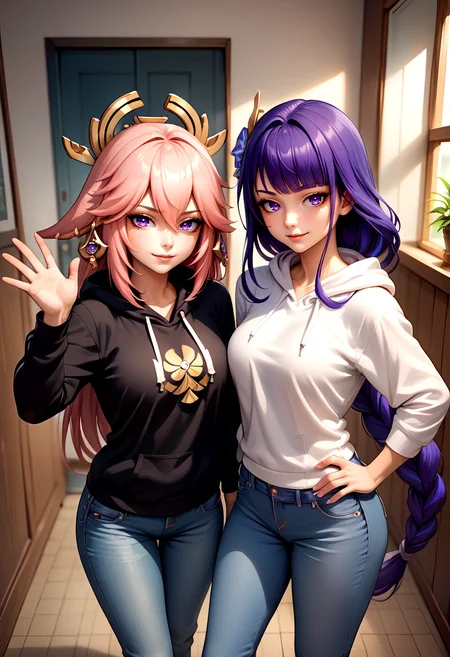
So, how do we use it? Let's start with something basic. First, activate the regional prompt, select the common prompt, divide the ratio to 1,1, create the template, and then set your prompts:
score_9, score_8_up,score_7_up, source_anime, indoors, standing, cowboy shot, 2girls, seductive smile, from above, hoodie, jeans, looking at viewer,

BREAK yae miko,
BREAK raiden shogun,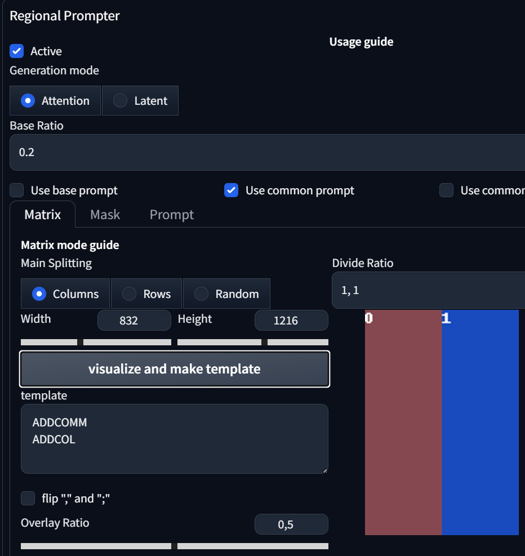


Okay, what do the prompts do here? We selected the Common prompt, which means the first line of the prompt will be applied to all regions. After the use of our first BREAK prompt, we arrive at our first region, Region 0. Here, I typed a baked-in character that is already quite stable without any additional use of LoRA. In this case, Yae Miko. After that, I added another BREAK to move to my second region and typed in another baked character, also known as Raiden Shogun.
See, that was pretty simple, right?
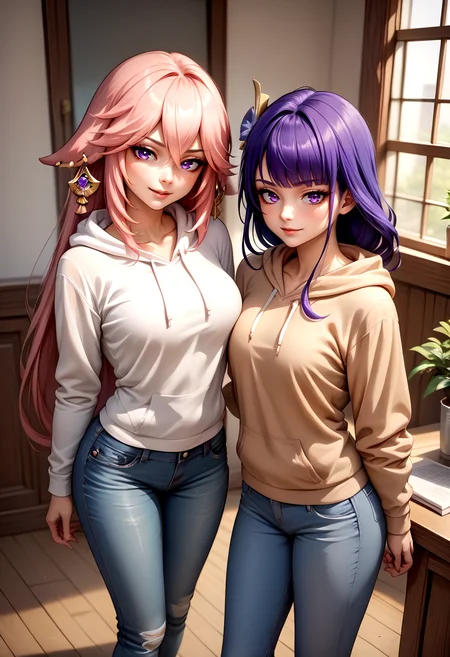
We can also make the prompt a bit longer or more complicated. Let's try the same settings, but with more prompts:
score_9, score_8_up,score_7_up, source_anime, indoors, standing, cowboy shot, 2girls, seductive smile, from above, hoodie, jeans, looking at viewer,

BREAK yae miko, black hoodie, waving,
BREAK raiden shogun, white hoodie, hand on hip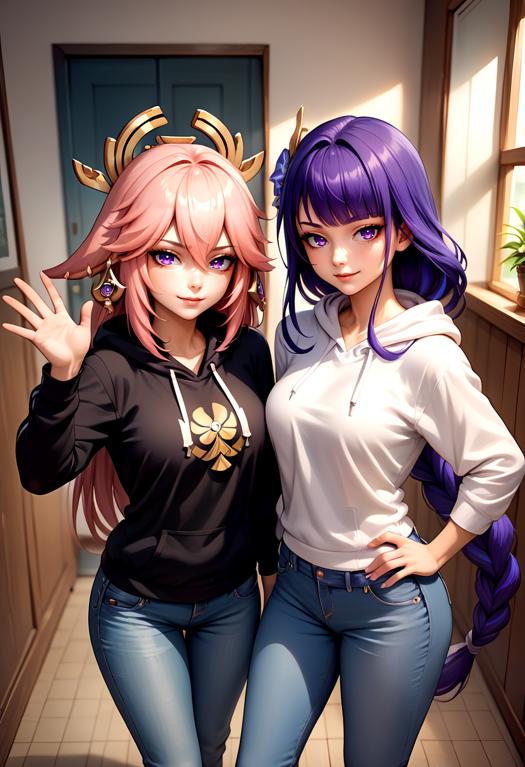
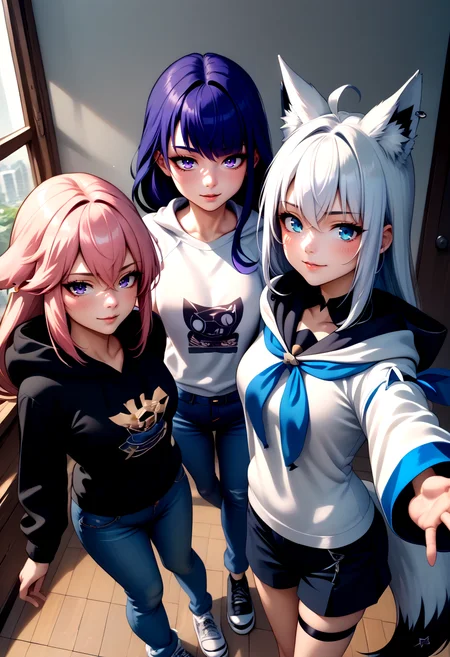
Okay, how about adding another character? Sounds crazy, right? Now, let's incorporate the use of LoRA for "Fubuki from @holostrawberry". Here are the prompts and settings:
score_9, score_8_up,score_7_up, source_anime, indoors, standing, cowboy shot, 3girls, seductive smile, from above, looking at viewer,

BREAK yae miko, black hoodie, hoodie, jeans,
BREAK raiden shogun, white hoodie, hoodie, jeans,
BREAK reaching towards viewer, <lora:fubukiXL:1>, fubukibase, white blouse, detached sleeves, black shorts, blue neckerchief, thigh strap, single thighhigh, white hair, single side braid, ahoge, piercing, fox tail, pentagram,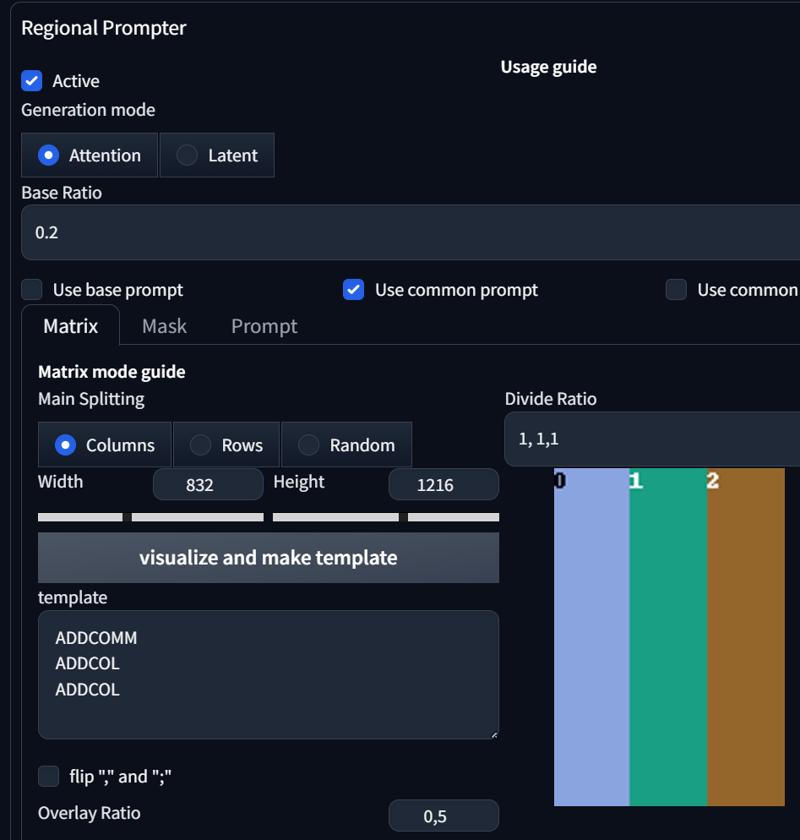
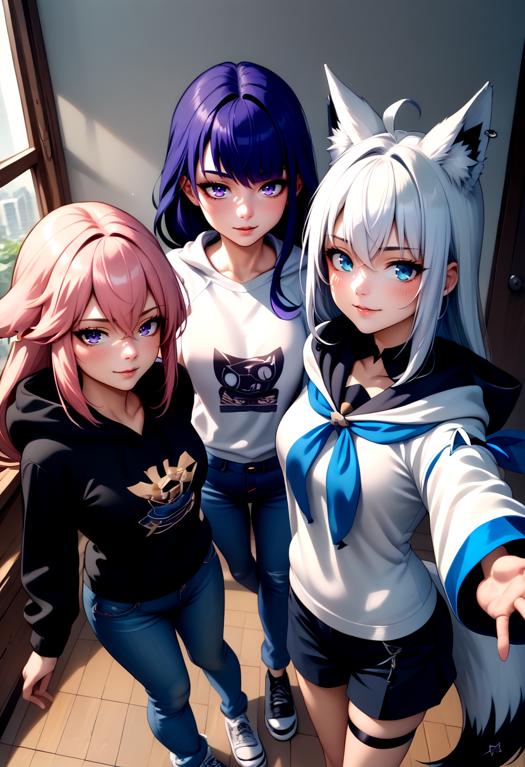
So, what changed? First of all, I tweaked the prompt slightly. I changed "2girls" to "3girls", swapped the positions of hoodie, jeans in the prompt, and added another BREAK to introduce another character. In the Regional Prompt Settings, I simply added another Divide Ratio; in this case, it's 1,1,1.
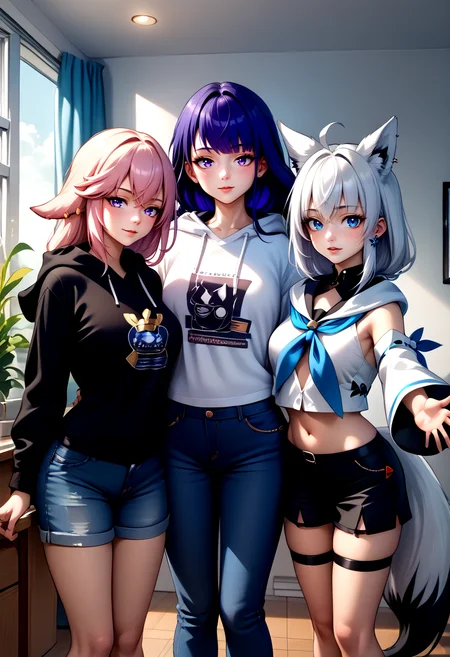
As you can observe, the results are becoming somewhat unstable. Incorporating elements like Cowboy shot, from above and generating images of 3 people can complicate maintaining the same scenario. However, by removing from above, we achieve this image:
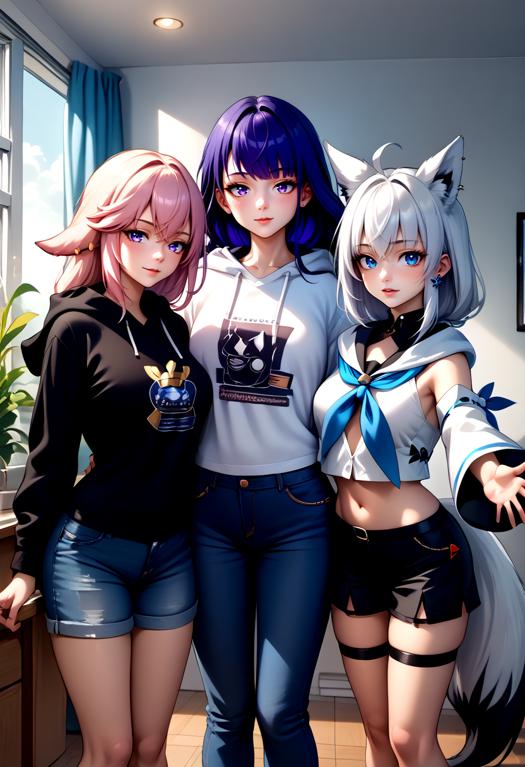
As you can see, our image becomes a bit more stable and follows the prompts more closely. What you prompt is very important; every single prompt can and will induce drastic changes. If something is not going according to plan in Regional Prompt, try to be more precise in your prompts.
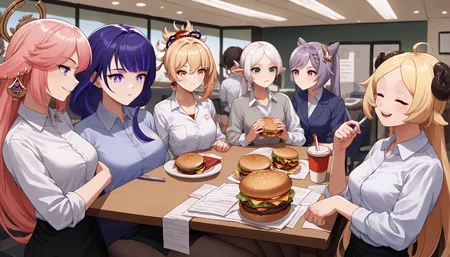
Let's prompt some more girls, shall we? Changing to a 1344x768 landscape format and increasing the number of sample steps from 24 to 30. Adding another two LoRAs Frieren and Watame from @ChameleonAI):
score_9, score_8_up, score_7_up, source_anime, 6girls, office, office lady, around table, table, food, beverage, burger, starbucks, shirt,

BREAK yae miko, smirk,
BREAK raiden shogun (genshin impact),
BREAK yoimiya \(genshin impact\),
BREAK FrierenBase, green eyes, white hair, long hair, twintails, earrings, <lora:ChamFrierenPonyXL:1>, eating burger,
BREAK keqing \(genshin impact\),
BREAK <lora:CHAR-TsunomakiWatamePonyXL:1>, TsunomakiWatame, sheep girl, long hair, ahoge, happy, sheep horns, blonde hair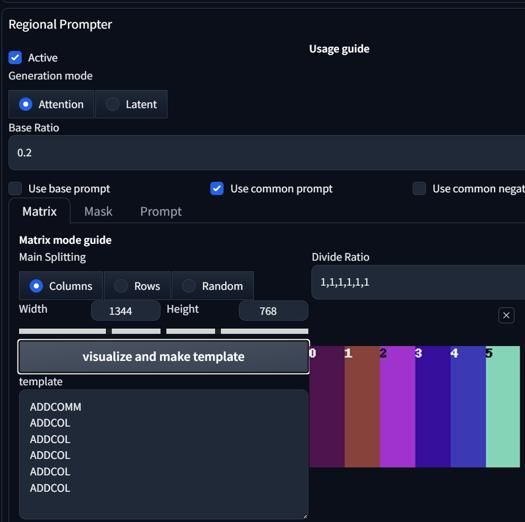
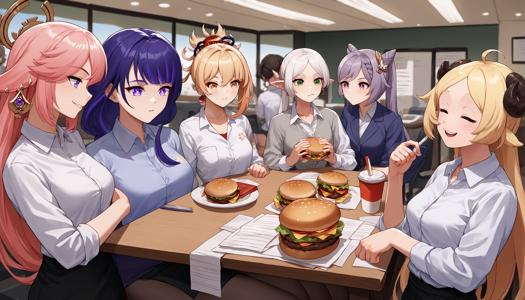
Cool, right? Using two different Character LoRAs while also prompting four baked-in characters in one image. With that many people, there's a high chance that you'll encounter image errors.
Now, let's combine some actions or concepts with multiple characters. As always, let's start with something basic and add "hug":
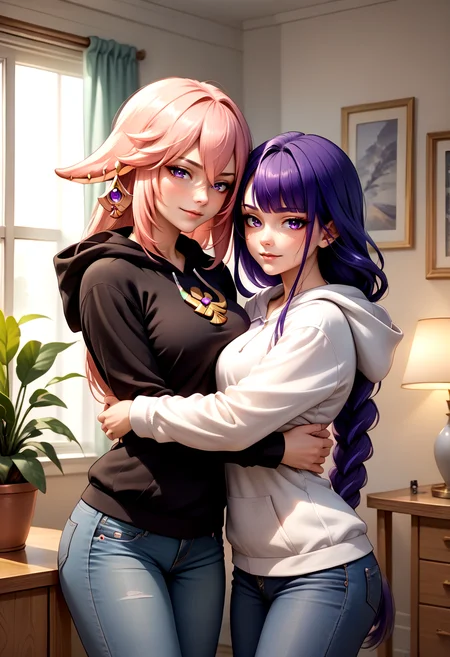
score_9, score_8_up,score_7_up, source_anime, indoors, standing, cowboy shot, 2girls, seductive smile, looking at viewer, hoodie, jeans, hug,

BREAK yae miko, black hoodie,
BREAK raiden shogun, white hoodie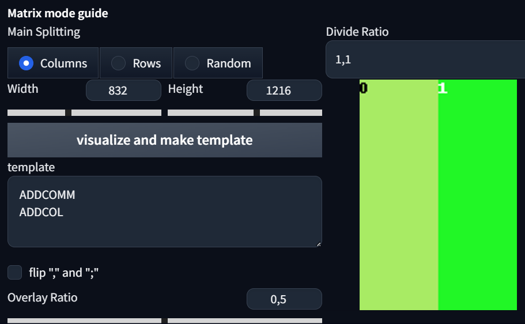

Hugging each other without much problem? Well, that's because our overall overlap ratio is high enough.
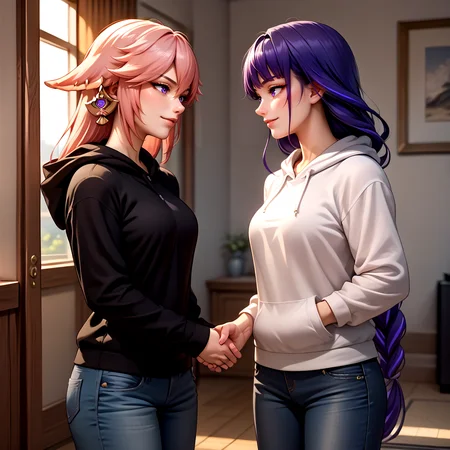
Now let's do it with a Concept LoRA called Handshake from @justTNP. Same settings, but with a different aspect ratio (1:1) and a different prompt:
score_9, score_8_up,score_7_up, source_anime, indoors, standing, cowboy shot, 2girls, seductive smile, looking at another, hoodie, jeans, handshake, <lora:concept_handshake_ponyXL:0.5>,

BREAK yae miko, black hoodie,
BREAK raiden shogun, white hoodie,
As you can see, I used that LoRA in the common prompt, but with half of the original weight (1 -> 0.5). Divide by the amount of regions you use, so if you have 2 regions, do half of the original LoRA weight. The reason for this adjustment is that each region takes the value, and the overall image shouldn't exceed a reasonable amount of LoRA weight.
Edit: Keep the batch size low. Max batch size should only be 4.
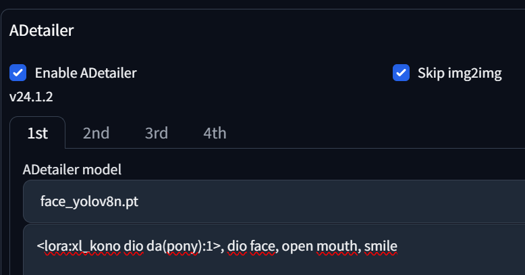
Also, using multiple characters requires you to adjust your Adetailer, because your Adetailer doesn't get affected by the regional split. It will mix faces and can dominate one eye color.
2. Adetailer
Adetailer is a very useful tool for detecting stuff and automatically inpainting. There are different YOLO models like face, hand, eye, full body, feet, clothing, etc., but we will focus here on the face model. There are two main ways to use Adetailer: one via Txt2Img and the other with Img2Img.
If you generate an image with one person and have your Adetailer on, it works normally. If you generate two people, with or without Regional Prompt, the attributes will most of the time be mixed. Dominant color or attributes from the other character will take over. Here is how to fix that.
Settings:
First, we need to adjust one setting when we install Adetailer. Go to Settings -> Adetailer -> Sort bounding boxes by -> Set it to "Position (left to right)"

That's it for now. Let's move on to image generation.
Adetailer (Txt2Img):
First, let us generate an image without adetailer on:
score_9, score_8_up, source_anime, 2girls, upper body,

BREAK white shirt, red eyes, black hair, long hair, tongue out, mole under eye,

BREAK black shirt, blue eyes, blonde hair, ponytail, smirk,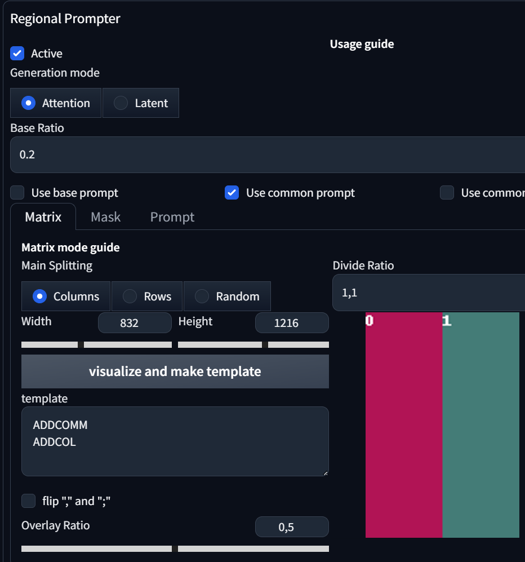
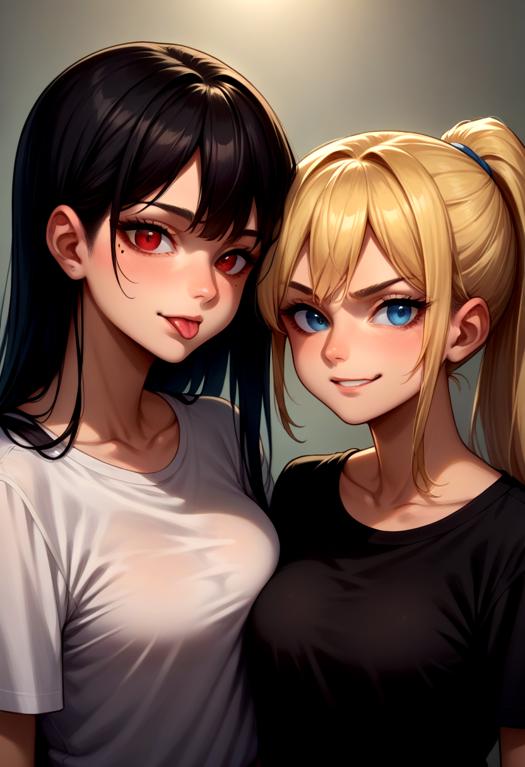
As you can see, the results are quite sharp even without the use of Adetailer. This is because we are using an upper body shot. Most faces will be sharp, but we can also see much more detail when we use Adetailer. Now, let's enable Adetailer.
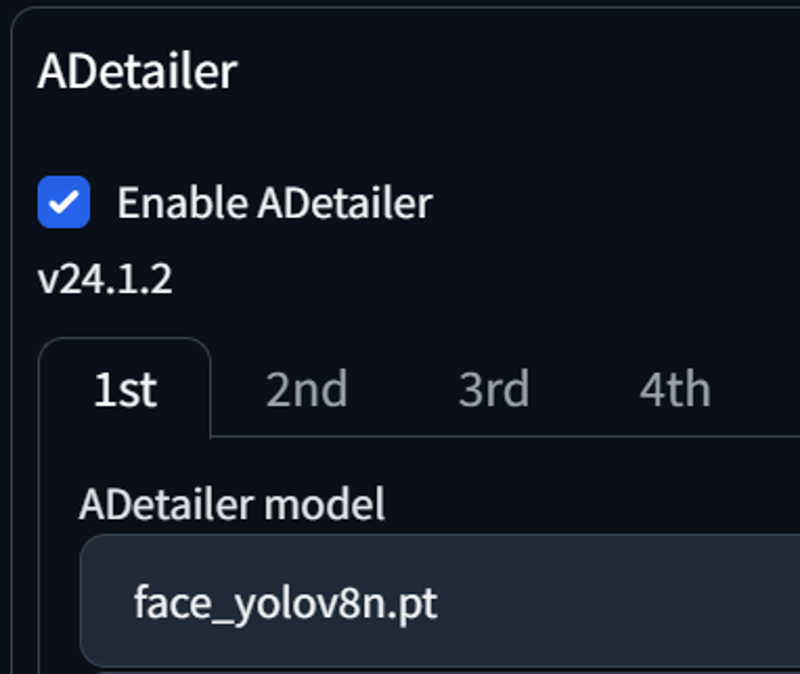

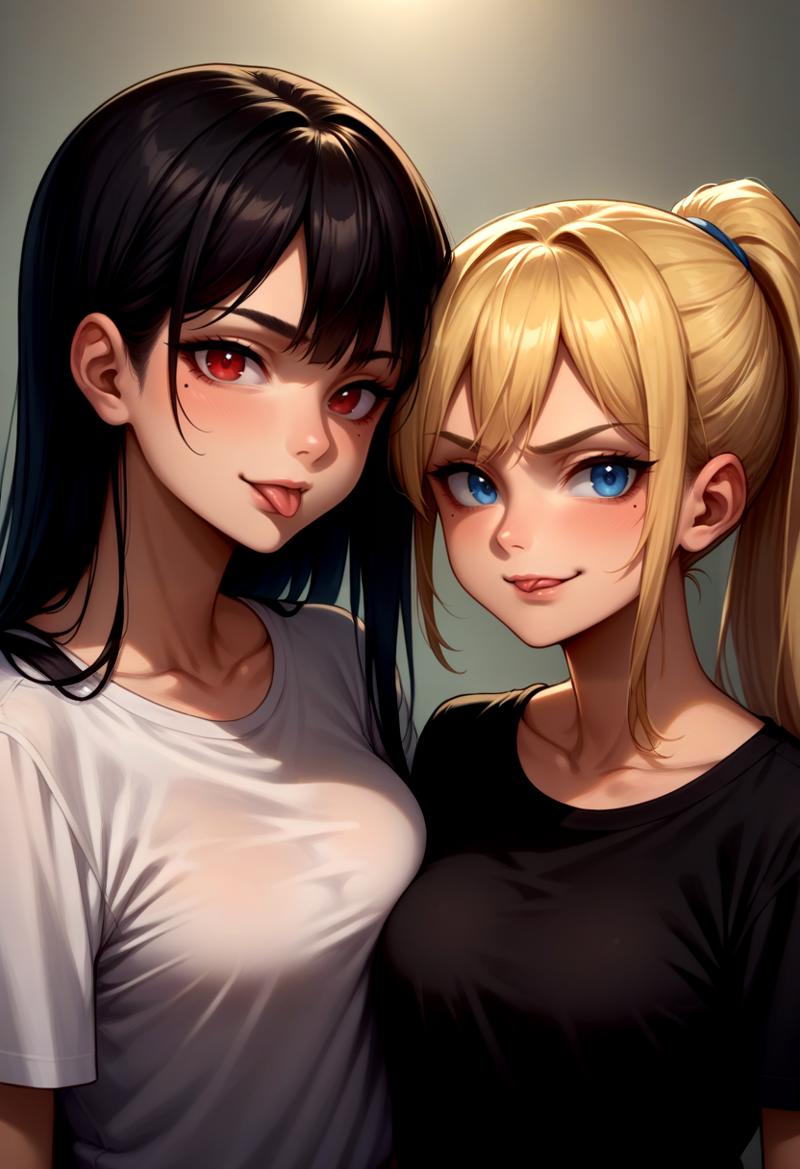
Both faces were detected by the Adetailer. As you can also observe, features like a mole under the eye, tongue out and smirk are getting mixed here. This is expected. How do we fix that? Easy solution: We use the [SEP] token in our Adetailer positive prompt. Generating this image again yields this result:

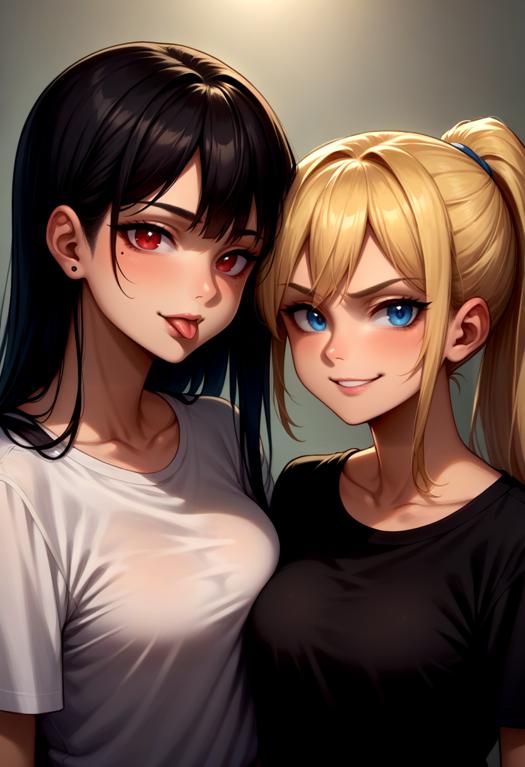
This was quite an easy example. Let's try this with a LoRA. Here are Ranni from Elden Ring and Vergil from DMC:
score_9, score_8_up, source_anime, cowboy shot, standing,

BREAK 1girl, <lora:Ranni_XLPD_CAME:1>, IncrsXLRanni, wavy hair, cracked skin, blue skin, colored skin, extra arms, extra faces, doll joints, white dress, witch hat, brown cloak, waving, crying,

BREAK 1boy, <lora:dmc5_vergil_ponyXL:1>, dmc5vergil, black coat, fingerless gloves, pants, smirk,
without adetailer

Adetailer detecting Faces:
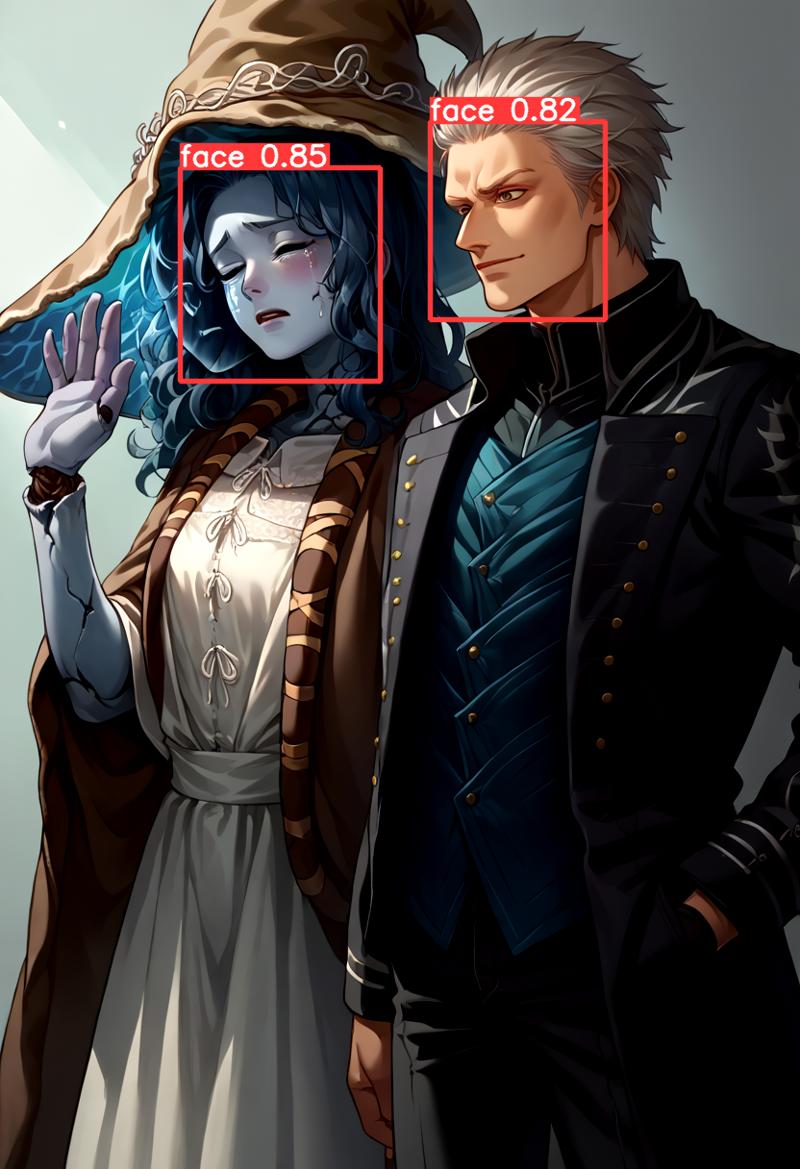
Adetailer without Prompt:
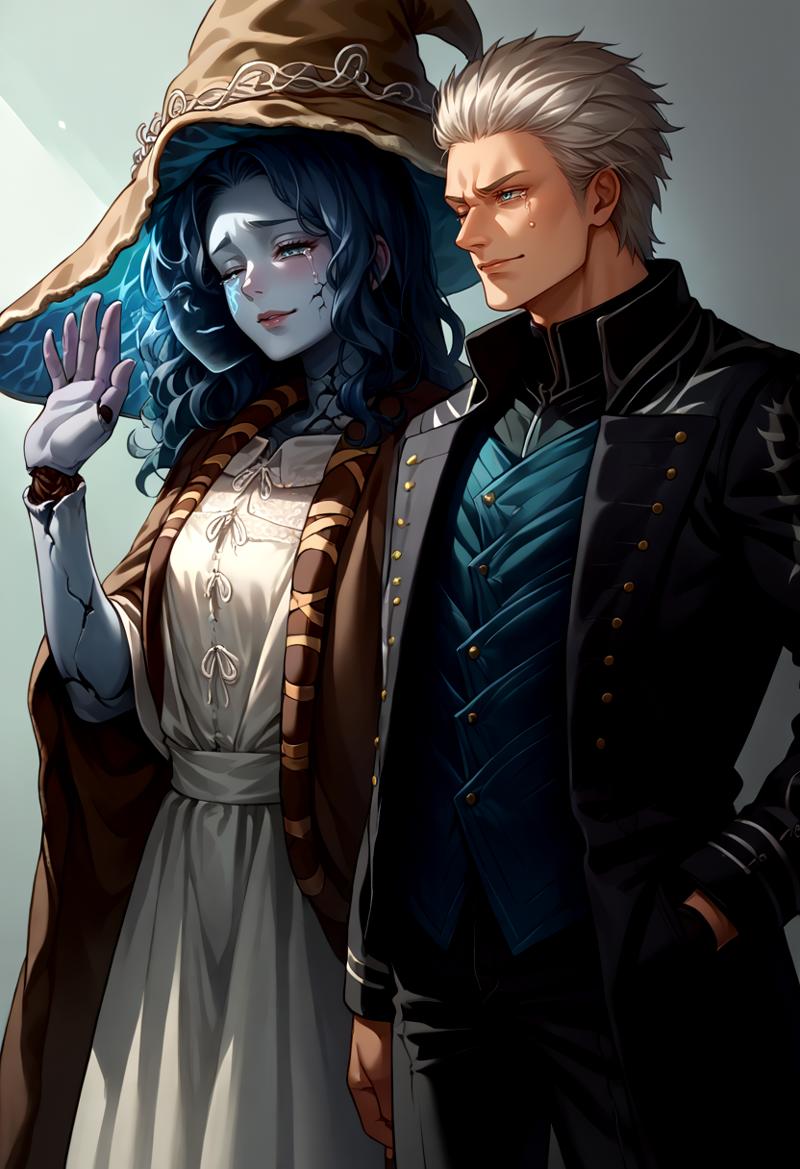
As you can see here, Vergil got some attributes from Ranni, like one eye closed and her crying. Let's fix that with this Adetailer prompt:
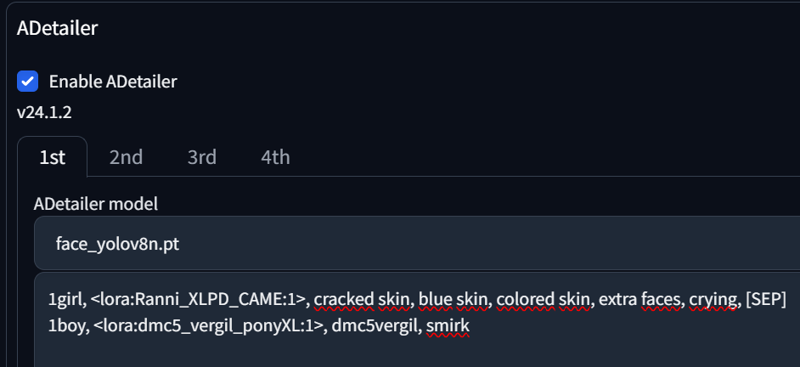
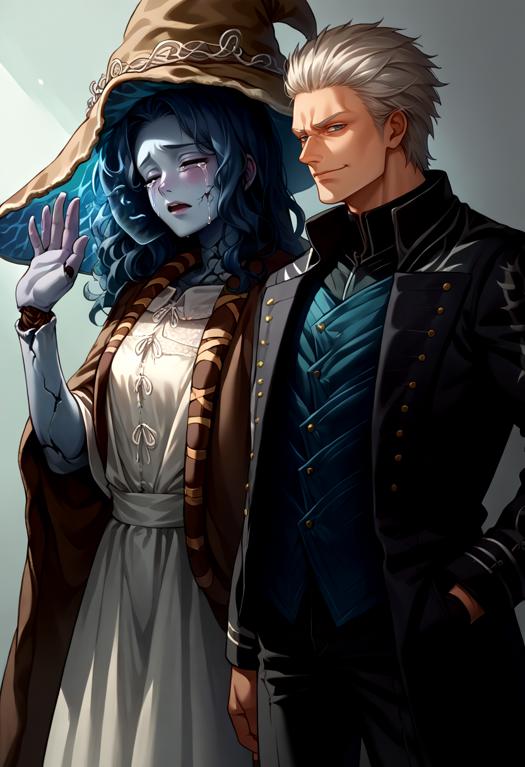
And it's done. Nothing more is needed here.
One final aspect you need to be aware of is that some VAEs leave marks around the faces. I'm currently using flatpieceVAEXL, and it can get quite messy, especially with other color VAEs. Here is one example:
score_9, score_8_up, source_anime, 1girl, solo, looking at viewer, cowboy shot, medieval, grass, flower field, cloudy sky, red eyes, long hair, black hair, shirt, jeans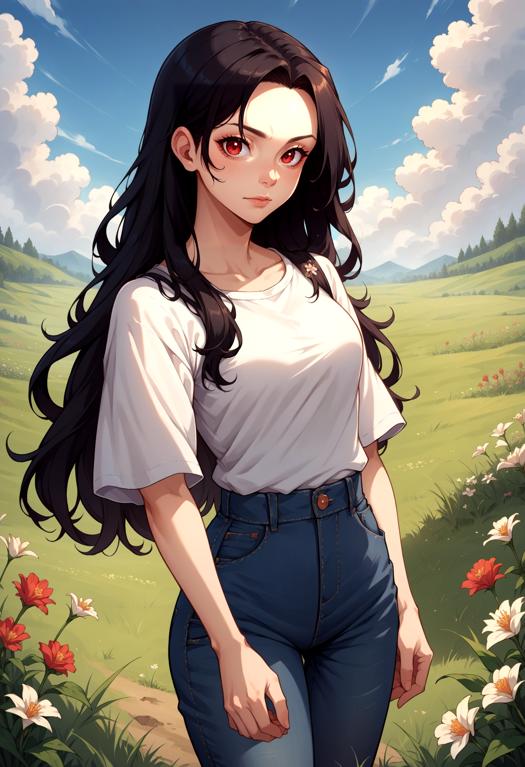
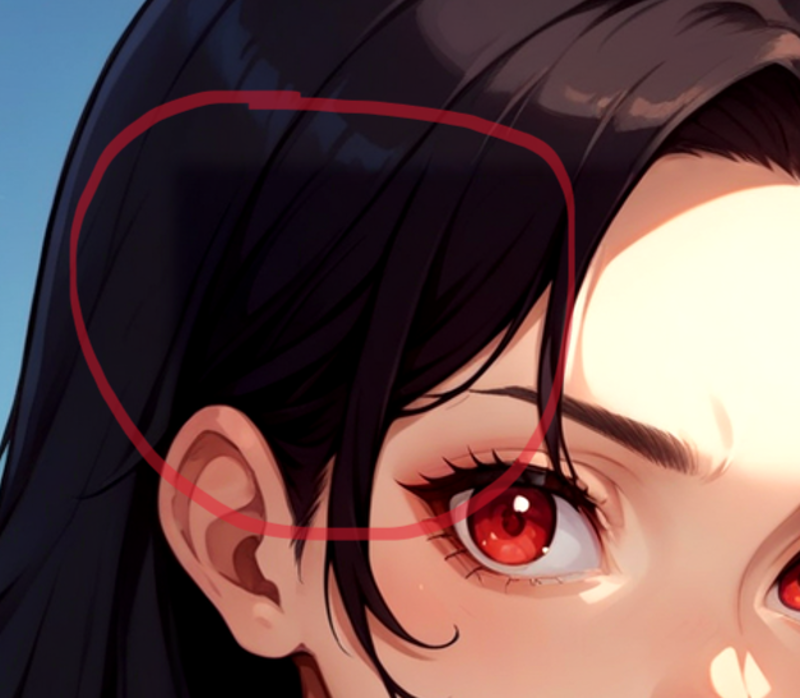
As you can see, it leaves a square, that looks very off. There are 2 ways to fix it.
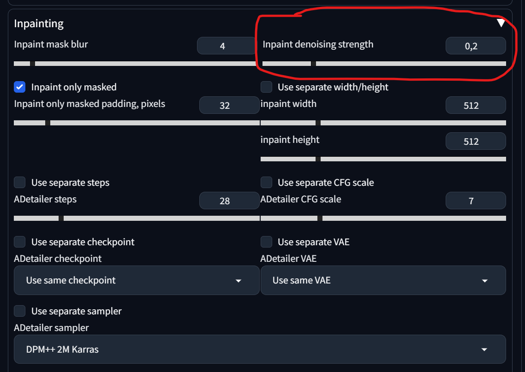
1) Adetailer -> Inpainting -> Inpaint denois strength from 0.4 to under 0.2
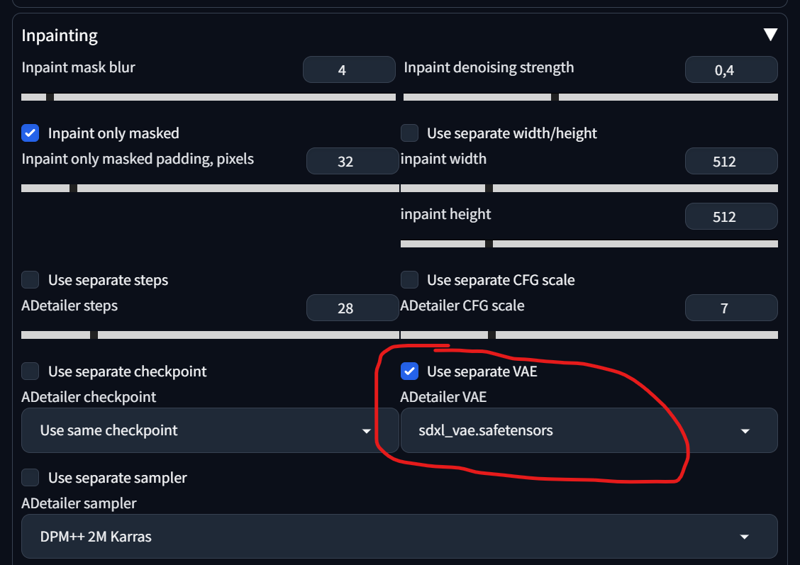
2) Adetailer -> Inpainting -> Use separate VAE -> sdxl_Vae (default) or something more neutral
Both are viable. Here is the Result:
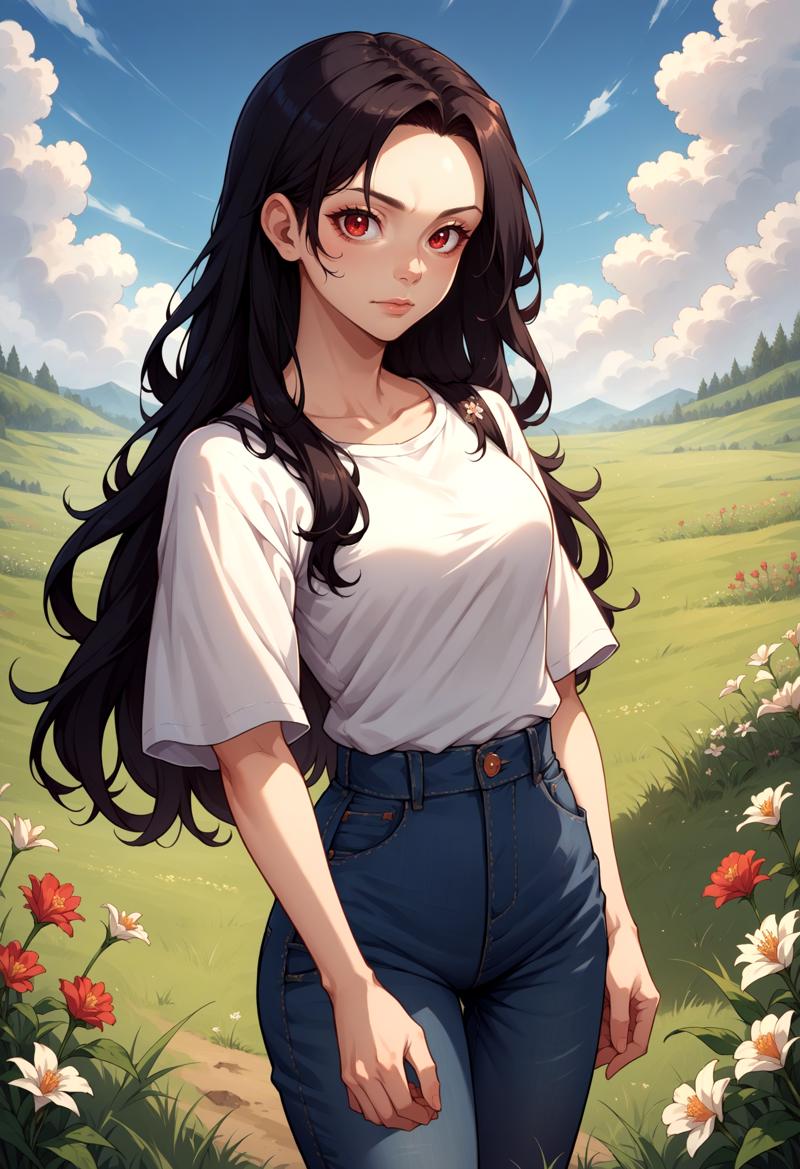

Let's move to the next section.
Adetailer (Img2Img):
If you have an image and you don't want to use Adetailer in txt2img (to save VRAM), then you can move that image to the img2img tab. This way, you have more control over the prompts you want to experiment with, without having to regenerate that image over and over again. Our starting image is this:
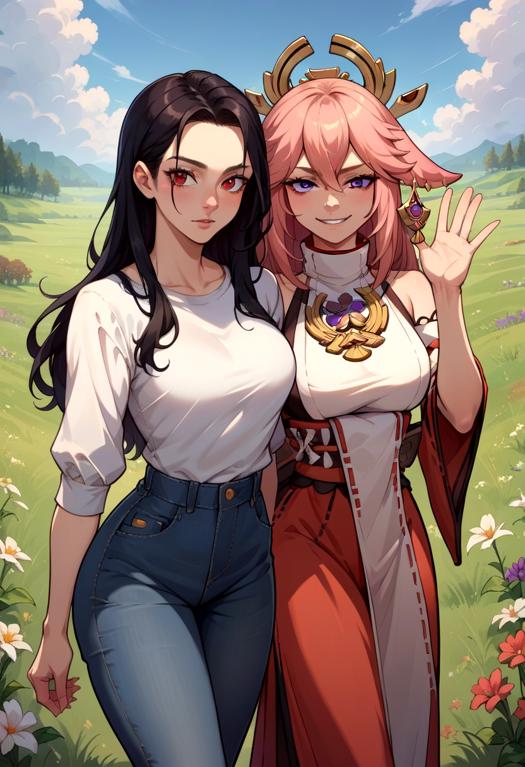
As you can see, the faces are somewhat off. We'll move that image to img2img now and adjust our settings and prompt:


Important here:
set width and height to 1024x1024 (for XL) or 512x512 (for 1.5)
set denois strength to 0.9 (in img2img)
set your prompt in your adetailer
enable "Skip img2img"
The Result:


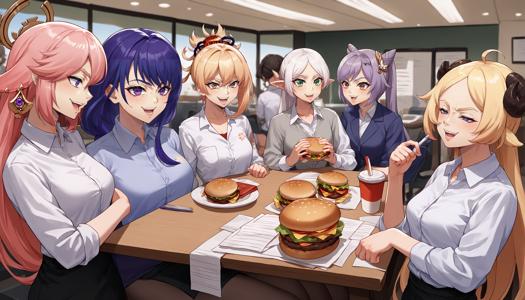
Okay, this seems to work quite well with 2 faces. But how about multiple faces? That's also quite straightforward. Let's take the initial image from the Regional Prompt:

Setting prompts:

Adetailer detecing:
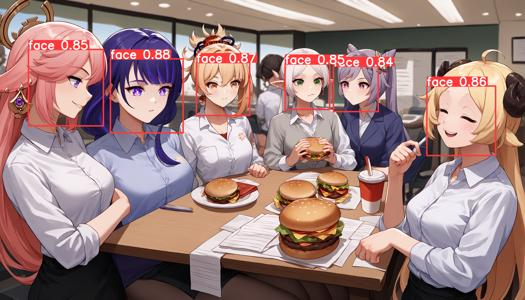
Result:
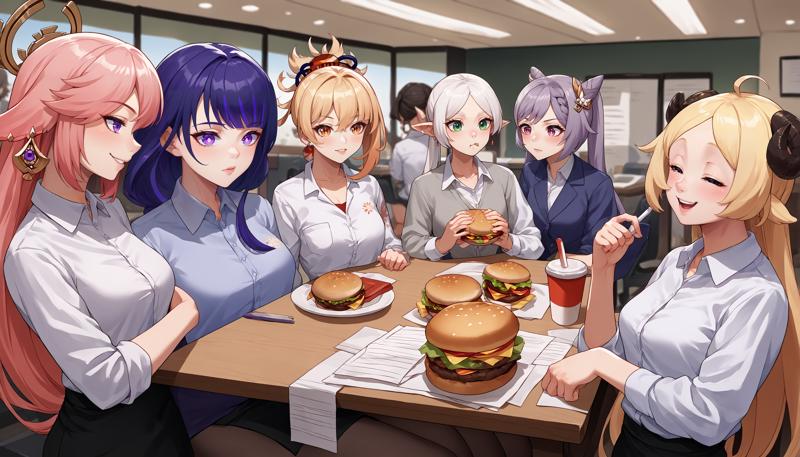
As you can see, Adetailer detected 6 faces. We separated each face with a [SEP] token and adjusted every face accordingly, from left to right. You might wonder what would happen if I just input 2 prompts with one [SEP] token for 6 faces. Well, the first face receives the first prompt, and the other 5 faces receive the second prompt.
If you use only one prompt, you can also create something funny. Here is the DIO's Face LoRA:
Well, that's everything for this section. The next update will focus more on the Regional Prompt Mask instead of the Matrix.
3. Regional Prompt (Mask)
The mask mode is a very useful tool for directly painting over the region where you want your prompt to apply. It also allows for better control over the regional overlap. @PotatCat is a big fan of the Mask mode, and it's understandable why. Check out his image gallery if you want to try and see what's possible.
Overall Settings and inpainting the Area:
First, let me introduce you to the overall settings for it. It might seem a little complicated at first, but bear with me. Instead of choosing "Matrix" in our Regional Prompt, we are going to choose "Mask" now.
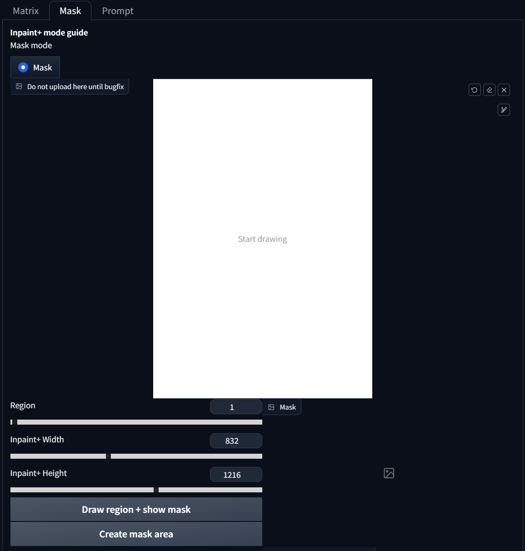 We first want to adjust the width and height to our initial size that we aim to generate. In my case, it's 832x1216. After that, you press "Create mask Area." That's our first step. Now we can start drawing. After drawing our region, we press "Draw region + show mask.
 As you can see, the Region Slider changed from '1' to '2', while also displaying a mask beside it. If you now draw another region and press 'Draw region + show mask' again, it will automatically advance to the next region and update the output mask.
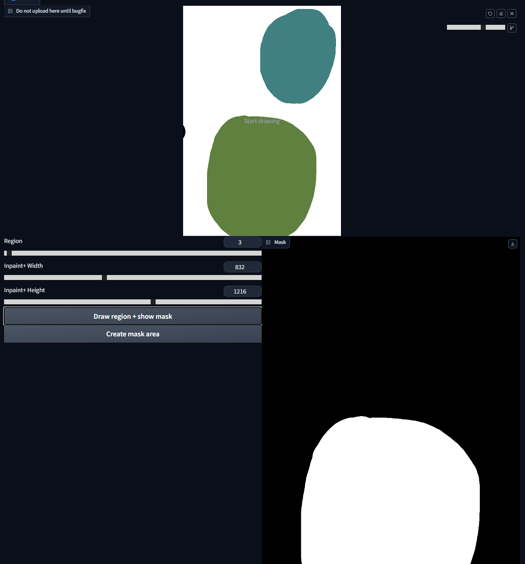 It's possible to add to existing regions by reselecting the same number and drawing as usual. In this case, we choose Region 1, paint it, and press 'Draw region + show mask' again.
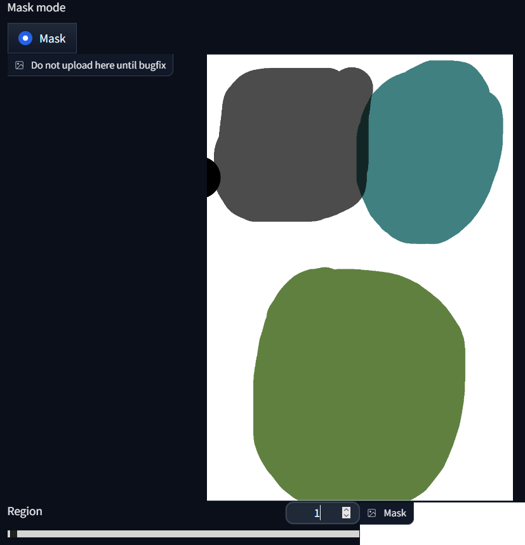
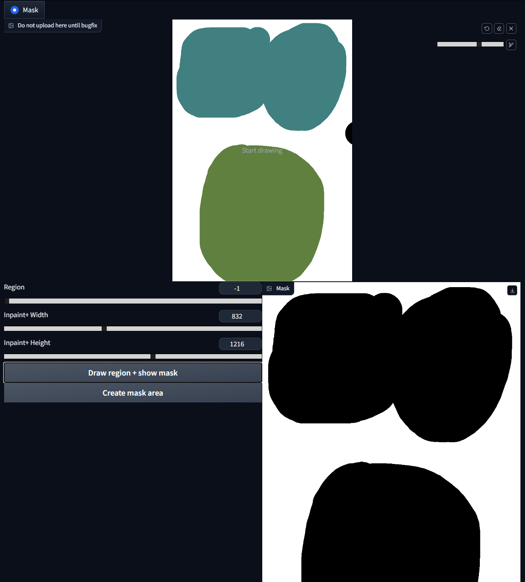
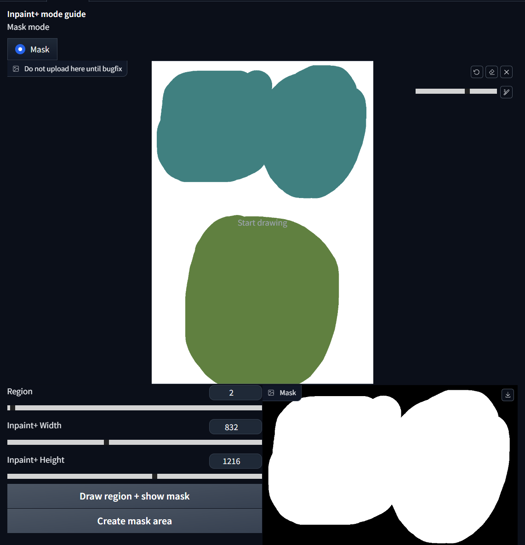 We can also display all the regions in the mask area by selecting -1 on the Region Slider and pressing 'Draw region + show mask'.
Special Case for Base Prompt:
Now, let's discuss the Base prompt. Using both Base prompt and Common Prompt in mask mode is advantageous because the Base prompt will fill all the non-masked areas.
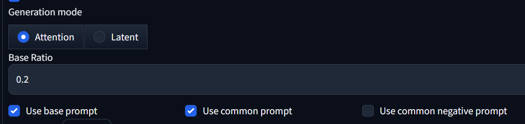 When the base is off, any non-colored regions are added to the first mask (and thus should be filled with the first prompt). When the base is on, any non-colored regions will receive the base prompt in full, while colored regions will receive the usual base weight.
The Base Ratio in this case can be set to 0 if you want to avoid any bleeding between the background and masked area. Alternatively, you can set the weight higher, like a 0.2 ratio. The inpainted area has an impact of a 0.8 ratio in this scenario. I would suggest staying at 0 or 0.2 and not going higher.
Prompting in Mask:
Now that we are using Mask mode with a Base prompt, we need to slightly adjust our prompting approach. Starting small, we activate "base prompt" and "common prompt", mask our area, and prompt:
score_9, score_8_up,score_7_up, source_anime,
BREAK forest, grass,
BREAK yae miko, from behind, sitting, full body, kneeling,
BREAK moon, full moon,
BREAK hill,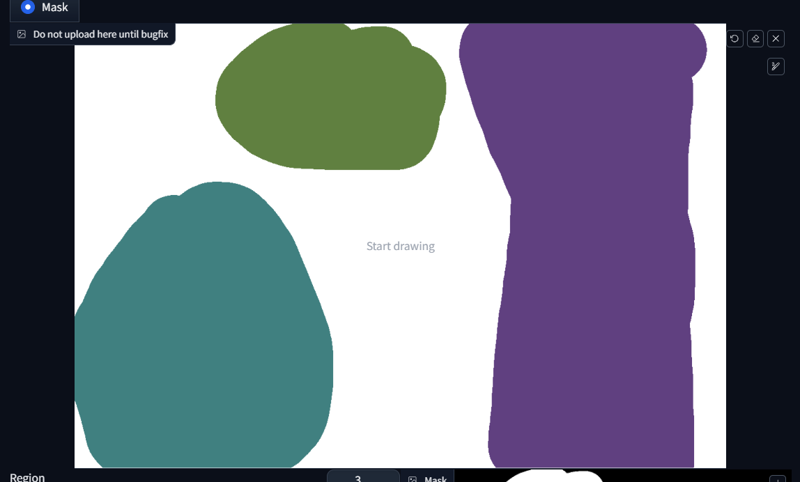
 Okay, what happend?
The first prompt: score_9, score_8_up,score_7_up, source_anime will be applied to all regions because it's our common prompt.
The first BREAK describes our base prompt, in this case BREAK forest, grass,.
Our first region begins with light blue mask and prompt yae miko, from behind, sitting, full body, kneeling.
Our second region is green with the prompt BREAK moon, full moon.
Our last region is pruple with the prompt BREAK hill.
Our three regions receive their respective prompts, and our base prompt fills out everything that is not painted.
Let's try something else, shall we? Now with LoRAs:
score_9, score_8_up,score_7_up, source_anime,

BREAK burning kitchen, messy, flames,

BREAK <lora:Doro_X_PDXL_V1:1>, doro, burning, cooking, creature, :3, chibi, pink hair, purple eyes, hair bun, hair bow, no humans, white skin, four legs, solid circle eyes, no pupils,

BREAK <lora:elie-pdxl-nvwls-v1:1>, zeroElie screaming, horrified, arms up, hands behind head, standing, black hairband, hair ribbon, long hair, ascot, uniform, long red sleeves, white dress, pencil skirt, belt, white hair,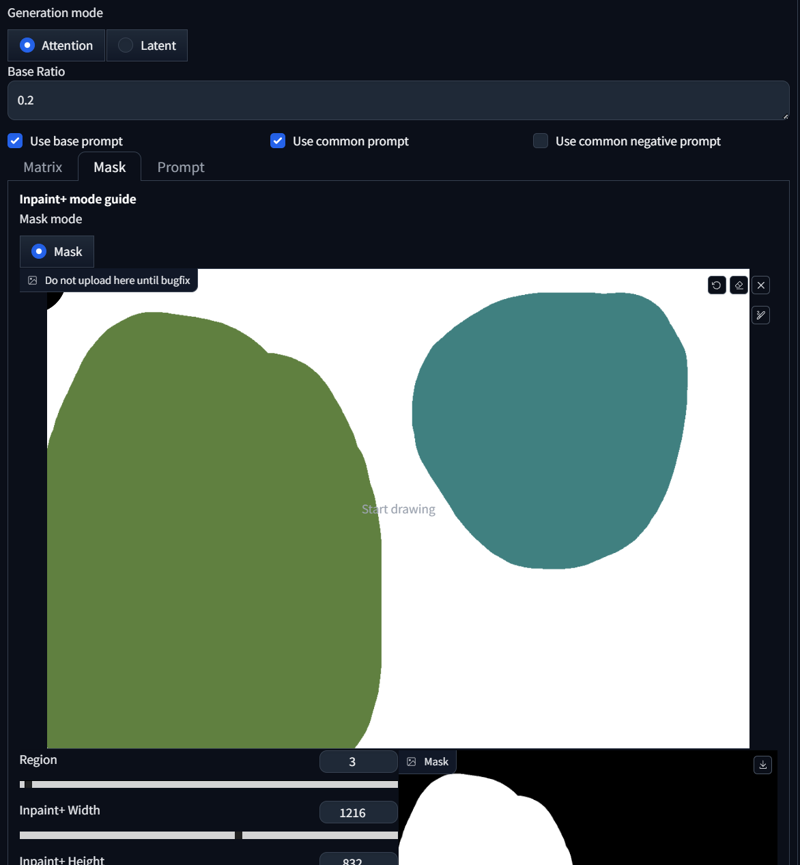
 As you can see, both regions received our dedicated prompt. That was pretty simple. What else can we do? We can create crossover regions. Here's an example:
score_9, score_8_up, score_7_up, source_anime, 2girls, princess carry,

BREAK cherry blossoms, outdoors, day,

BREAK raiden shogun, expressionless, holding person, black shirt, jeans,

BREAK yae miko, happy, black pantyhose, pencil skirt, white shirt, office lady, 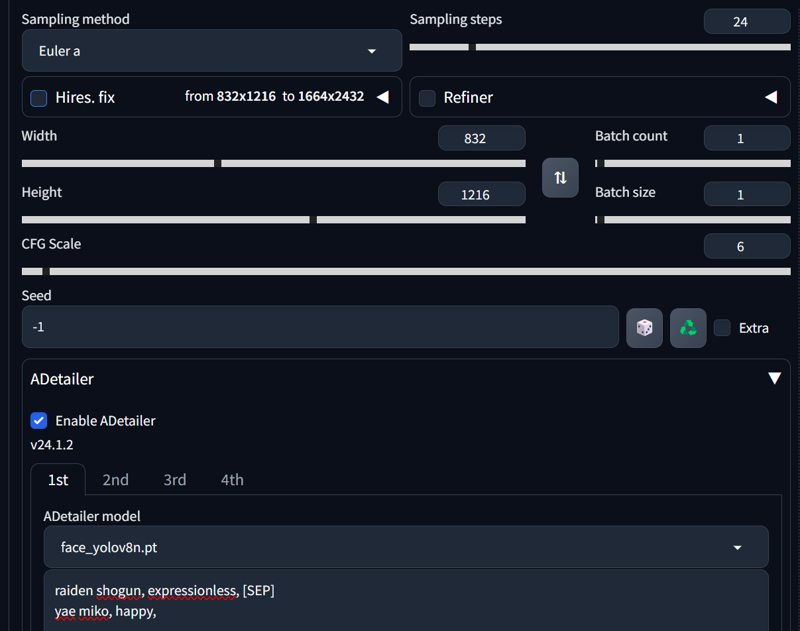

 We also have to adjust Adetailer, as we learned before. As you can see, we can overlap two regions if the interaction extends across a region. Unfortunately, such things don't work in Matrix mode, but Mask mode facilitates this.
It's not only about overlapping; elements can also coexist within a single inner region. Here's another example:
score_9, score_8_up,score_7_up, source_anime,

BREAK cherry blossom,

BREAK 1girl, red eyes, black hair, white shirt, long hair, seductive smile, holding creature, holding pikachu,

BREAK pikachu, pokemon (species), smile, open mouth,

BREAK bird, flying bird
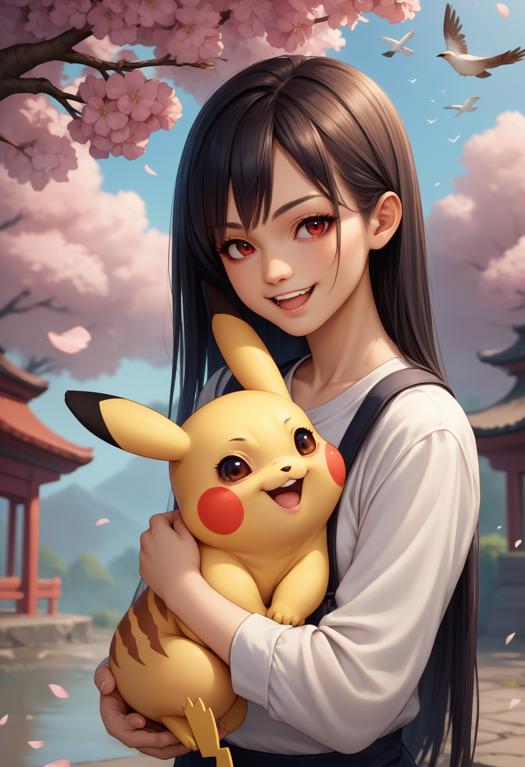 This makes holding animals or objects rather easy. But sometimes, you want to capture the imprint of the object, and SD doesn't quite catch it. You can also accomplish this in Mask mode.
If we prompt without Regional Prompt
score_9, score_8_up, score_7_up, source_anime, 1girl, cherry blossoms, shirt, watermelon, watermelon print, jeans, yae miko, it tends to give us this Result:
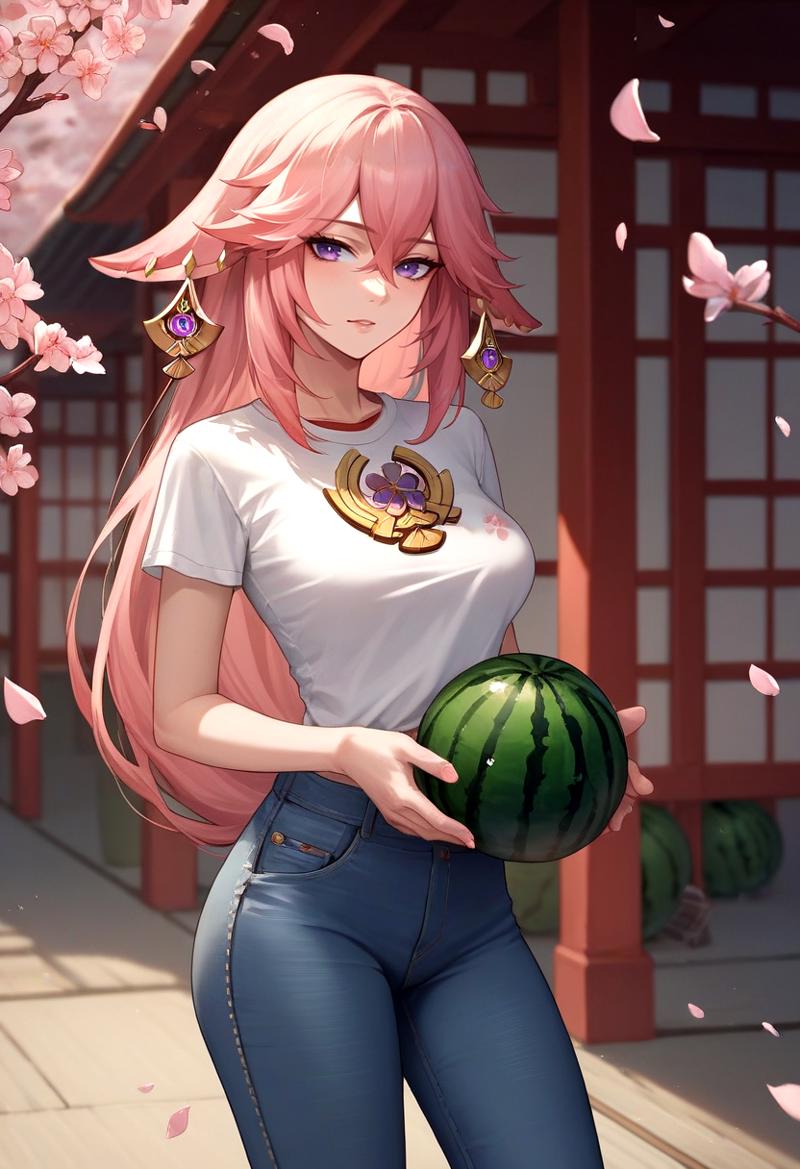 If we prompt without Regional Prompt, it tends to generate the object while holding it, despite prompting for a
 print. If we include Regional Prompt, that changes:
score_9, score_8_up, score_7_up, source_anime, 1girl,
BREAK cherry blossoms,
BREAK shirt, watermelon, watermelon print,
BREAK jeans,
BREAK yae miko, 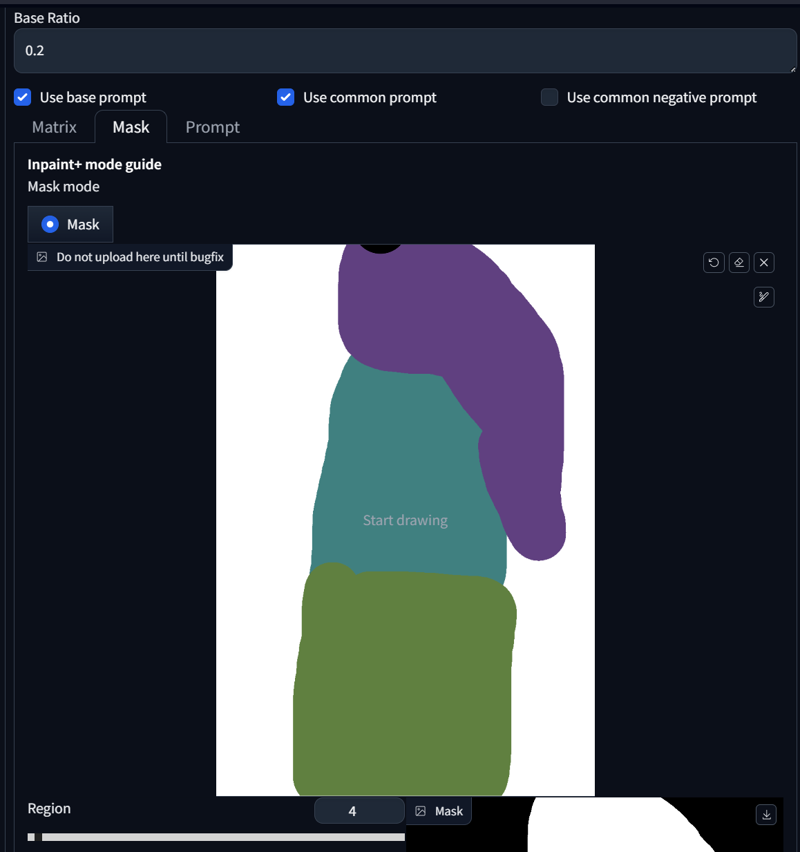
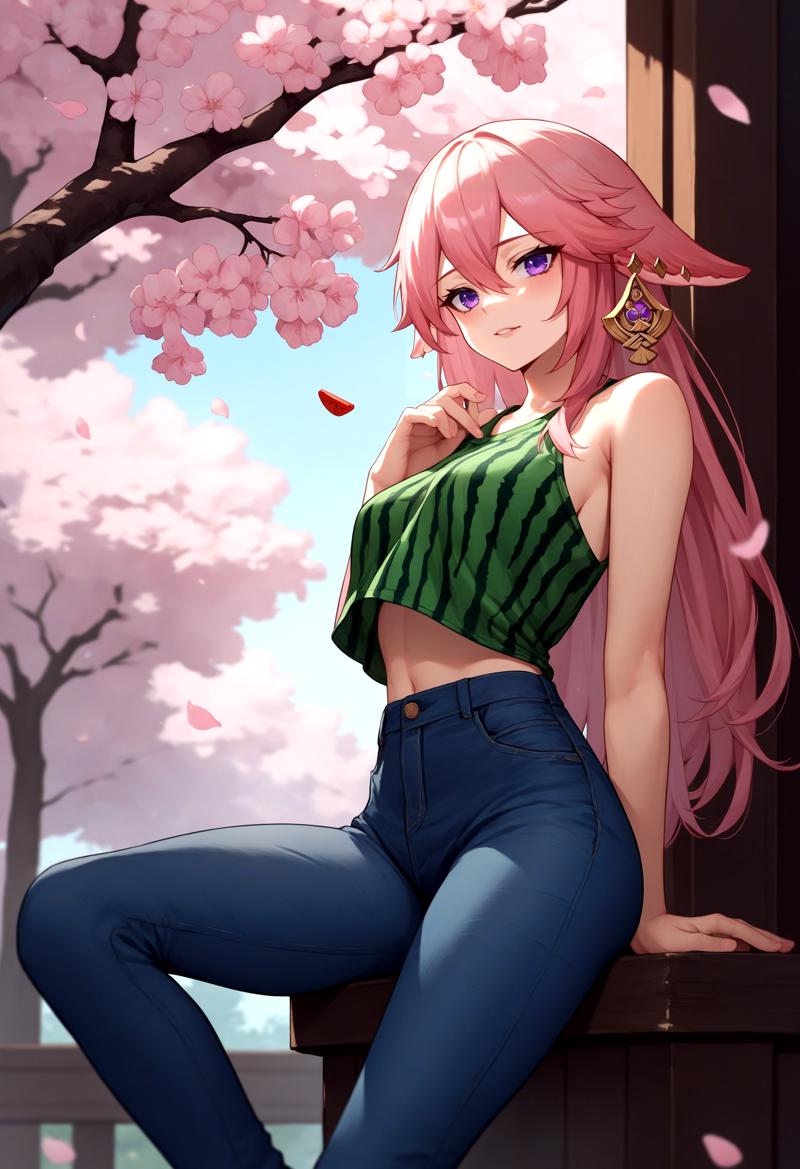 That's it. This part was rather quick because most of it was already explained before. I will be away for 3 weeks now, so the next update might take a while. The next part will include the Inpaint section on how to correct mistakes and reduce blur.
4. Forge Couple - Advanced
(Forge Couple works in ComfyUI. See here: Link1 & Link2)
Overall Settings:
After installing all necessary extensions, you’ll see a “Forge Couple” tab in both your txt2img and img2img interfaces.
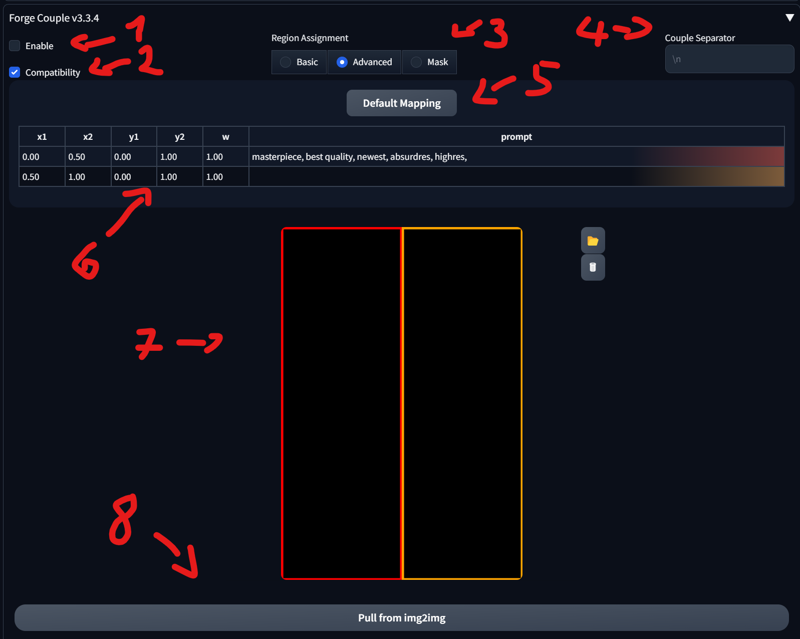
Enable/Disable
When the option is enabled: The extension will not function during the Hires Fix pass, to improve compatibility with other extensions..
Basic, Advanced, and Mask:
Basic: Divides the image into multiple tiles. You can configure the direction on this tab. I don’t use it much, so it won’t be covered here.
Advanced: Lets you specify each region manually.
Mask: Similar to Section 3 of this tutorial, where you can mask specific areas instead of using a matrix.
Couple Separator: When left empty, it defaults to “\n” (i.e., pressing Enter creates a new line). It’s best to leave it as is.
Default Mapping: Resets the current matrix.
Main Splitting: Allows you to change how the template is divided. Changing this updates the template accordingly.
Template: Shows a visual representation of the current splitting and mapping.
Pull image from img2img: Imports the image from img2img.
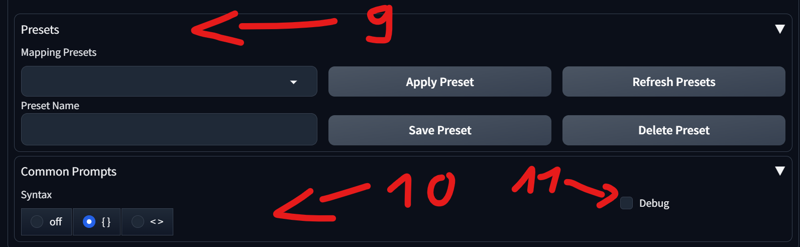
Presets: Lets you select or save your own presets.
Common Prompts: Lets you choose the syntax for common prompts.
Debug: Enables debugging.
SD Forge Couple - Advanced:
The mapping might seem overwhelming at first. Let’s start with the default configuration:
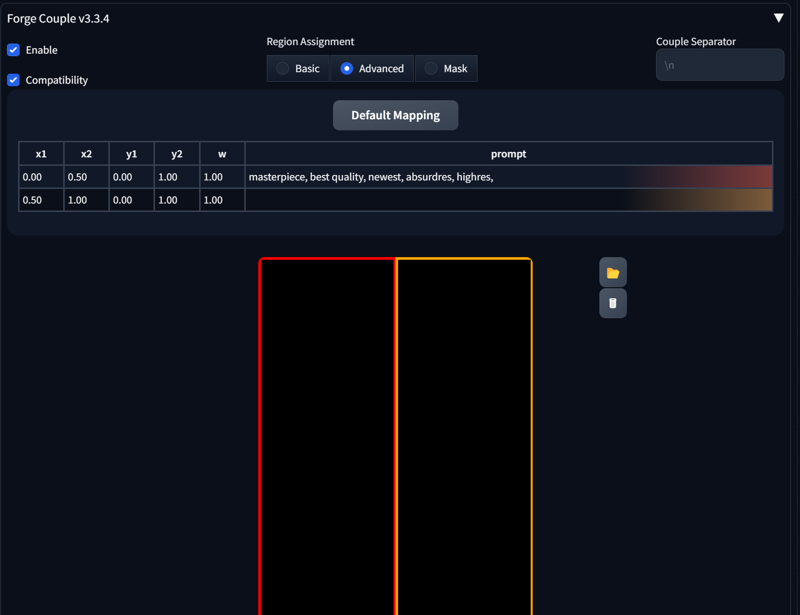 Enable Forge Couple and go to the Advanced section. The first line already contains a prompt; this is the prompt you use in your generation tab:
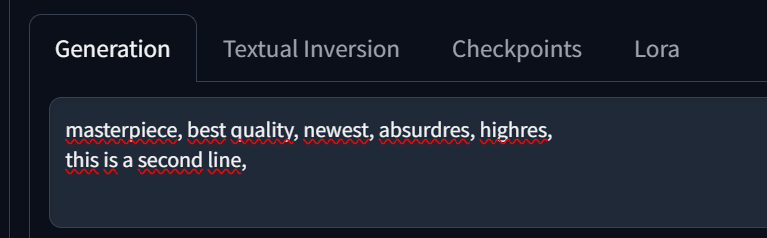
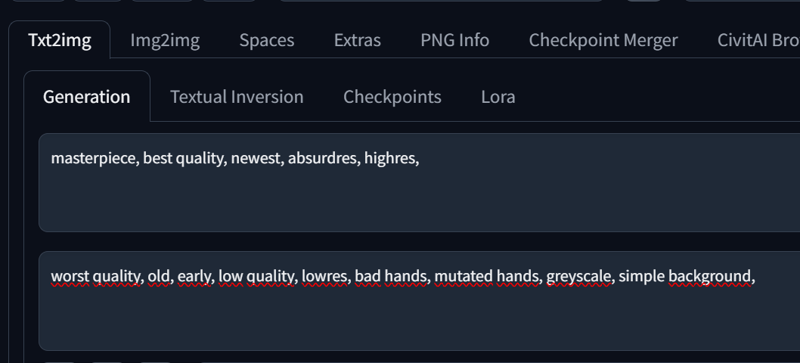 When you add a new line, it appears as the second line. You can also edit the prompt directly in Forge Couple—whichever way you prefer.
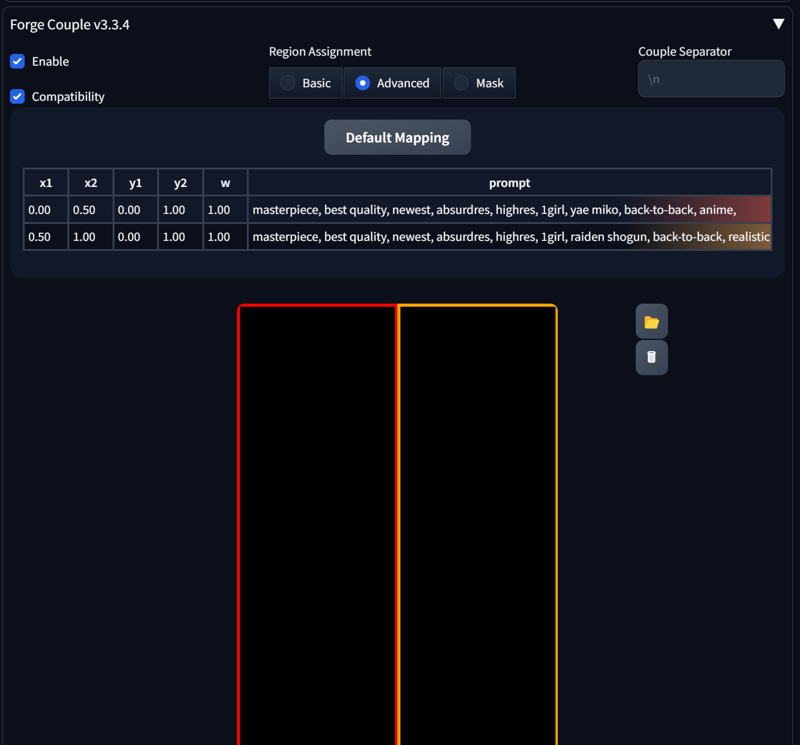
 On the right, you’ll see colors indicating which region each prompt applies to. Clicking on a prompt will highlight the corresponding area in the template.
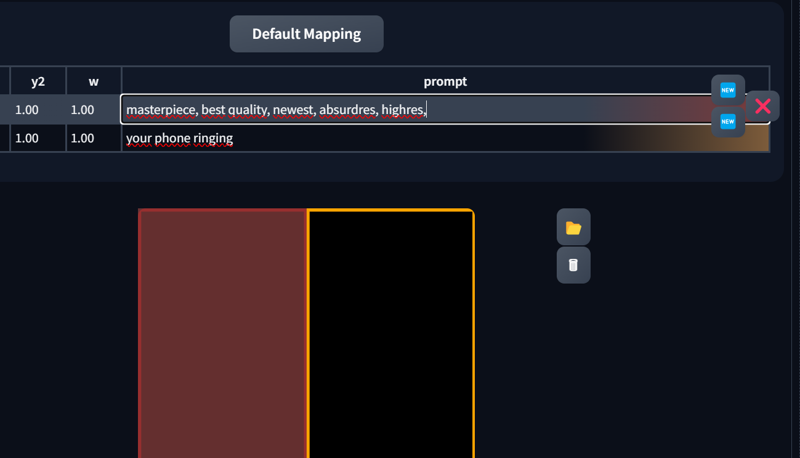
You can change the region size with x1, x2, y1, y2.
“w” sets the weight (leaving this at 1 is perfectly fine).
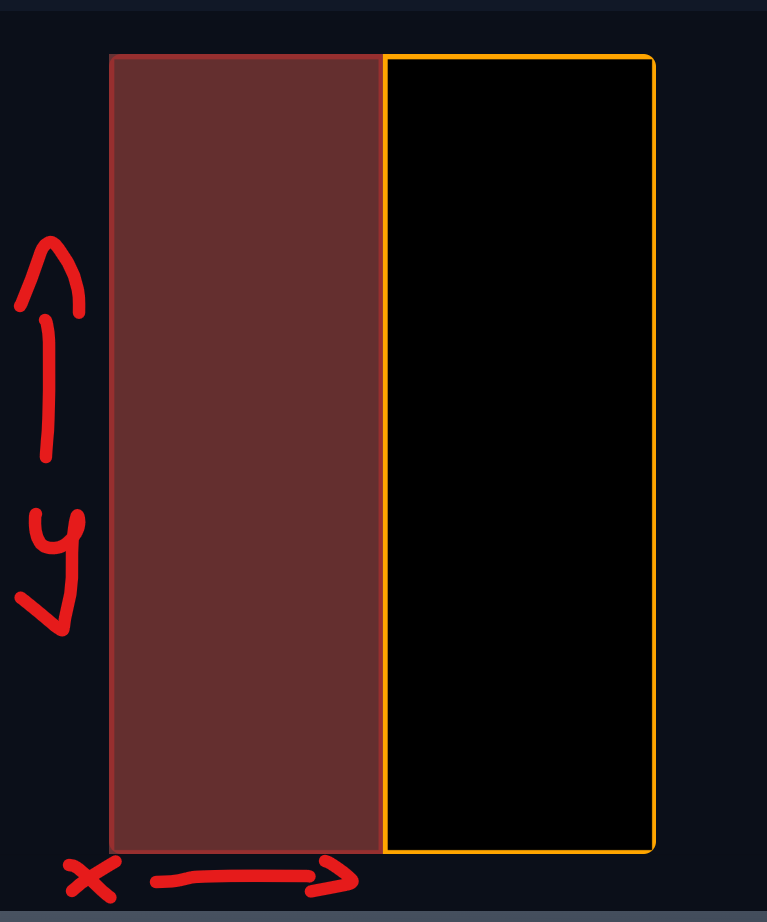
The horizontal axis is X, and the vertical axis is Y, with values ranging from 0 to 1.
Make sure not to leave gaps, or the generation may fail.
 When you click on a prompt, you’ll see two or three new buttons:
New: Creates another region.
X: Deletes the currently selected region.
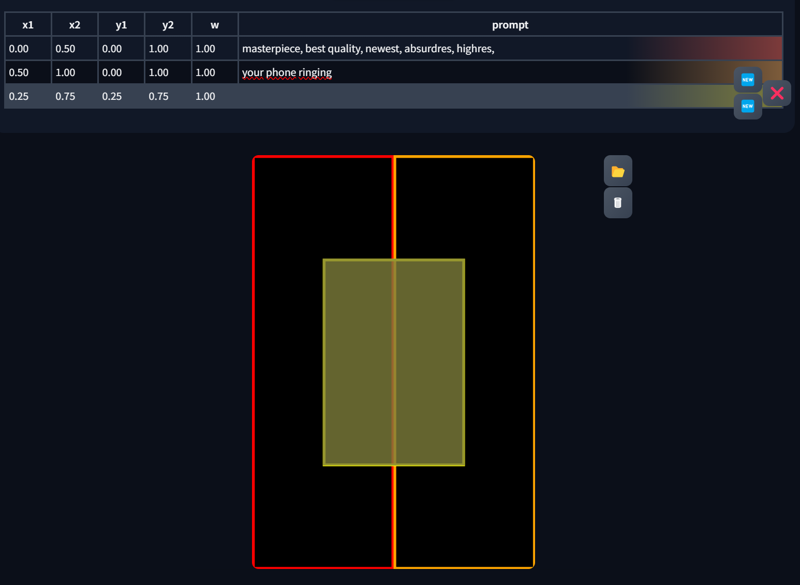 Adjusting the X and Y values will also change the template. Here are some examples: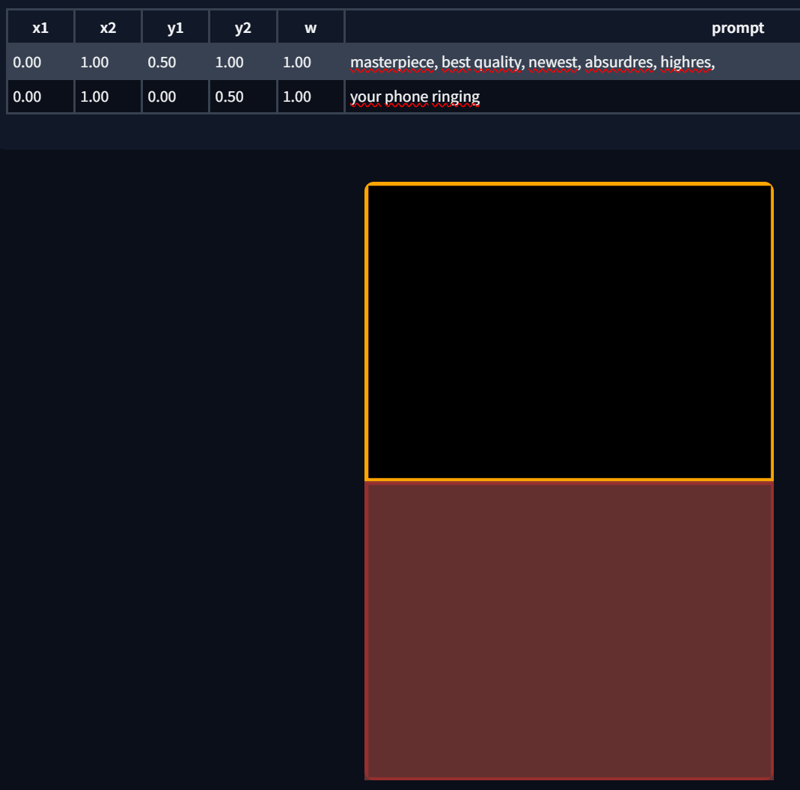
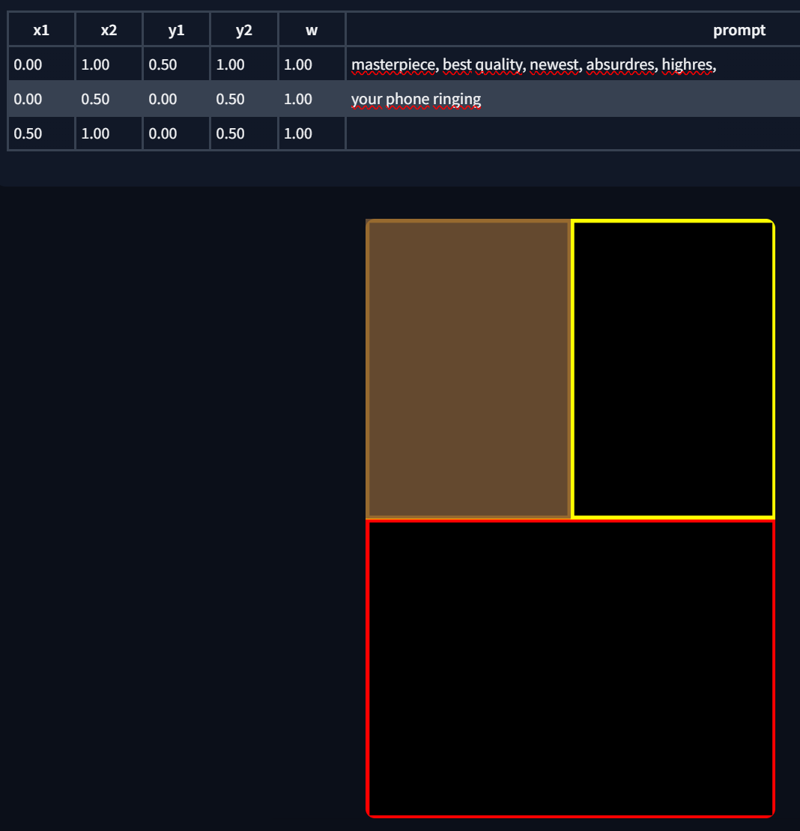
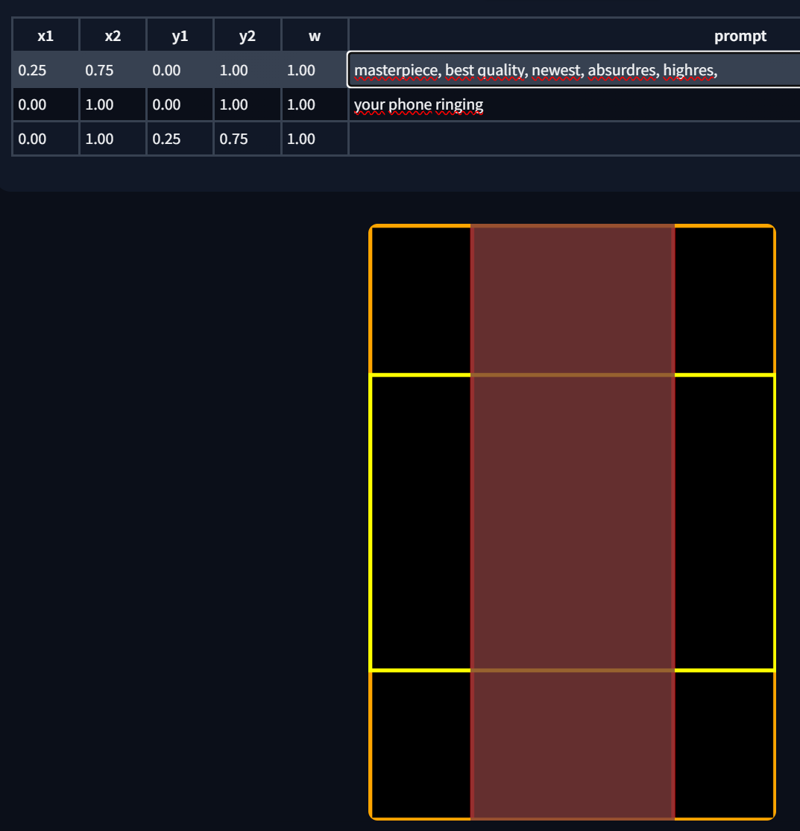 You can also edit the region directly from the template. Just highlight the corresponding region in the prompt list and make your edits. PS. Regions can also overlap.
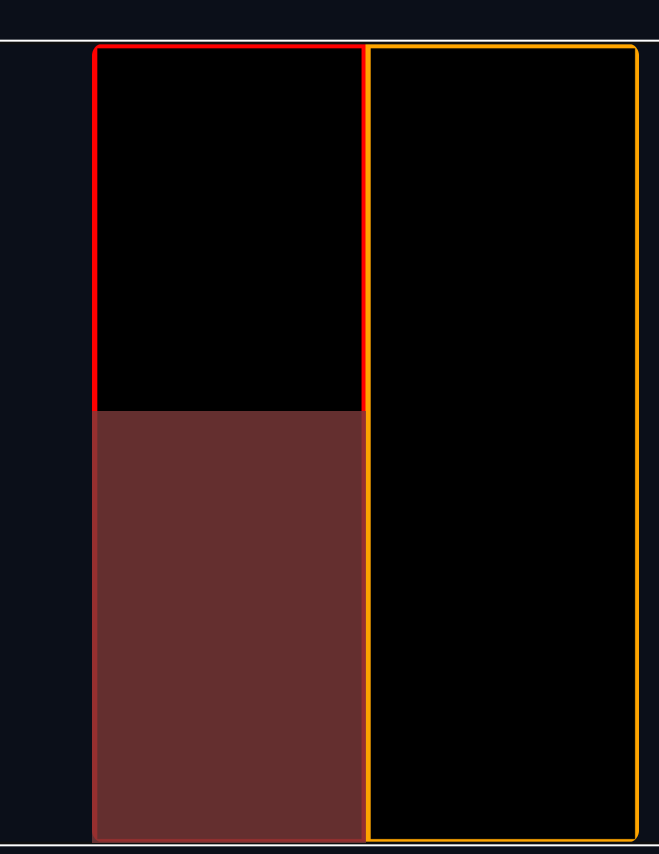
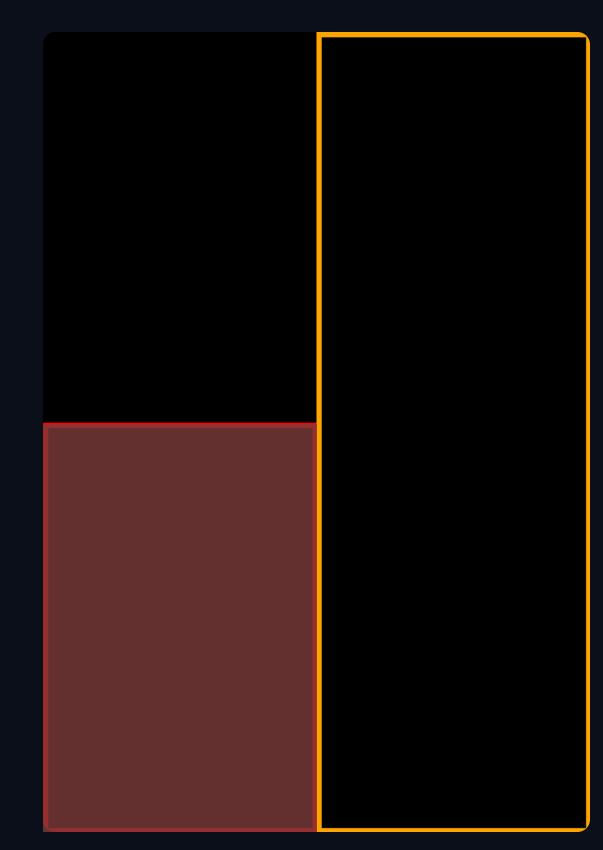
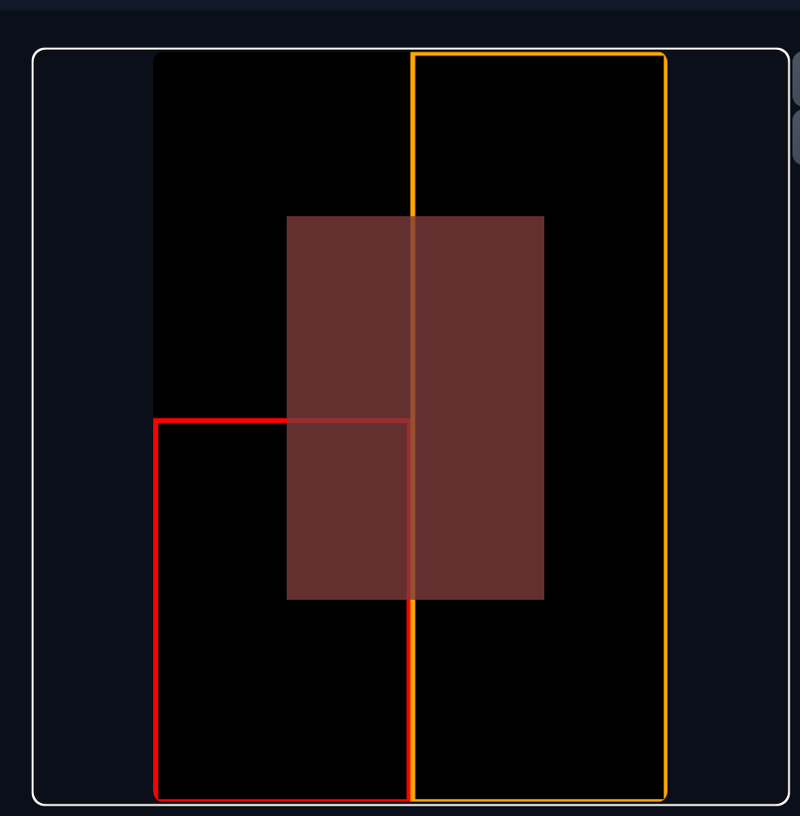
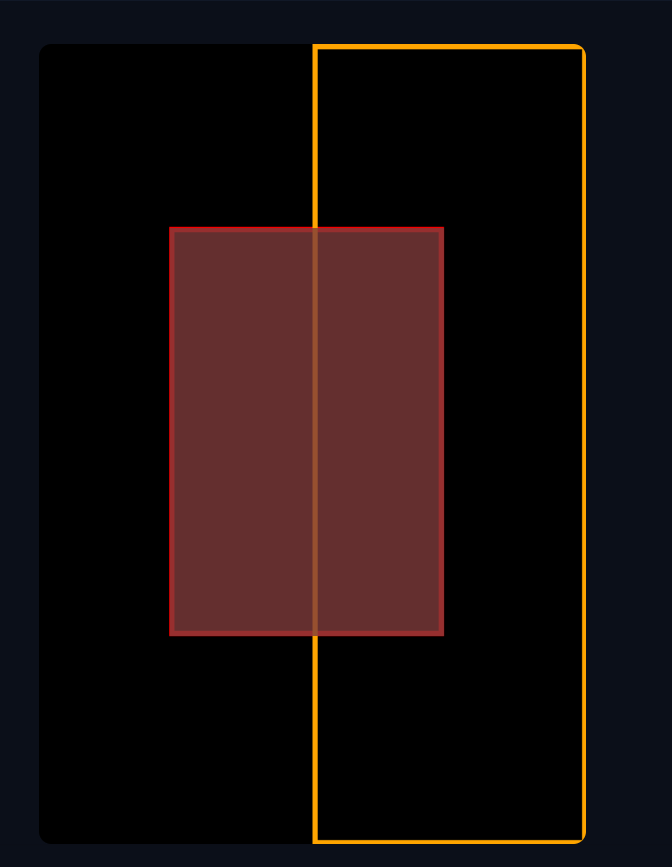
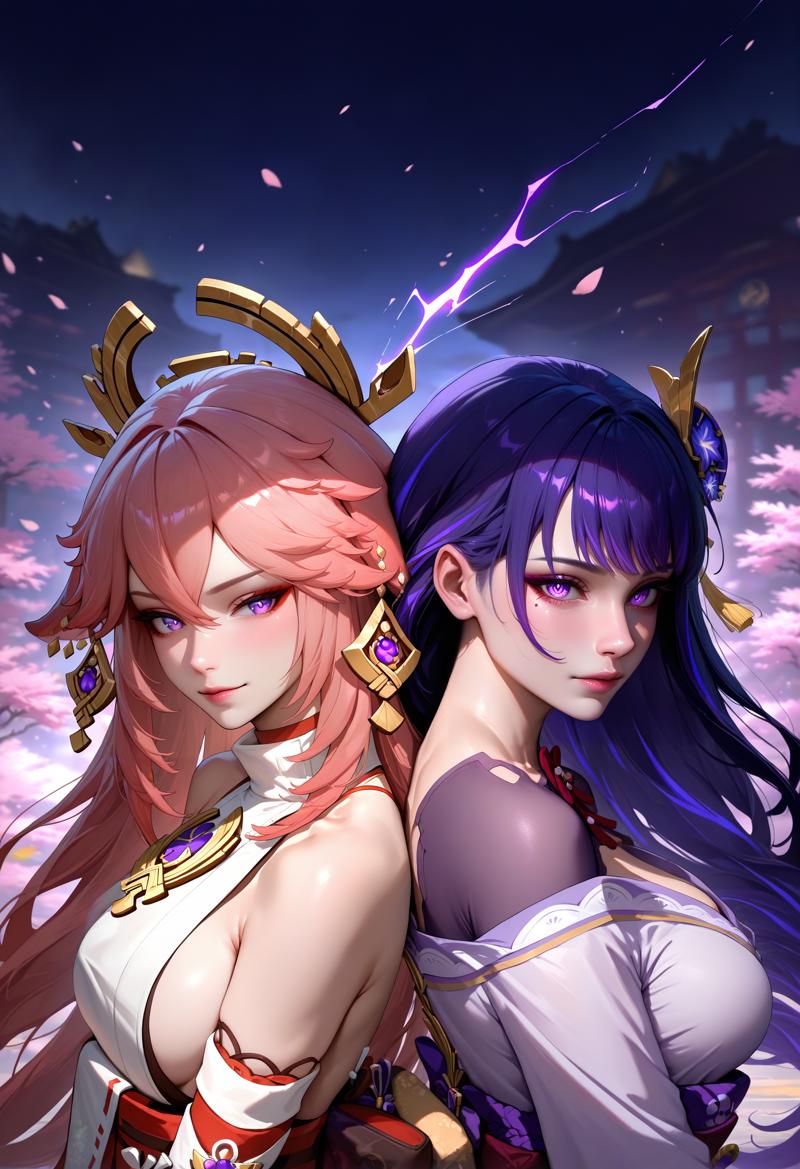
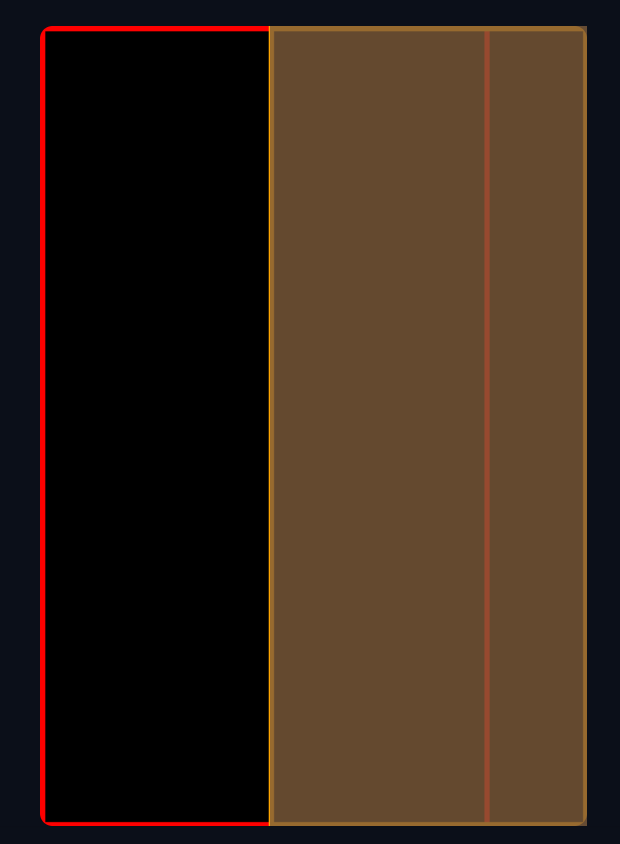 That covers the basics of the “matrix” part. Below are some example images with their corresponding regions and metadata:
masterpiece, best quality, newest, absurdres, highres, 1girl, yae miko, back-to-back, anime,
masterpiece, best quality, newest, absurdres, highres, 1girl, raiden shogun, back-to-back, realistic,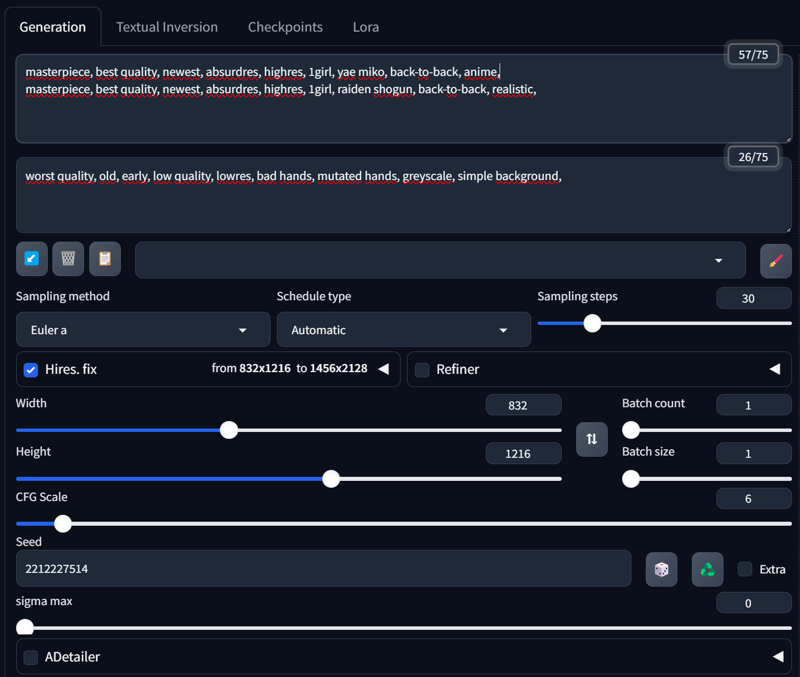
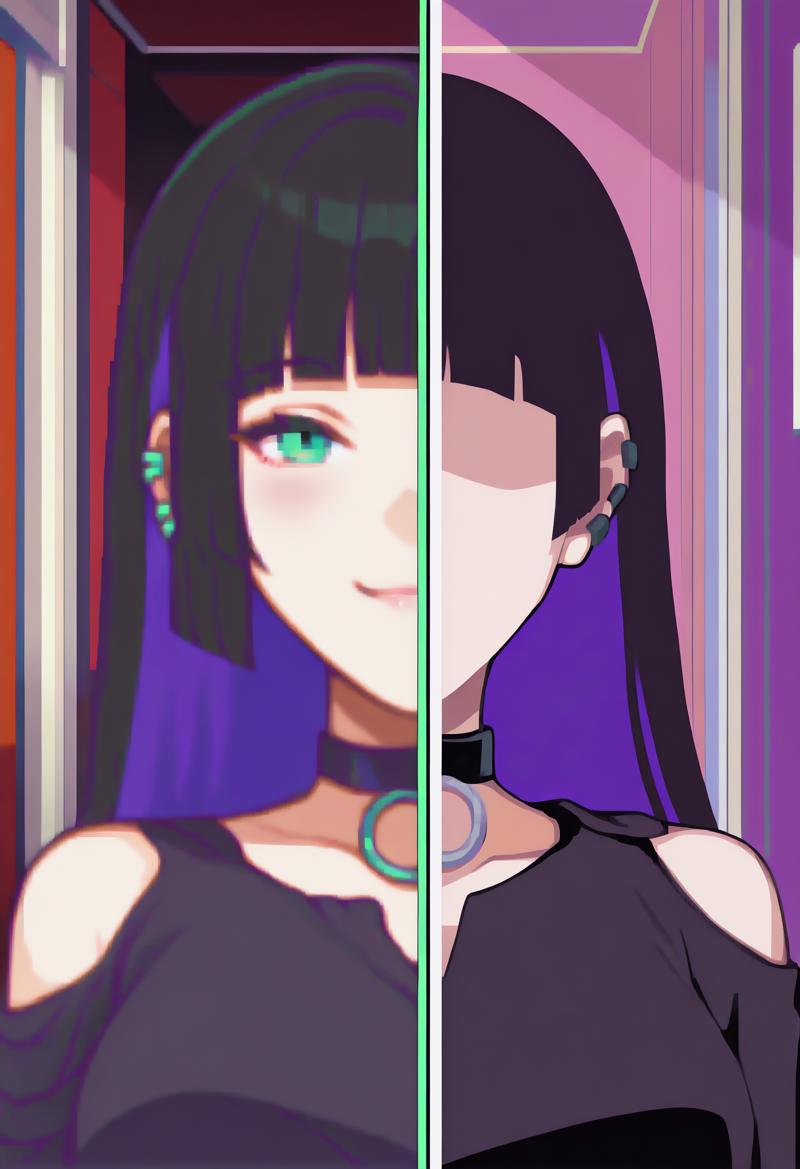
 A neat feature in Forge Couple is using LATENT, which allows you to separate styles for each region—something that wasn’t possible with the Regional Prompt Extension. Here’s an example:
masterpiece, best quality, newest, absurdres, highres, indoors, 1girl, SplitScreen, split screen, upper body, <lora:SplitScreen_illusXL_Incrs_v1:1>, pa-san, purple colored inner hair, ear piercing, hime cut, choker, black dress, long dress, shoulder cutout, seductive smile, green eyes, <lora:FEGBA-PortraitsV2-illus_Fp:1> portrait, pixel art,
masterpiece, best quality, newest, absurdres, highres, indoors, 1girl, SplitScreen, split screen, upper body, <lora:SplitScreen_illusXL_Incrs_v1:1>, pa-san, purple colored inner hair, ear piercing, hime cut, choker, black dress, long dress, shoulder cutout, <lora:MinimalismStyle-Illustrious-V2:1> flat color, limited palette, no lineart, no eyes,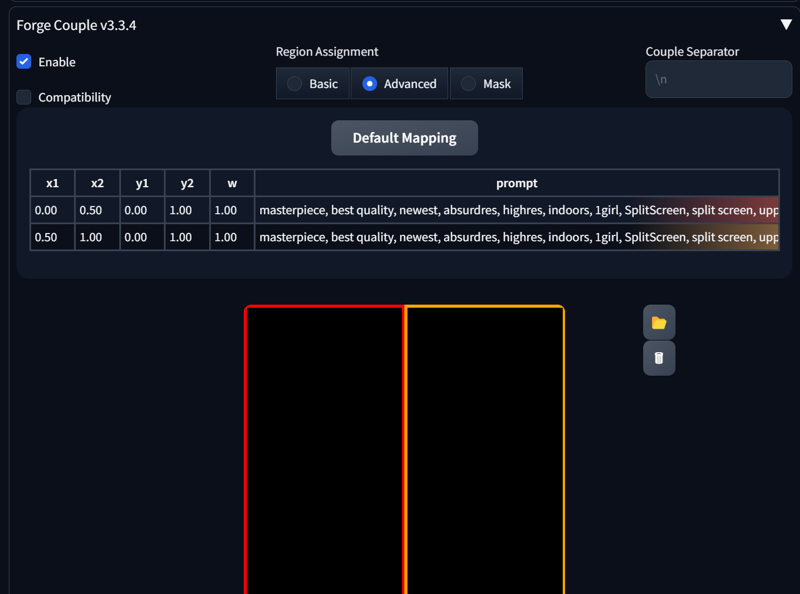
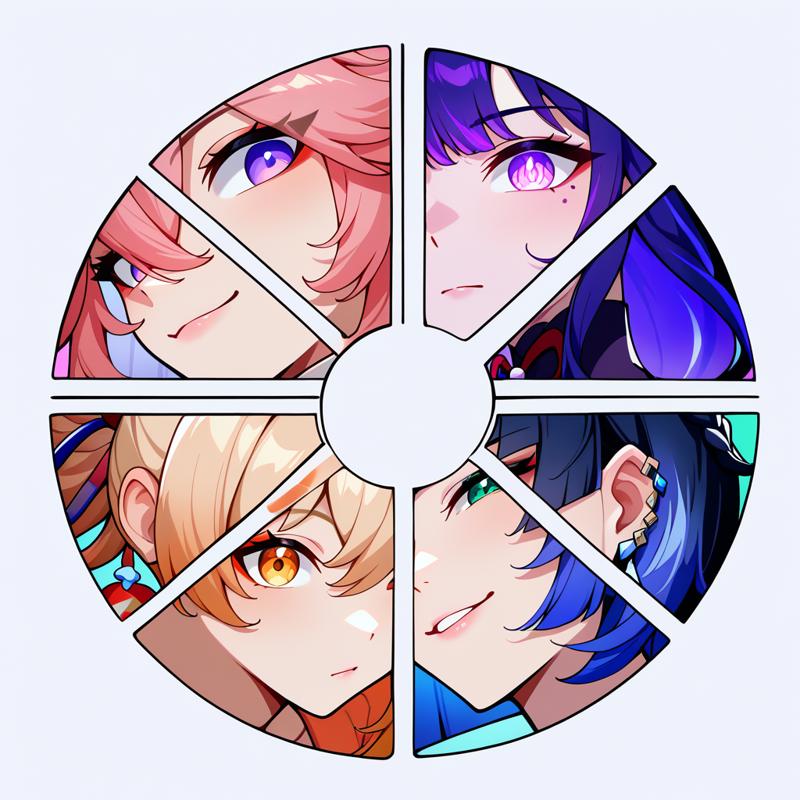
 And here’s a more complex setup:
masterpiece, best quality, newest, absurdres, highres, color wheel challenge, multiple girls, yae miko, close-up,
masterpiece, best quality, newest, absurdres, highres, color wheel challenge, multiple girls, raiden shogun, close-up,
masterpiece, best quality, newest, absurdres, highres, color wheel challenge, multiple girls, yoimiya \(genshin impact\), close-up,
masterpiece, best quality, newest, absurdres, highres, color wheel challenge, multiple girls, yelan \(genshin impact\),  close-up,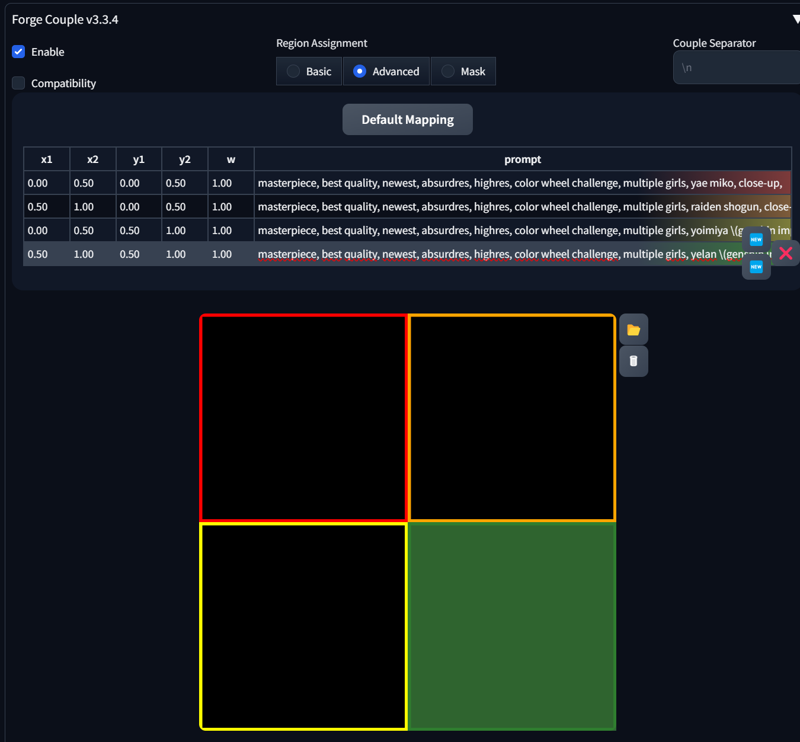
 That’s it for now. In the next section, we’ll focus on the Mask part of Forge Couple.
5. Forge Couple - Mask
6. Loopbackscaler
7. Inpaint
Description
FAQ
Comments (51)
mama mia
Where seggs samples i made? :FubukiSpaz:
Fine ill do it myself :FubukiKidneyFailing:
:BONK: (since like none of my effort to find a good emoji that made sense worked XD)
I think this would be better suited being posted as an Article in the Article section
The article section has a problem with showcasing images while maintaining metadata.
Also the comment section has a better view in model pages.
@FallenIncursio Yea i'm gonna agree they shoudlv'e ported the model card way for comments, and allowing metadata
Thank you, sincerely.
:doro:
Is there an sd 1.5 guide for this
Mama Mia
Will be added here soon as well
:Doro:
Thank you!Today I learned how to make multiple character >.0
This is really great guide, thank you! I didn't realize each sector uses the same amount of the lora strength.. that explains some things.. in that same regard though it feels like if the lora you have doesn't even work until like 0.7 strength, I feel then it just wouldn't really work?
Depends on if it's XL or 1.5. Those 2 have different Settings here. Also some loras might need more strength than normal if combined in certain situations, so it might be still used between weight of 0.5-1, when used in common prompt for 2 regions.
To learn from the best
Great Tutorial! Looking forward for part 2.
P.S. How do you apply Style Lora?
style loras can be used in common prompt, but they should be divided by the amount of regions u use., so if you have 2 regions, do half of it.
But you can also apply 2 different styles in each region, thats also possible.
if someone could do freddy fazbear hugging diamondhead i will name my first born child after you
Maybe it's SD-Forge but all I get when trying to use RP on attention is "TypeError: 'NoneType' object is not iterable" even with the baked in Lora
I unfortunately cant reproduce that error. Maybe someone else can help.
I have the same problem and I use Forge, too. As soon as I activate regional prompter I get "TypeError: 'NoneType' object is not iterable" - @FallenIncursio do you use Forge or normal Automatic1111?
Okay I did some digging and apparently Forge has problems using LoRAs. If I remove these from the prompt it works. Unfortunately, that makes the workflow much less useful. However, the author of Forge is aware about the problem and wants to take a closer look. But I don't know how long that will take.
Well, thats odd. I use Forge and Regional prompt with loras just work fine for me. Maybe try to update Forge and Extensions?
It seems like the newest forge version might broke it down. The current latest 276 does have that error. 274 and below did work. I'm currently at 269
@FallenIncursio Thanks for the info, I reverted back a few commits and now it's working!
@ElevatedKitten Could you tell me how to do that? I find many, many articles on google, but nothing I really find understandable.
@tvange365 hey there. here you go.. do this at your own risk though:
in a terminal window navigate to your root installation folder of WebUI Forge (...\stable-diffusion-webui-forge)
type "git reset --hard b9705c5" (without quotation marks) and hit enter
type "git log -1" (without quotation marks) and hit enter. check the first seven digits/letters next to commit. do they match the ones you typed in earlier? if yes, the rollback was successfully
@ElevatedKitten My hero. Thank you!
@ElevatedKitten I know I'm five days late but I'm just now getting to this. I apologize but I'm a little dumb when it comes to terminal stuff.
So just to check here:
Is it a cmd terminal? Cause typing in the file location does nothing cause it's not recognized as a command.
Also I tried doing it when I run SD-Forge but I can't type into the window.
And also @FallenIncursio thank you both for your help, truly
@afincaoa no worries, I'll try to explain it in more detail:
Since you're on Windows press Windows + R
Type "cmd" (without quotation marks, yes thats a terminal window 😊) and hit enter
For example my Forge installation is in C:\AI\stable-diffusion-webui-forge
So I type "cd /d C:\AI\stable-diffusion-webui-forge" and hit enter (again without quotation marks)
Now we should be in the root folder of Forge
Next execute the commands from my previous comment
If you get a message like "command not found" or something similar, you probably need to install git first.
you can find it here https://git-scm.com/download/win
when installing, make sure you select the option that makes it possible to use git from cmd (as described in Step11 here)
let me know if this works for you :)
@ElevatedKitten First and foremost, you have gone above and beyond and I can't thank you enough.
So this is where I'm at currently; I can navigate to the root folder now. I installed git and I did so several times (partially because I can't read lol) and I tried doing it by selecting "Use Windows; default console window" as described in step 18 and also the default version, Both have returned "fatal: not a git repository (or any of the parent directories): .git"
Currently I'm on all default settings with git and tweaked it on step 11 how you recommended.
Side note: when git installs it looks like its defaulting to the path to where my SD-Forge is and when I look through the webui file, it shows '.git-blame-ignore-revs' and '.gitignore.' Git is also in my system folder as well.
Maybe I'm just a unicorn here and will probably just have to wait for an update
@afincaoa I think it's because you're in the wrong folder. You have to in the folder called webui, not the one with the run.bat file.
I made the same mistake.
@afincaoa no problem, so many people have already helped me here so i'm happy to do my part
yeah it seems you're in the wrong folder. "fatal: not a git repository (or any of the parent directories): .git" is a good thing because that means you've installed git correctly and can use it in cmd 😊
lets try this: open windows explorer and navigate to the folder your "webui-user.bat" is in that you click if you want to start forge. if you're in the folder click the adress bar of your explorer window. type "cmd" (without quotation marks as always) and hit enter. now a terminal window should open in which the correct path is already set.
next try execute the commands "git reset --hard b9705c5" and "git log -1" as i described in one of my previous comments.
if that doesn't work either shoot me a pn or chat message and i'll do a quick video tutorial if u want
@ElevatedKitten I know it seems I can barely operate a computer at this point but we are good now! Y'all where right, I simply wasn't navigating to the webui folder, after I did that we are in business.
Again thanks so much for all your help!
If anyone else is still getting this error and doesn't want to revert your forge version, i found this alternative works:
go to webui\extensions\sd-webui-regional-prompter\scripts
edit the file attention.py
change line 106 from this:
def forward(x, context=None, mask=None, additional_tokens=None, n_times_crossframe_attn_in_self=0, value = None):
to this:
def forward(x, context=None, mask=None, additional_tokens=None, n_times_crossframe_attn_in_self=0, value = None, transformer_options=None):
@Goblintide Awesome! Thank you!!!!
@Goblintide This is really strange. I applied your fix, restarted Forge, and now Regional Prompter is nowhere to be found. The extension is there, but it's gone from the menu.
@Goblintide FOund the error. The problem was caused by my apparently lacking ability to copy/paste properly.
Do you know how to make Forge NOT auto-update, or prevent it? Ty!
@Malessar AFAIK Forge doesn't auto-update. Or did you use a 3rd party software (like Stability Matrix for example) to install / maintain the installation?
@ElevatedKitten No I don't think so
@MalessarThat one's fairly easy ;-)
Just don't click update.bat.
I followed all the steps and I still get the error TypeError: 'NoneType' object is not iterable
@salazardias I still get the error even after downgrading, however I've noticed that using "BREAK" instead of the "ADDCOM", "ADDCOL", etc. makes it work, one thing that kinda sucks when doing so is that only the 1st image out of a batch count really stick to the prompt.
I wanted to make sure that using BREAK will still make it work even when looking at github page because some of the most recent result such as Saiva's image from 2 days ago are using the ADD, and it still does as far as I can tell, even when using the most recent update of ForgeUI. I am using just the regular webui and nothing special like Stability Matrix.
hey y'all - I don't use forge anymore but for the ppl who still having problems getting regional prompter to work try this extension instead. it is specifically for forge and seems to work well from what i have heard so far.
@ElevatedKitten thanks for this. this one doesn't seem to have the issue with having to half lora strength for each region either
Time to add a tutorial for this as well
@FallenIncursio do you know how to upload masks? (from photoshop or photopea)? I don't know how to do that. If I want be super specific I need to have the controlnet model in front of me to make it as accurate as possible. but when I upload a mask, it does not show up in the mask or draw region area. I don't know why. Do you know what colors i need to use for the mask to work? What do I have to do to make it work? (i am not accurate when drawing from there, because I can't be precise
@Malty Mine is still having problems, with all these alternatives and attempts.
Finally a proper guide on this! I have looked EVERYWHERE and can never find a guide on how to use everything and even at times be vague on what each setting does what!
You are a savior, your Loras are great and now your guides are excellent, keep doing God's work my good man.